iMac Pro + Hasselblad H6D Photo Review: Antarctica

Twenty years ago today (May 6, 1998), my dad walked into my classroom on the last day of school holding an inkjet print. He handed it me and said, “You’re going to want one of these!” On this piece of paper was the just-announced Bondi Blue iMac.
You can view this monumental announcement here. (Note: Steve and Phil run a benchmark test with a 27MB file.)
As a 12-year-old obsessed with all things digital and constantly craving more speed than the Apple IIsi could offer me, I couldn’t take my mind off the iMac. I went straight home from school and spent the first afternoon of summer making a flyer for a lawn mowing business with one goal in mind: earn $1299 to buy my own iMac before I go back to school.
I pushed my mower from yard to yard all summer long. Between mowing lawns and working a bit online, I scrounged together around $1200. My dad helped pay the rest and I had my very first Mac in September of that year.
It had groundbreaking new technology called Universal Serial Bus (USB) which allowed, for the first time ever, hot swapping peripherals. It also had a massive 4.2GB hard drive, a 13.8-inch viewable CRT screen, and a built-in 56K modem.

The only photo I could find of me with my first Bondi Blue iMac. (Dear Adam, sorry if I punched you.)
I worked on that machine for thousands of hours. I started building websites in HomePage, hacked apps with ResEdit, played plenty of StarCraft, polished my skills in Photoshop, and so much more. Now many Macs later, that original iMac still holds the dearest place in my heart.
Today, after a few months with the iMac Pro, I can say in many ways it stays true to its original ancestor. It packs a powerful punch and continues to deliver on its promise to be a simple yet powerful tool that unlocks creative potential in people.
Journey of a Lifetime
For as long as I can remember, I’ve wanted to travel to Antarctica. For me, it’s been the ultimate trip. When I got the opportunity to jump on a boat to the frozen continent w/ Quark Expeditions and Ker & Downey, I knew I needed serious equipment—in the field and editing in the studio.
Here’s our journey: Buenos Aires > through Ushuaia > through Falkland Islands > South Georgia > Antarctic Peninsula > Patagonia

Our stops sketched on iPad Pro w/ Pencil.
Gear for Antarctica
As I prepared and weighed my gear options, I wanted top notch optics, but also needed to be prepared for shooting wildlife in shaky, wet, and stormy conditions. This was also our honeymoon (woohoo!), so while we did shoot a lot, we weren’t packing everything we would in full-on pro mode.
I spoke with a few friends, including Kevin Raber of Luminous Landscape who has been to Antarctica 15+ times, and here’s the key camera gear and tech I decided to put in my bag.
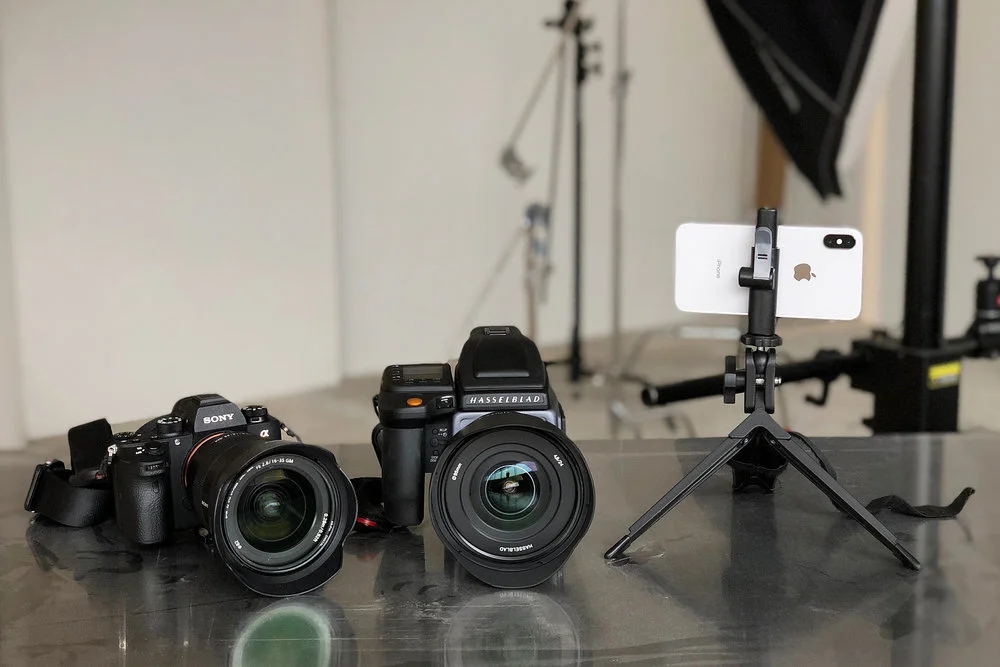
Sony A9 w/ 16–35 f/2.8, Hasselblad H6D-100c w/ 24mm, iPhone X w/ UltraPod II + Studio Neat Glif
Cameras:
Hasselblad H6D-100c: Ultra-high-res at 100 megapixels, razor sharp optics
- 24mm
- 100mm
- 300mm w/ 1.7x multiplier
Sony A9: Unbelievably fast at 20 fps, weather sealed, silent, and small
- Sony 16–35 f/2.8
- Canon 135 f/2 w/ adapter
iPhone X: As my “always on” camera, its dynamic range, speed, and spontaneity can’t be beat, and this is exactly what travel photography is all about.
Here’s my thinking with this camera kit: While the Hasselblad is the best in optics, it’s simply not designed for the extreme elements or outdoor wildlife photography. Medium format is generally slower, heavier, and more complicated to use than 35mm—and this Hassy is no exception. I chose the Sony A9 as its counterpart because it’s extremely fast, small, and light, but only 1/4 of the image resolution.
Data & Digital Workflow
15" MacBook Pro: I have an older MBP (for the port set) and knew I needed to dump media in the field, but I’d save my heavy processing for the studio with the iMac Pro.
10.5" iPad Pro w/ Pencil: I’ve found myself using the iPad Pro for in-field editing with Lightroom more and more. I love the screen of 12.9" iPad Pro, but the nimble nature of the 10.5" is where it’s at. The iPad Pro is crazy fast and I had no problems editing 100MP raw images from the Hasselblad.
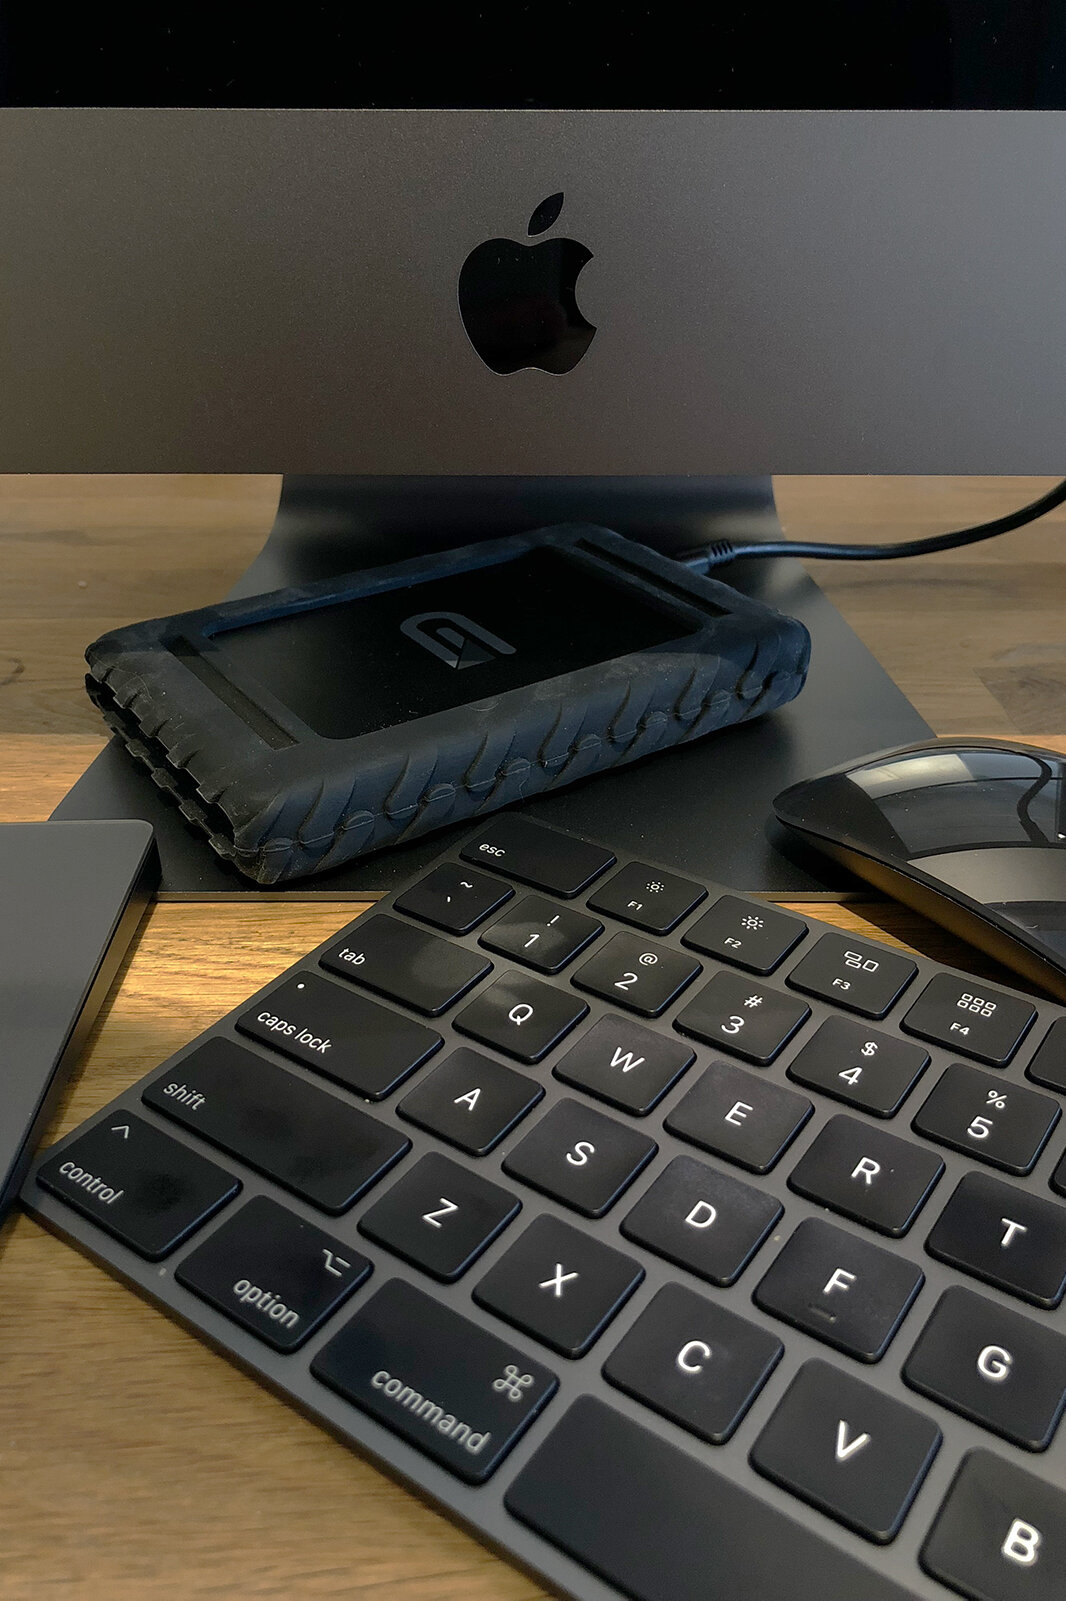
Glyph BlackBox Plus SSDs: I chose these because they are compact, reliable, and lightning fast (which I really got to experience back home on the iMac Pro).
Note: While the MBP would be fine in the field, I knew there was no way I could edit this entire project without iMac Pro. I’ll get to that later.
With these primary and backup options in place for both shooting and editing, I felt ready to go for the adventure. We got married in Colorado and then hopped on a plane to head south!
1st Stop: Buenos Aires
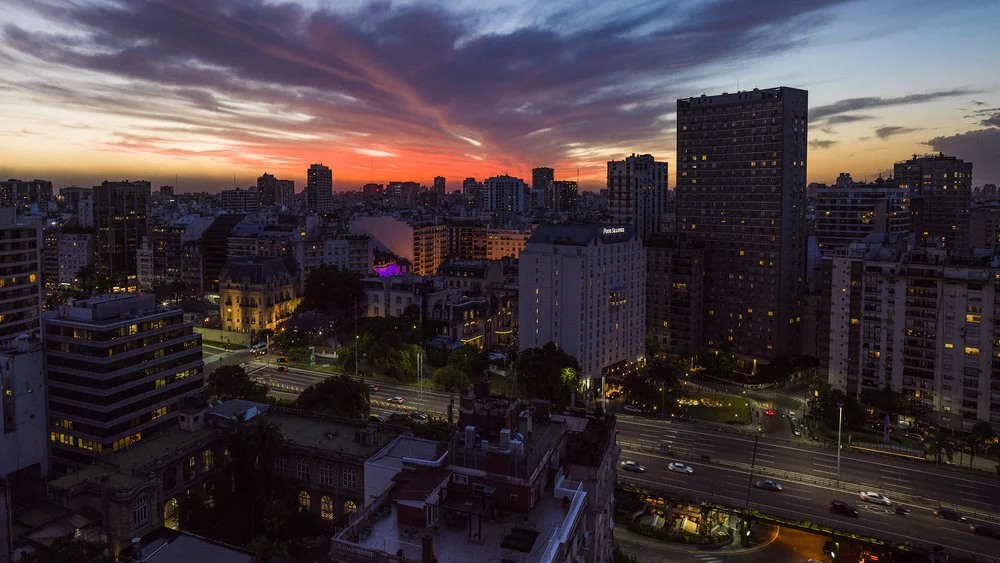
Rooftop view in Buenos Aires. H6D-100C w/ 24mm (handheld).
They call Buenos Aires “the Paris of Latin America” for a reason. Beautiful architecture, cobblestone streets, a rich culinary scene, and tango lessons made our short couple of days there a blast.
I spent some time here playing with the Hasselblad kit and familiarizing myself with the lenses and testing its sensor limits. (In the above image, I was experimenting with the 15–17 stops of dynamic range.)
Before we knew it, we were flying to Ushuaia to get on the boat. We arrived and boarded Quark Expedition’s Ocean Endeavour and set sail. We made a very quick stop in the Falkland Islands (but didn’t get to spend much time there because of weather), and then we were back at sea, headed to South Georgia.
Next Stop: South Georgia
After almost seven days, we finally arrived at South Georgia!
I’d read about South Georgia before this trip, but I really had no idea how mind-blowing this place would be. We saw super unique rock structures and mountains jutting up out of the ocean, covered with millions of penguins, countless seals, and more varieties of birds than I even knew existed.

Shot on Hasselblad H6D-100c w/ 24mm.

Shot on Hasselblad H6D-100c w/ 300mm.
Penguins were pretty curious about my gear.

Hasselblad H6D-100c and Peak Design Everyday Backpack 30L.

BTS of iPhone X time-lapse w/ MOMENT Superfish 170°, UltraPod II and Studio Neat Glif in South Georgia.
The detail from the 'Blad is just is insane. Check it out.

Shot on Hasselblad H6D-100c w/ 100mm. (Left: Full view -- Right: 100%)
I’ve worked with these cameras before, but the gap in optics between standard DSLR/mirrorless and medium format still astounds me.
Superpano
On our last day in South Georgia, we stopped at Gold’s Cove. This was probably my favorite stop as it was packed with wildlife against a colossal backdrop of rock, glaciers, and waterfalls.
Capturing the breadth of this scene was nearly impossible. While on land, I turned to the iPhone X to capture the width with this panorama.
iPhone X Panorama (see boat in distance).
When I got back to the boat pictured above, I decided to try to capture this scene with the Hasselblad and 300mm lens. I put all settings to manual (shutter, aperture, focus, WB) and shot the pano below.

Note: The thumbnails in the image above are 100% crops from various parts of the Superpano above it. These are not separate photographs!
To capture this image, I shot two rows of images, seven images wide. This Superpano is comprised of 14 images at 100 megapixels each.
I tried to start assembling this massive image while in the field on my MBP and it simply would not process it. I would get various error messages, so I decided to wait until I got back to the studio with the iMac Pro (more on that later).
This 11.4GB file is .psb (Large Document Format is required when exceeding 2GB) and I can print it 160 inches wide (about 13 feet) at 300 DPI with no enlargement. I’m planning to work with my friends at White House Custom Colour to output this, and I can’t wait to see it.
After four days or so in South Georgia, we set sail for the main event: Antarctica.
Insane Dynamic Range
Working with files from the H6D continually blew my mind—not just from a resolution standpoint, but also the dynamic range. This came in especially handy in this part of the world where we were constantly encountering things like snow-covered peaks (highlights) and dark penguin backs (shadows) in the same shots.

Use the slider below for another example.
Digital Workflow on the Boat
Between destinations, I spent a good bit of time dumping and managing media. Here’s my workstation setup. (Vertical video disclaimer: This was initially shot for Instagram Stories, but I wanted to share here, too.)
3rd Stop: Antarctica
Our first sighting of Antarctica was Elephant Island (a place you may have read about in Endurance, Shackleton’s Incredible Voyage.)
The conditions were super rough (about 75MPH straight-line winds), so there was no way we could land in zodiacs. These are also the kinds of conditions that are tough (and risky) for the Hasselblad, so I grabbed the A9 and made my way to the deck.
First sighting of Antarctica at Elephant Island amidst intense 75MPH winds. Shot w/ Sony A9, 16-35 f/2.8.


The weather conditions could quickly go from from windy to rainy to sunny to foggy, all rapidly changing our lighting conditions in a few short hours.
6th Stop: Patagonia
One of my favorite places in the world is Patagonia. I knew we couldn’t go all the way to Antarctica and skip this magical land, so on the way back we stopped there for a few days.
I found the Hasselblad kit really thrived in this environment. There's more time, less rain and wind, and solid ground to put a tripod on. These are all great things for medium-format shooting. Here are a few images from our time there.
Torres del Paine. Pano shot on Hasselblad H6D-100c w/ 100mm.
Torres del Paine. Shot on Hasselblad H6D-100c w/ 100mm.
We loved the unique architecture at Tierra Patagonia Hotel. Shot on Hasselblad H6D-100c w/ 24mm.
Yurt living at Patagonia Camp was Esther’s favorite. Shot on Sony A9 w/ 16–35 f/2.8 (pano).
Perito Moreno Glacier. Shot on Hasselblad H6D-100c w/ 300mm.
Photo Editing on iMac Pro
The whole time we were shooting in Antarctica, I was thinking about setting up the iMac Pro and how I couldn’t wait to get back to the studio to put it to the test. When it came in the mail, I went through my routine “New Mac Checklist” (click here to check it out).
While in the field, I used Glyph’s insanely fast BlackBox Plus SSDs. When I got back to the studio, dumping the images via USB-C and editing them on iMac Pro was lightning fast.
We all know the iMac Pro is insanely fast. There’s a ton of benchmark tests out there, but for me, I was mostly interested in the speed difference between my field kit (maxed 2013 MacBook Pro 2.3GHz i7, 16GB RAM, SSD) and my studio kit (iMac Pro 3.0 GHz, 128GB RAM) when running through my standard digital workflow.
Yes, I realize we should expect a major gap considering I’m comparing a 2018 Mac against a 2013 Mac, but I also realize many of you are still using a machine similar to my MBP, so I hope this info is helpful.
Here’s what I found:
> Export 20 RAW images
MBP: 185s | iMac Pro: 61s
> Convert 20 JPEGs to web-res
MBP: 82s | iMac Pro: 44s
> Assemble 8-image panorama in Adobe Camera Raw
MBP: 357s | iMac Pro: 33s
> Open 8-image panorama in Photoshop
MBP: 39s | iMac Pro: 16s
And one quick test with my buddy Brett Warren:
> Export 1400 Canon 5Ds RAW images from Capture One
2013 iMac: About 4 hours | iMac Pro: 49 minutes
Why Speed Matters
Let’s do some back-of-the-napkin math.
As a professional photographer, let’s conservatively hypothesize you shoot and process 25,000 images a year. Let’s say the difference of choosing the faster computer saves you one second per image. That’s 25,000 seconds, which is 416 minutes, which is about 7 hours. Remember, this on the assumption of one second per image. As a creative pro, what’s the time worth to you?
Granted, it takes a lot of energy to switch machines. I’m not advocating upgrading every single time something slightly faster comes out, but it’s important to keep this in perspective.
Flying with iMac Pro
Right in the middle of this Antarctica editing project, I needed to visit our studio in Nashville (WELD), so I decided to find out what it’s like to fly with an iMac Pro. I fly Delta, so I called them and asked them about worst-case scenarios. They said I shouldn’t have trouble flying with it, and if it’s completely lost they’ll replace it, but if it’s damaged it’s on me.
I did a little research for the best travel cases and it really came down to the Pelican 1630 and the Tenba Transport Case for iMac. While the Pelican is probably the most protective, it’s nearly double the weight of the Tenba (36 pounds to 19 pounds). Extra weight is super important when considering travel luggage of any kind because your total bag weight has to stay under that 50-pound limit.
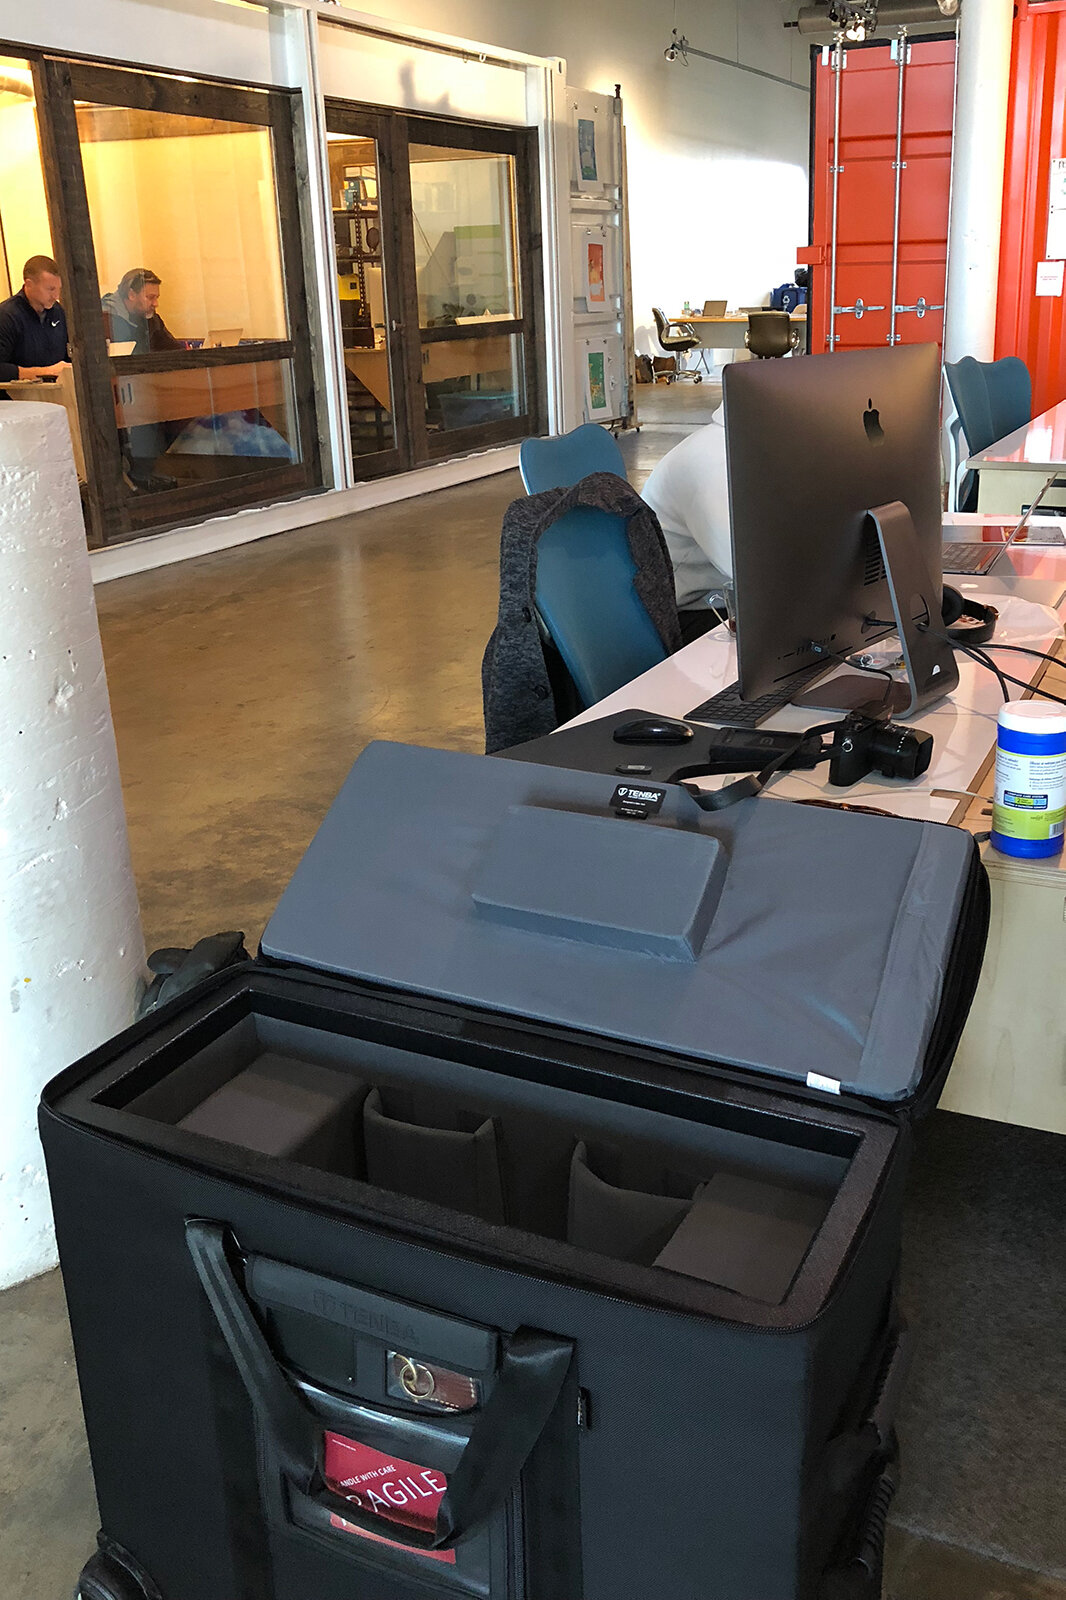
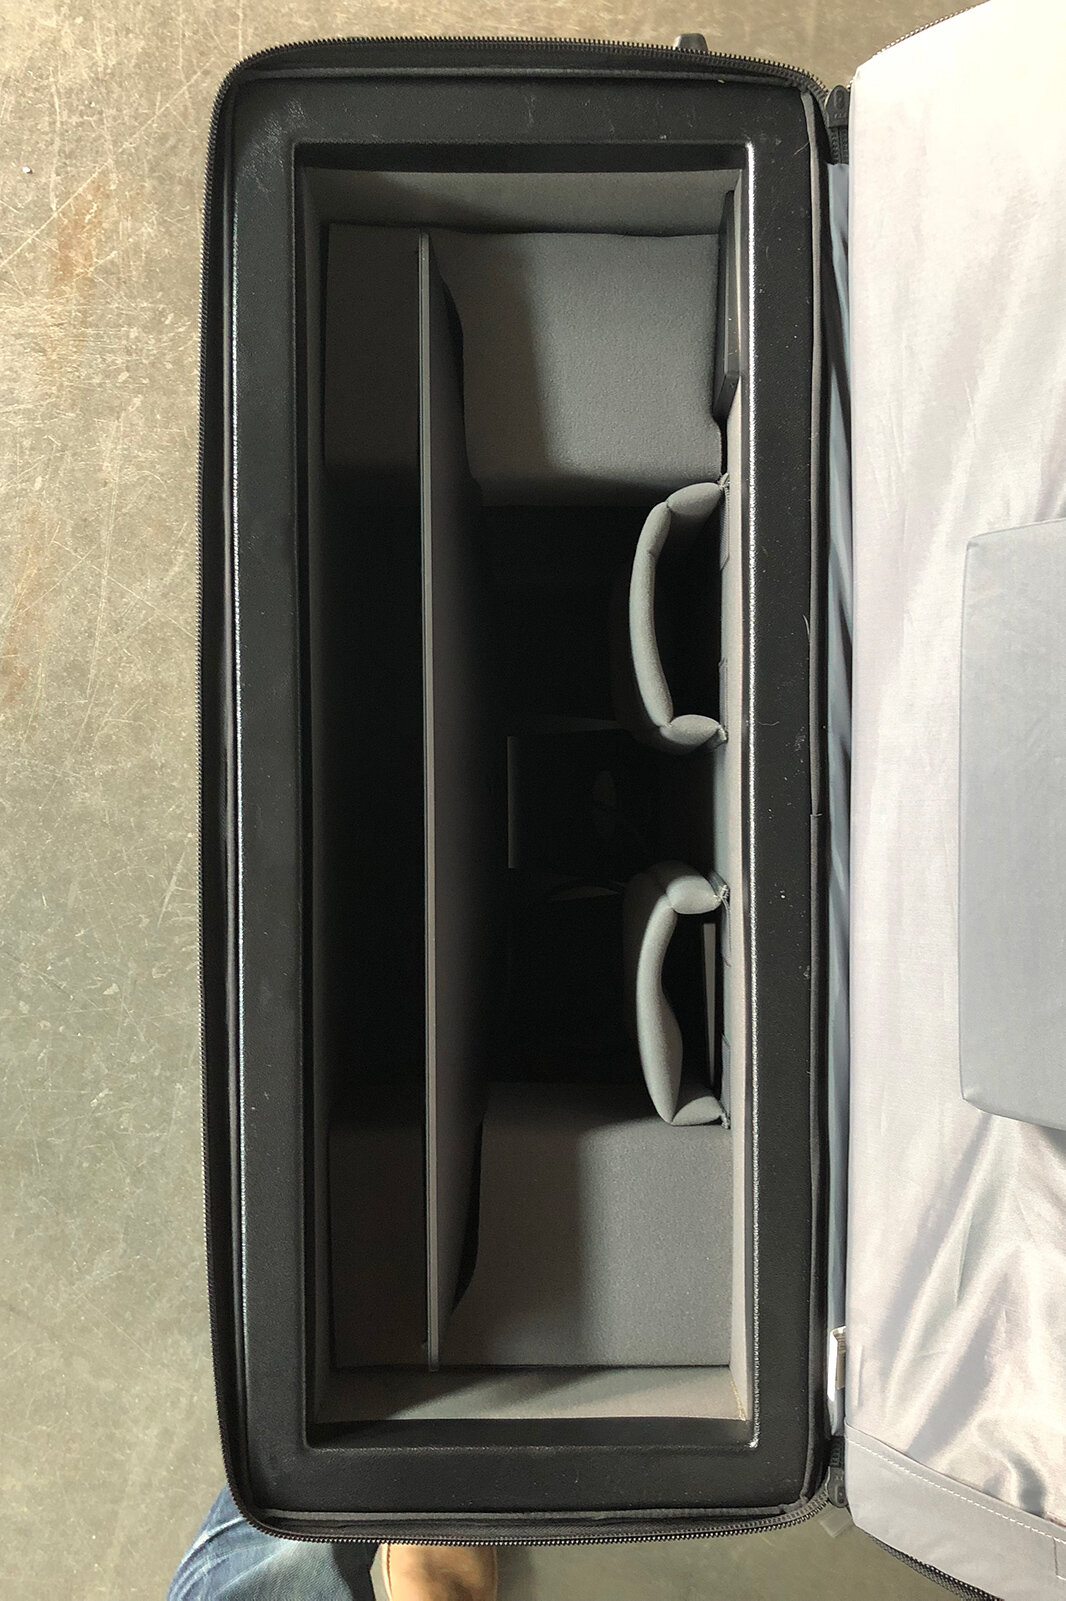
The iMac Pro kit with accessories weighs about 25 pounds, so the Pelican case would put my total weight around 61 pounds and the Tenba would be about 44 pounds. After watching a few videos, I became confident both would protect the iMac Pro well, so I decided to go with the Tenba. (Plus I’m a big fan of Tenba and the quality of their products across the board.)
I showed up the airport a little nervous they would bill me extra for such a large and oddly shaped piece of luggage, but they didn’t say a word. They just checked the bag and it arrived safely in Nashville.
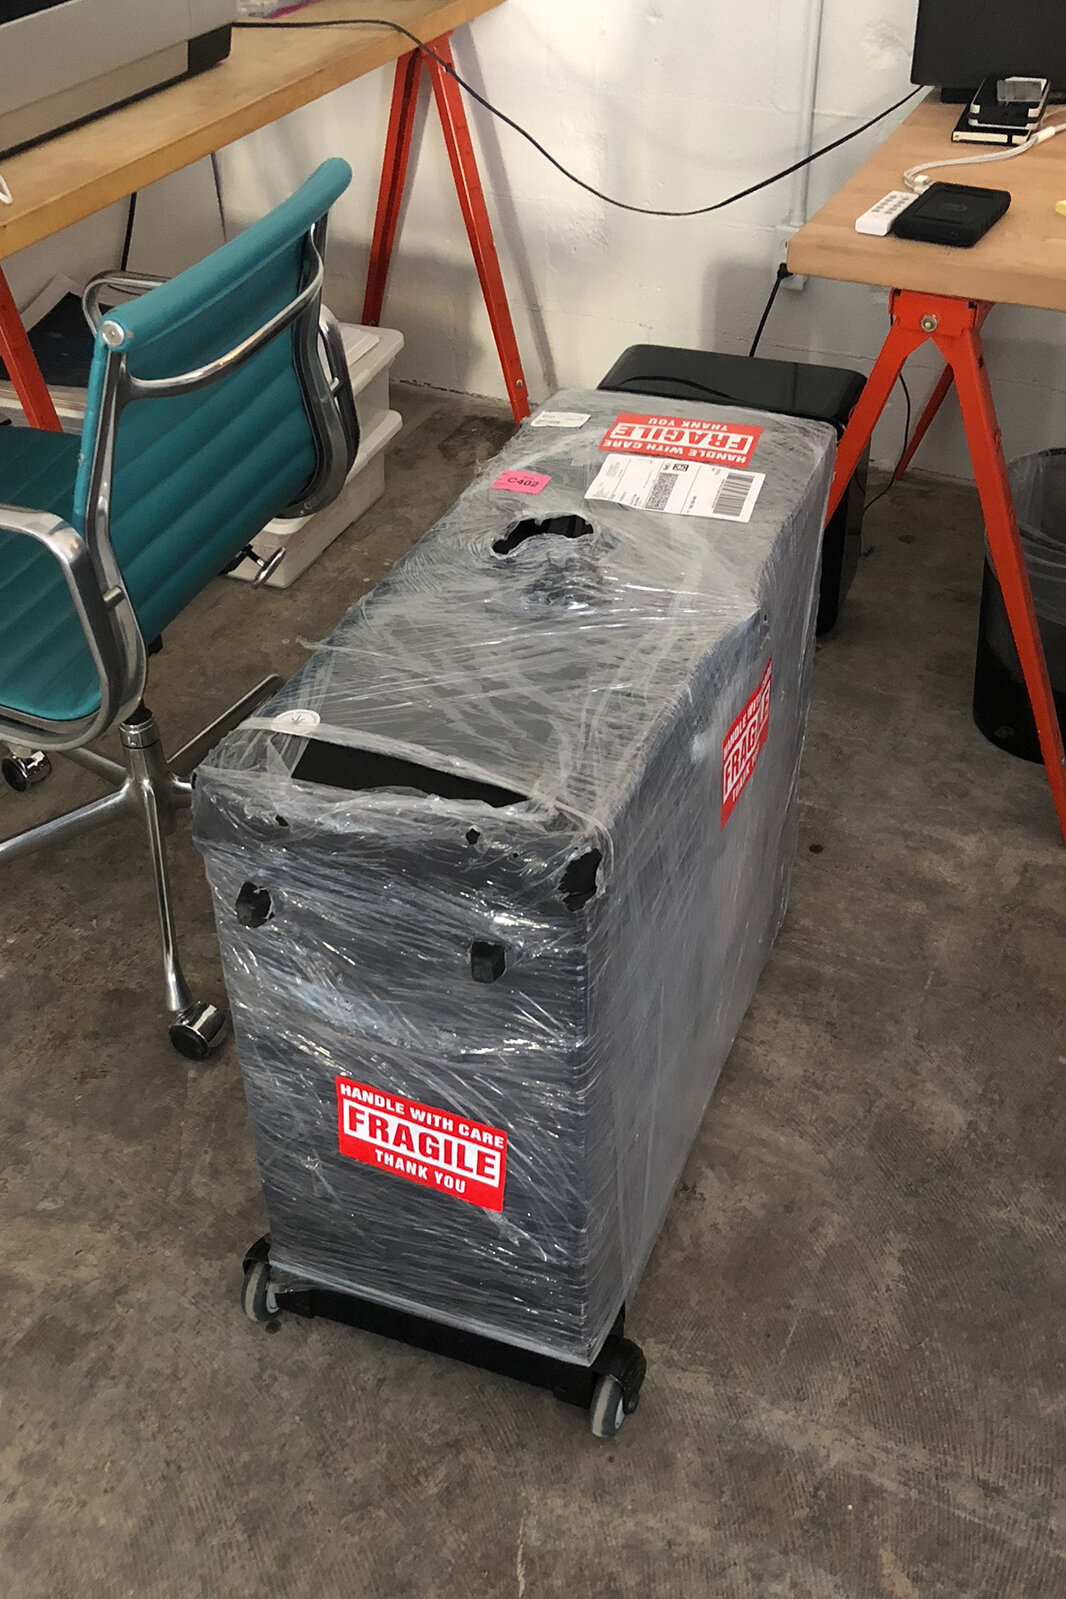
Leaving Nashville a couple weeks later, I had to stop in NYC before heading home, so I decided to ship the iMac Pro back home (the Tenba case is shippable, as well). My buddy Adam (owner of Southern Lights Electric) helped me package it up for shipping.
The iMac Pro arrived safe and sound. Overall, I’ve been thrilled with this Tenba case.
Note 1: I find after I’ve shut it down, I can pack up the iMac Pro with accessories in about 60 seconds, and when I arrive at my destination I can set everything up in about two minutes. Not bad!
Note 2: Before going to the airport, I talked with the airline and they said if they lose it, it’s on them, but if it arrives damaged, it’s on me. I also have my own insurance to cover damage or loss.
Note 3: It’s a really big case. You can move it alone without a problem, but it doesn’t fit in most small cars.
iMac Pro Buying Advice for Photographers
One thing to be aware of for the iMac Pro is that it is not user-upgradeable. If you decide the iMac Pro is right for you, I’d max it out as much as your budget allows from the start. One thing I’ve come to realize is you can never get enough internal storage, so put your money there. Get the 4TB if you can. If you’ve maxed that out and still have budget, go for the RAM.
My recommended spec is:
iMac Pro, 3.0 GHz 10-core w/ 4.5 Turbo Boost // 128GB RAM // 4TB SSD
Truthfully, I’ve had a hard time finding scenarios that REALLY push the iMac Pro to the max. With Adobe’s software not yet optimized for this platform, most of my software stack just isn’t leveraging what I’ve got. But my advice when upgrading your machine at any time is give yourself as much room to grow as possible. Upgrading workstations takes a bit of energy and time away from your craft, so when you do it, take it seriously and max it out.
The monitor on the iMac Pro is really beautiful, but if you are looking for more control and 16-bit support, pick up the LG 5K, or an EIZO. (Or wait and see if Apple gets back into the display game!) I haven’t printed any of the work I’ve created from the iMac Pro’s monitor, so I can’t speak to its accuracy.
Tip: In System Preferences > Displays you can option-click “Scaled” to see more resolution options.
Favorite iMac Pro Features
Swappable VESA Mount
The previous iMac model had to be ordered with the standard foot or a VESA mount from the factory and couldn’t be switched later. The fact that I can swap these means if my needs change and I want to swap to VESA later, I can.
Reliable Wireless Input Devices
Up until now, I’ve never trusted wireless keyboards or mice. The first time I tried one (many years ago), it would go in and out of connectivity, lose charge quickly, etc. And inevitably, I couldn’t find batteries when I needed them. This machine is the first time a wireless keyboard/mouse has really gained my approval. It keeps the desktop cleaner and works flawlessly. One note: I do love how the keyboard basically morphs into a wired keyboard while charging and I wish the mouse did the same.
Improved FaceTime Camera
I recorded some training materials using the FaceTime camera on iMac Pro and it is leaps and bounds better than my MBP. Less grain, sharper edges, and very usable.
iMac Pro Wishes
1. I wish the Magic Mouse would let me charge it while using it (seems like the Lightning charge port could be on the top instead of the bottom).
2. I wish the iMac Pro had integrated FaceID. I can’t wait until my Mac knows it’s me just because I’m sitting in front of it. Making purchases and installing apps will be so much easier.
3. I’m looking forward to seeing more photo software optimized to leverage this beast.
Bottom Line
When I reflect on this adventure, I’m really thankful for the opportunity to work with such cutting edge tech in such a beautiful place.
As artists, our tools are far less important than our vision, but gear like the Hasselblad and iMac Pro expand our possibilities. They give us a new horizon and propel us in creating something entirely original.
Without the Hasselblad’s ultra sharp clarity, I couldn’t have captured the Superpano above, and without the iMac Pro, I simply wouldn’t have attempted to assemble it. But now, informed by this gear, I’m asking myself new questions like, “Where could I install an extremely high-res, 30-foot panorama in print?”
Hasselblad + iMac Pro = 👍🏻
If you are the type of creative pro who is constantly pushing the boundaries of what’s possible, these machines will massively expand your boundaries immediately and give you plenty of room to grow.
BTS


Questions I’ve Been Asked
Q: Can I plug my headphones into the iMac Pro?
A: You sure can. However, you should get a pair of AirPods. They’re my favorite Apple product since iPhone.
Q: The space gray keyboard, trackpad, and mouse are super sweet. Can I buy them separately?
A: Until recently, the answer was no, but space gray accessories are now available separately.
Q: What’s the best camera for Antarctica?
A: It really depends on you and your shooting style. There are so many different ways to capture this place, but be prepared for moisture (rain, ocean splashes, etc.). We found we used our iPhone X’s camera perhaps more than anything because of its dynamic nature and speed.
Q: Looking back, what would you have done differently?
A: I would have taken different lenses for the Hasselblad. I was really lacking in the 35mm range.
Q: Will you post more about your other gear for Antarctica?
A: Yes. This was a massive post, so I’ve chosen to post the rest my Antarctica Packing Guide in a separate post in the future.
Special Thanks
Hasselblad: Thanks for making insanely amazing cameras and always pushing the boundaries of what’s possible with optics.
Apple: Thanks for building a machine that gives creative pros room to run.
Ker & Downey: Thanks for making these amazing adventures happen around the world. The rest of our Antarctica story just went live in their magazine, QUEST. Check it out.
Quark Expeditions: Thanks for a fantastic voyage. All the leaders on your expedition team are amazing. (Dave Merron, thanks for all the insight.)
Glyph: Thanks for making lightning fast SSDs in an adventure-ready enclosure.
Tierra Hotels & Patagonia Camp: Thanks for your fantastic Torres del Paine accommodations.
Kevin Raber at Luminous Landscape: Thanks for the trip prep and packing insights. (Everyone loved my lobster fishing gloves.)
Esther Havens MANN! — Thanks for giving up the dream of a warm beach honeymoon to go on this crazy adventure together. :-)