iPhone 12 Pro Max Camera Review: Zion NP
iPhone 12 Pro Max Camera Review: Zion NP
Hello from Zion National Park, UT!
We’ve been adventuring through canyons, rivers, mountains, and more with the iPhone 12 Pro Max and have learned a lot along the way.
In case you missed it, I posted my iPhone 12 Pro review from Glacier National Park a few weeks ago and we found significant camera improvements, driven mainly by major software upgrades. Be sure to check it out as most of my focus today will be on the major hardware upgrades of the iPhone 12 Pro Max, notably the bigger sensor, longer telephoto lens, and a new sensor-shift stabilization technology.
As always, I’m asking the question:
how will this new tech make
our pictures and videos better?
I had a ton of fun finding those answers and I’m excited to share my findings with you.
Big thanks to my friends at Airstream, ProDPI, and Halide for supporting this review and for making great products for the creative pro community at large.
Enjoy!

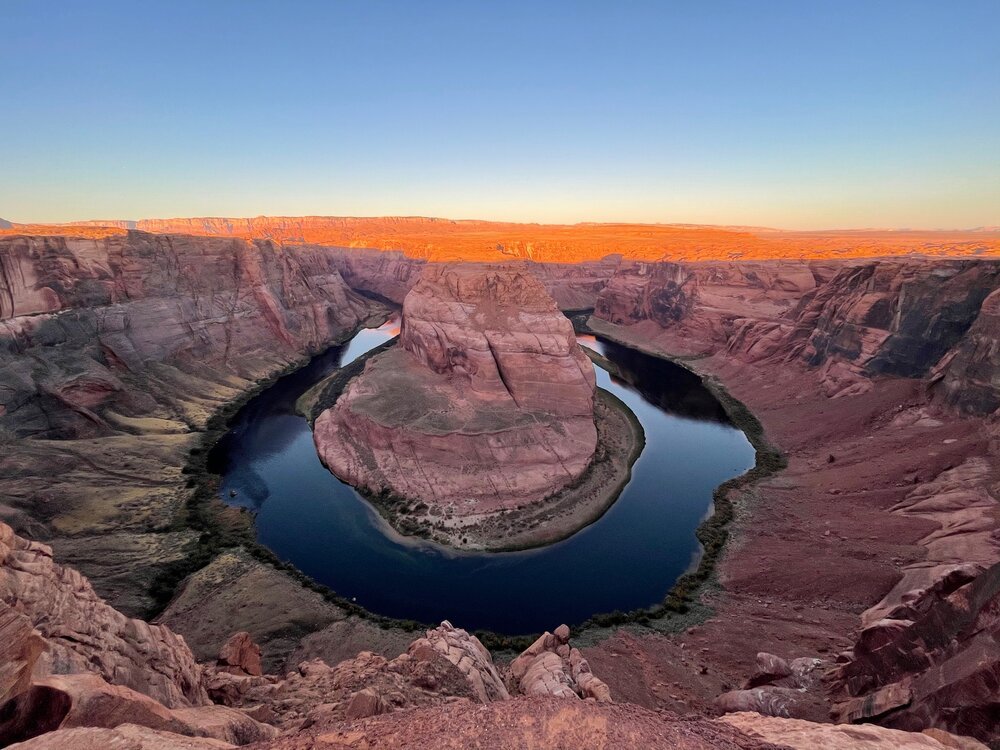
Shot on iPhone 12 Pro Max w/ Ultra Wide in Pano mode (color adjusted in Apple Photos).
Capture the Night Sky
I’m fascinated by light’s power over darkness and absolutely love shooting at night — it’s how I got into photography and the night sky continues to be one of my favorite subjects, so the very first thing I did when I got my hands on the iPhone 12 Pro Max was point it up toward the stars.
Below is a 30-second Night mode exposure shot with iPhone 12 Pro Max.
Shot on iPhone 12 Pro w/ Wide lens in Night mode (on tripod).
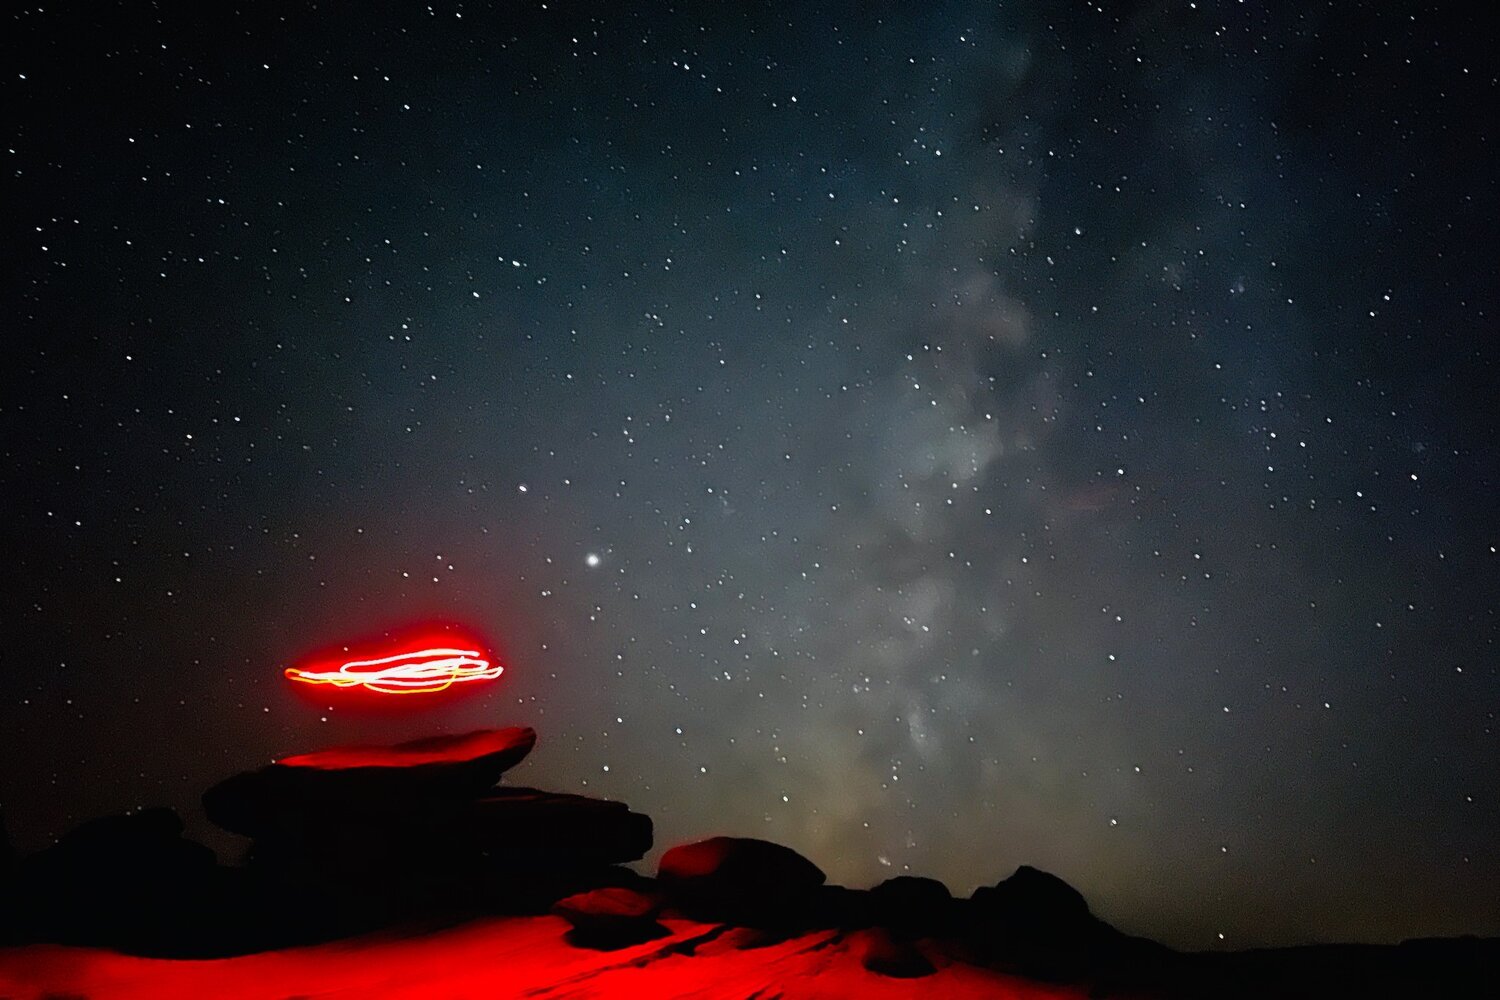
We can now capture photos of the Milky Way with an iPhone — crazy!
Here’s another shot captured as the horizon began to glow about forty-five minutes before sunrise. I’m happy to report the white dot you see glowing in the sky is not a lens flare, but instead is Venus, shining brighter than all the others. (And a very keen eye will see Mercury too, just above the horizon. Thanks, Brent.)

I knew the Max would be a great camera and I loved shooting the photos above, but I was really curious to learn if the Max hardware upgrades would be worth carrying the larger device even though I definitely prefer the smaller size of the already powerful iPhone 12 Pro.
I shot in tons of different lighting scenarios, and frankly in many of the scenes both cameras rendered a beautiful image and I could barely see a difference between iPhone 12 Pro and iPhone 12 Pro Max.

This got me thinking — what kind of scene is challenging for the most people and what scene leverages all of the new hardware?
This led me to the most significant improvement I found which was when shooting Wide (26 mm) and handheld in semi-low-light scenes. Think candle-lit dinner, just after sunset, or a night urban scene with some available light.
In several of these cases, I found the iPhone 12 Pro required 2 seconds in Night mode versus the iPhone 12 Pro Max requiring only 1 second. This means less time for camera shake and subject movement.
Below is a scene lit only by two small candles. I turned on the gas stove (on the right), but only for effect. Any light it provided was negligible.
This was an auto Night mode 3-second exposure for both the iPhone 12 Pro and iPhone 12 Pro Max. I handheld both devices, mounted together on my side-by-side rail — so they experienced the exact same camera shake.
Check out the 100% crops on the right and consider the differences in grain, detail, and contrast.
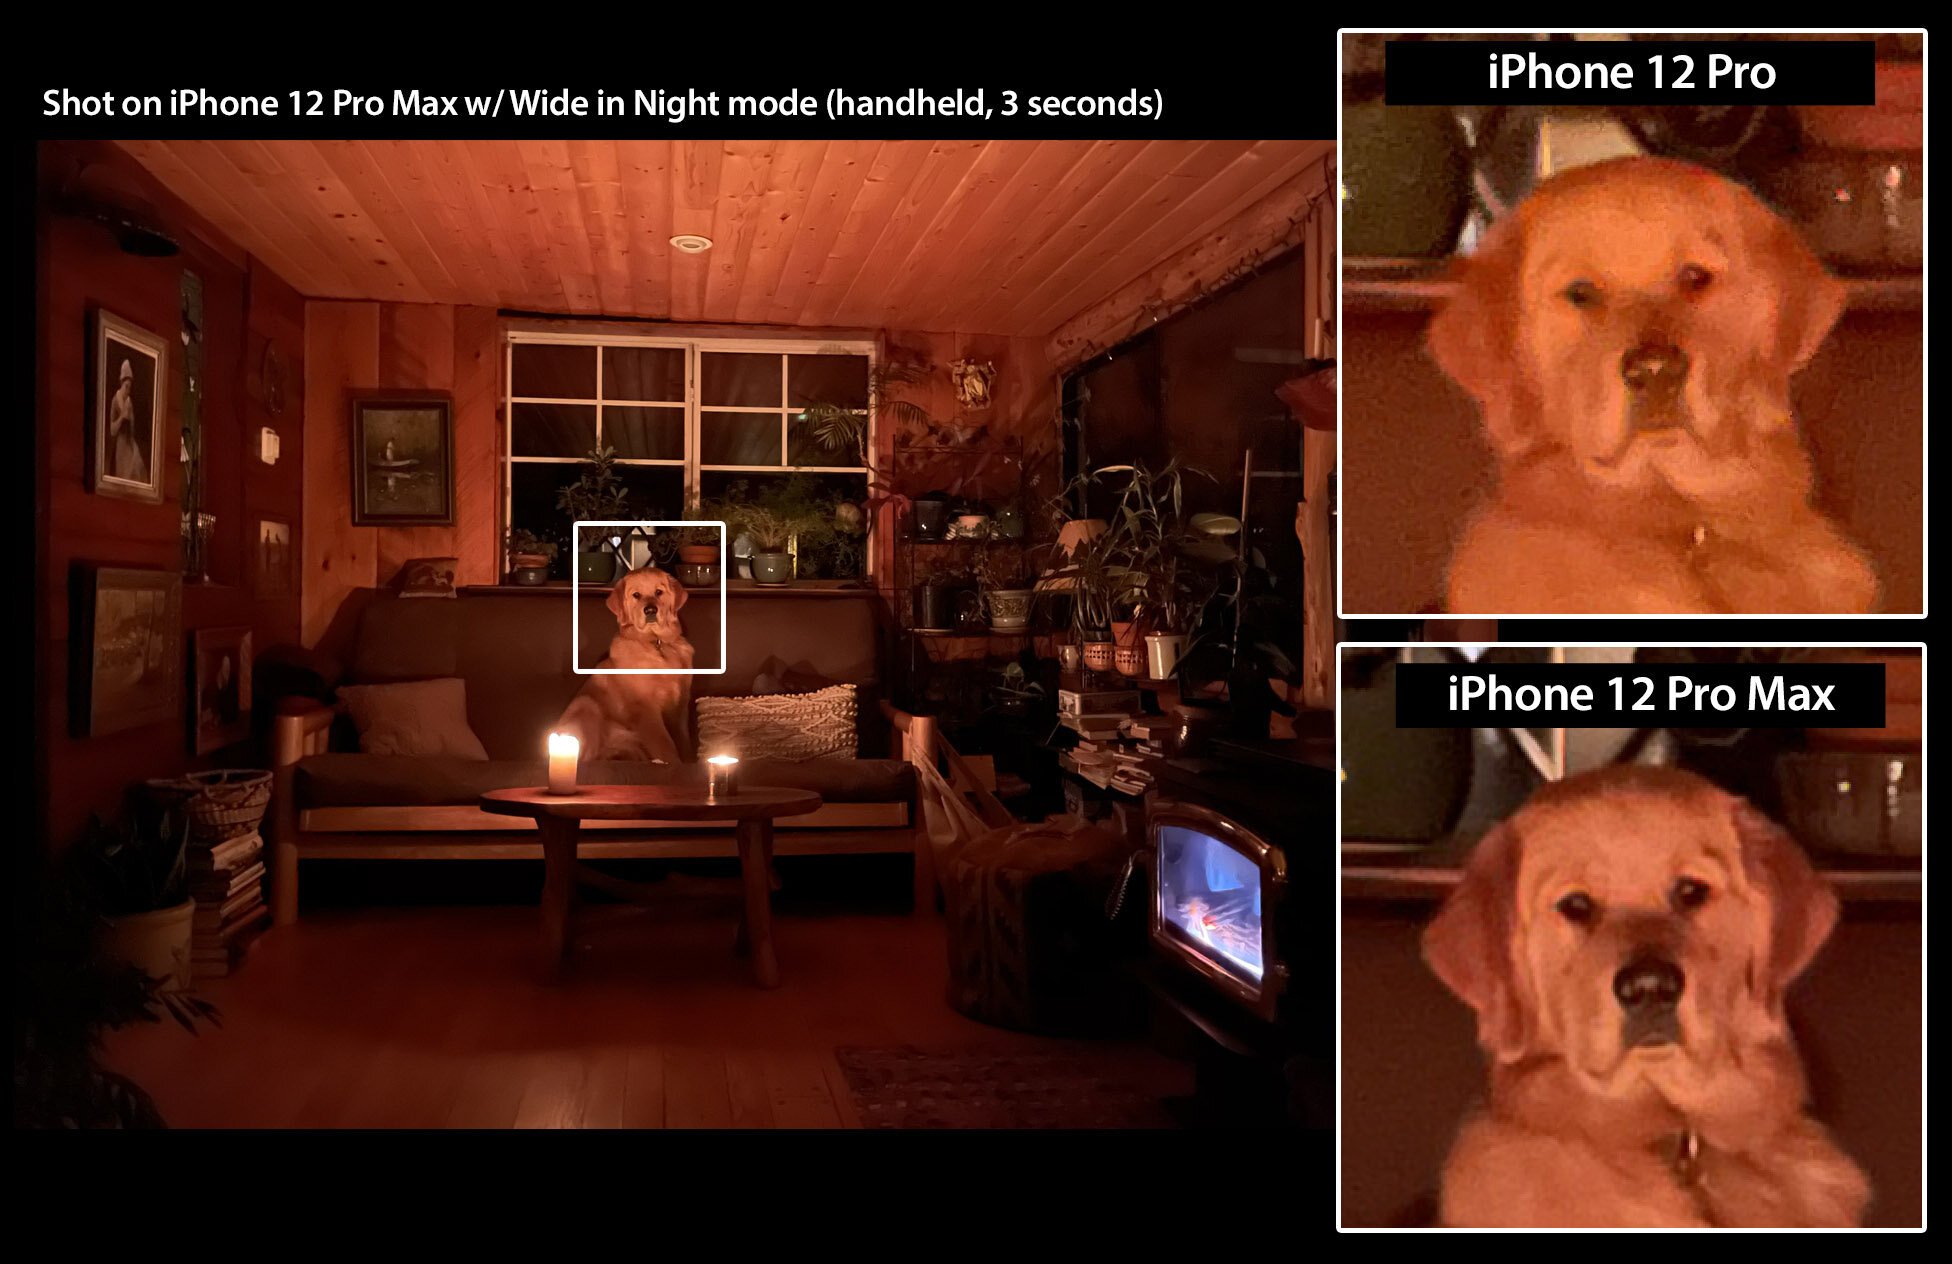
This kind of scene really leverages the major hardware strengths in the Max. The larger sensor can collect more candlelight, the bigger pixel size keeps the grain smoother without sacrificing detail, and the sensor-shift OIS keeps the image sharp despite my handheld camera shake.
I also found minor improvements when shooting extremely low-light scenes in Night mode on a tripod w/ 30-second exposures. Check out the moonlit scene below.
5x Optical Zoom
With the iPhone 12 Pro Max, we now have a 5x optical zoom range (from 13 mm to 65 mm) compared to the iPhone 12 Pro with a 4x zoom range (from 13 mm to 52 mm), which is the same as last year’s iPhone 11 Pro. Before that, we had a 2x zoom range all the way back to the iPhone 7 Plus.
As photographers, this extended range gives us more freedom to see and capture scenes differently. While the Ultra Wide reveals context, the more compressed 2.5x Telephoto can highlight specific details from afar.
Click on the image below and scroll through the three different lenses. Consider the different details you notice in each perspective and the different story each lens tells.


Here’s a quick clip showing you the full 5x optical zoom in camera.
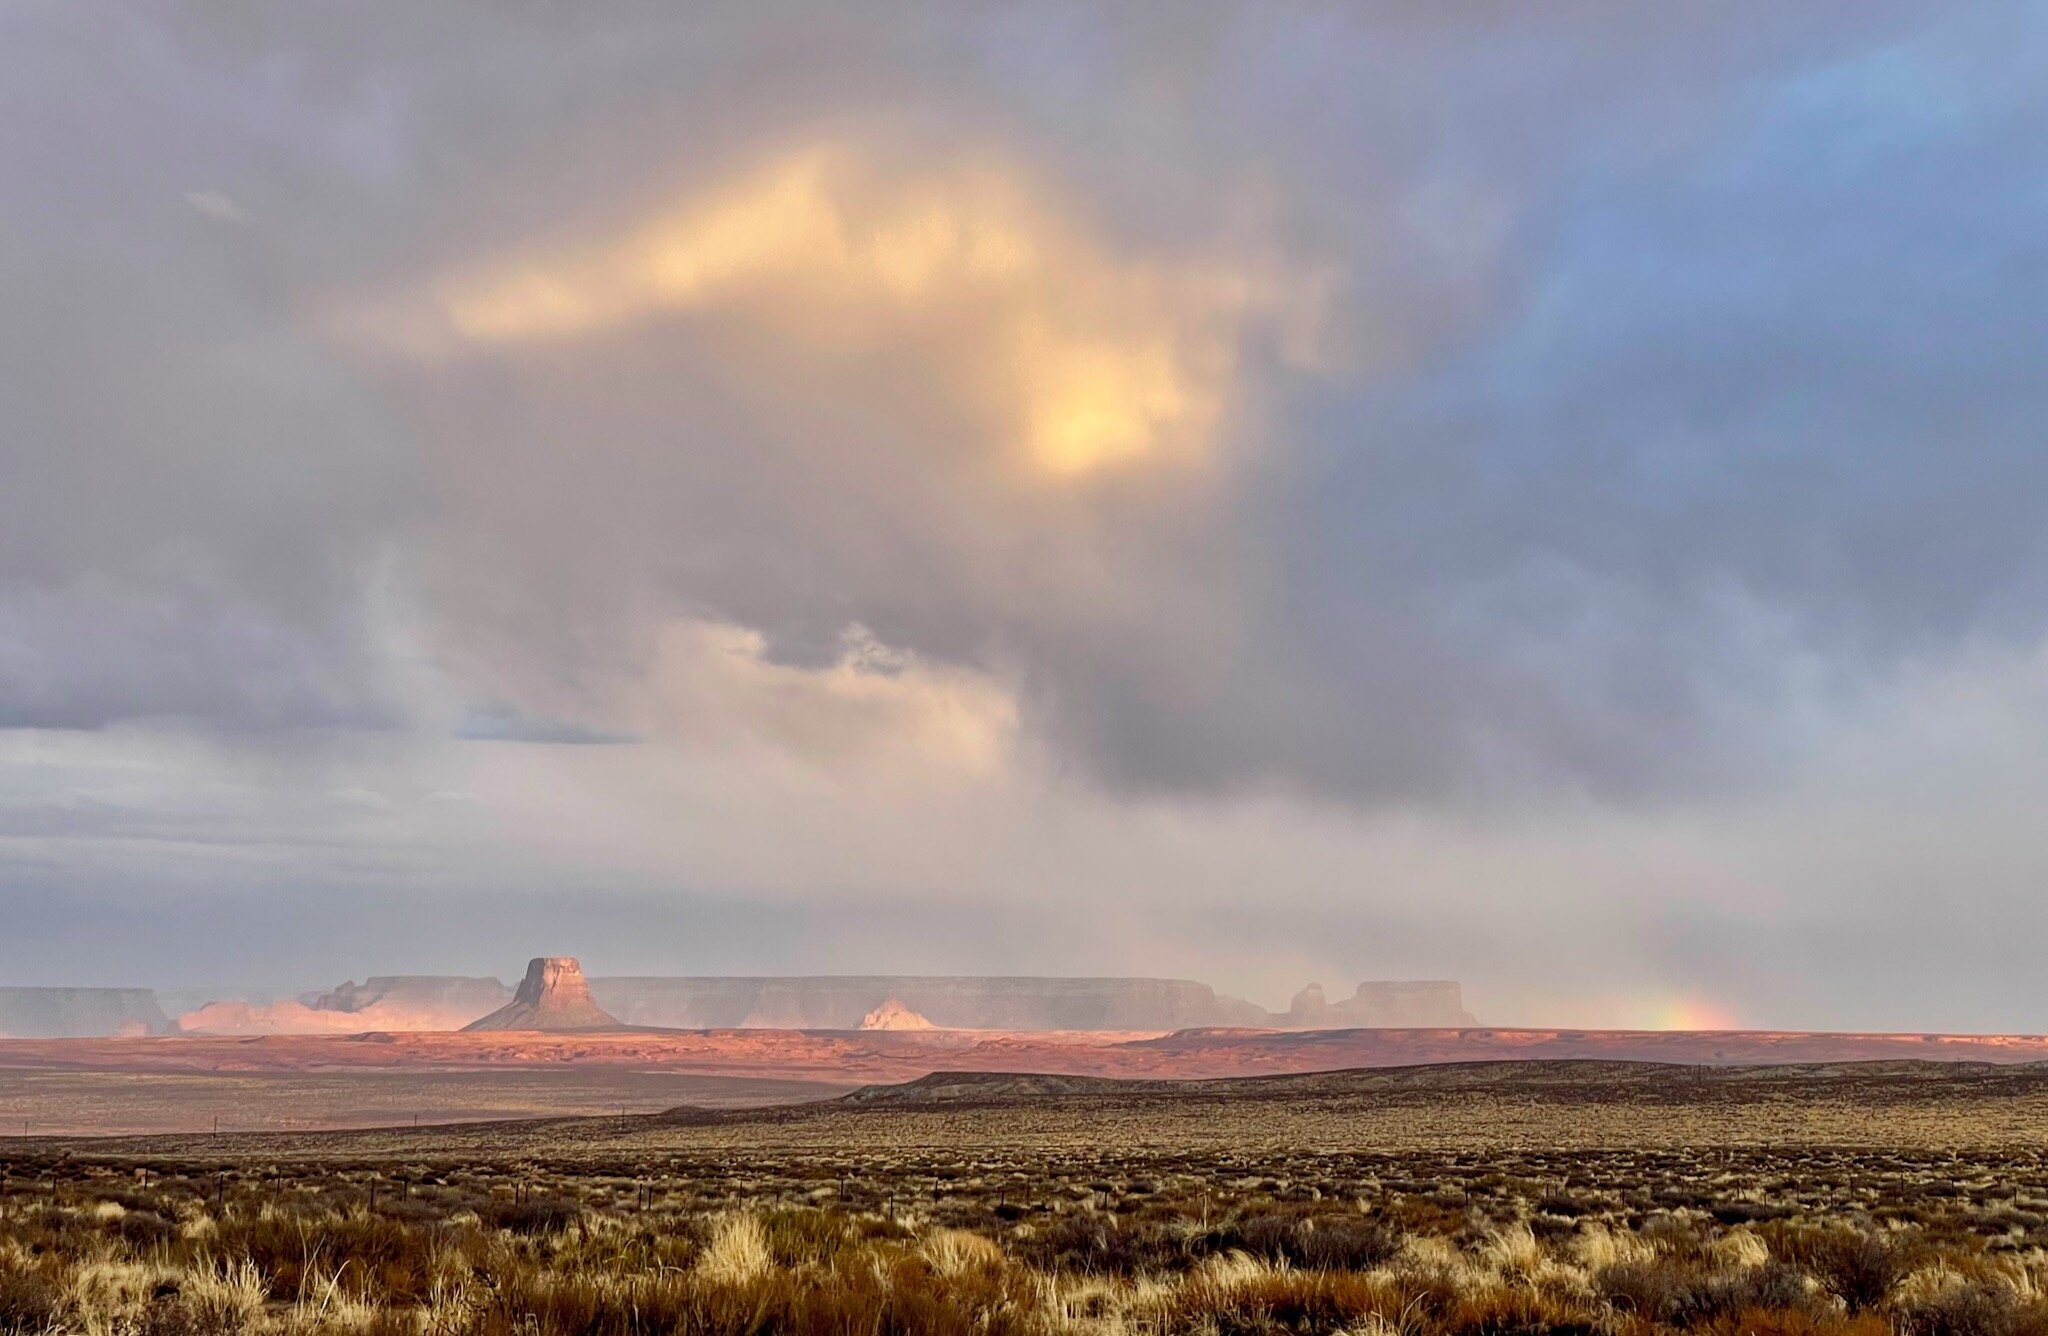
Below, I was able to capture the rock formation and the rainbow with the 2.5x telephoto lens — these details would have been less noticeable with a wider lens.
Halide Mark II’s Technical Readout
Since my review of the iPhone 12 Pro just a few weeks ago, the team at Halide has launched an all-new and very powerful update to their already great pro camera app: Halide Mark II.
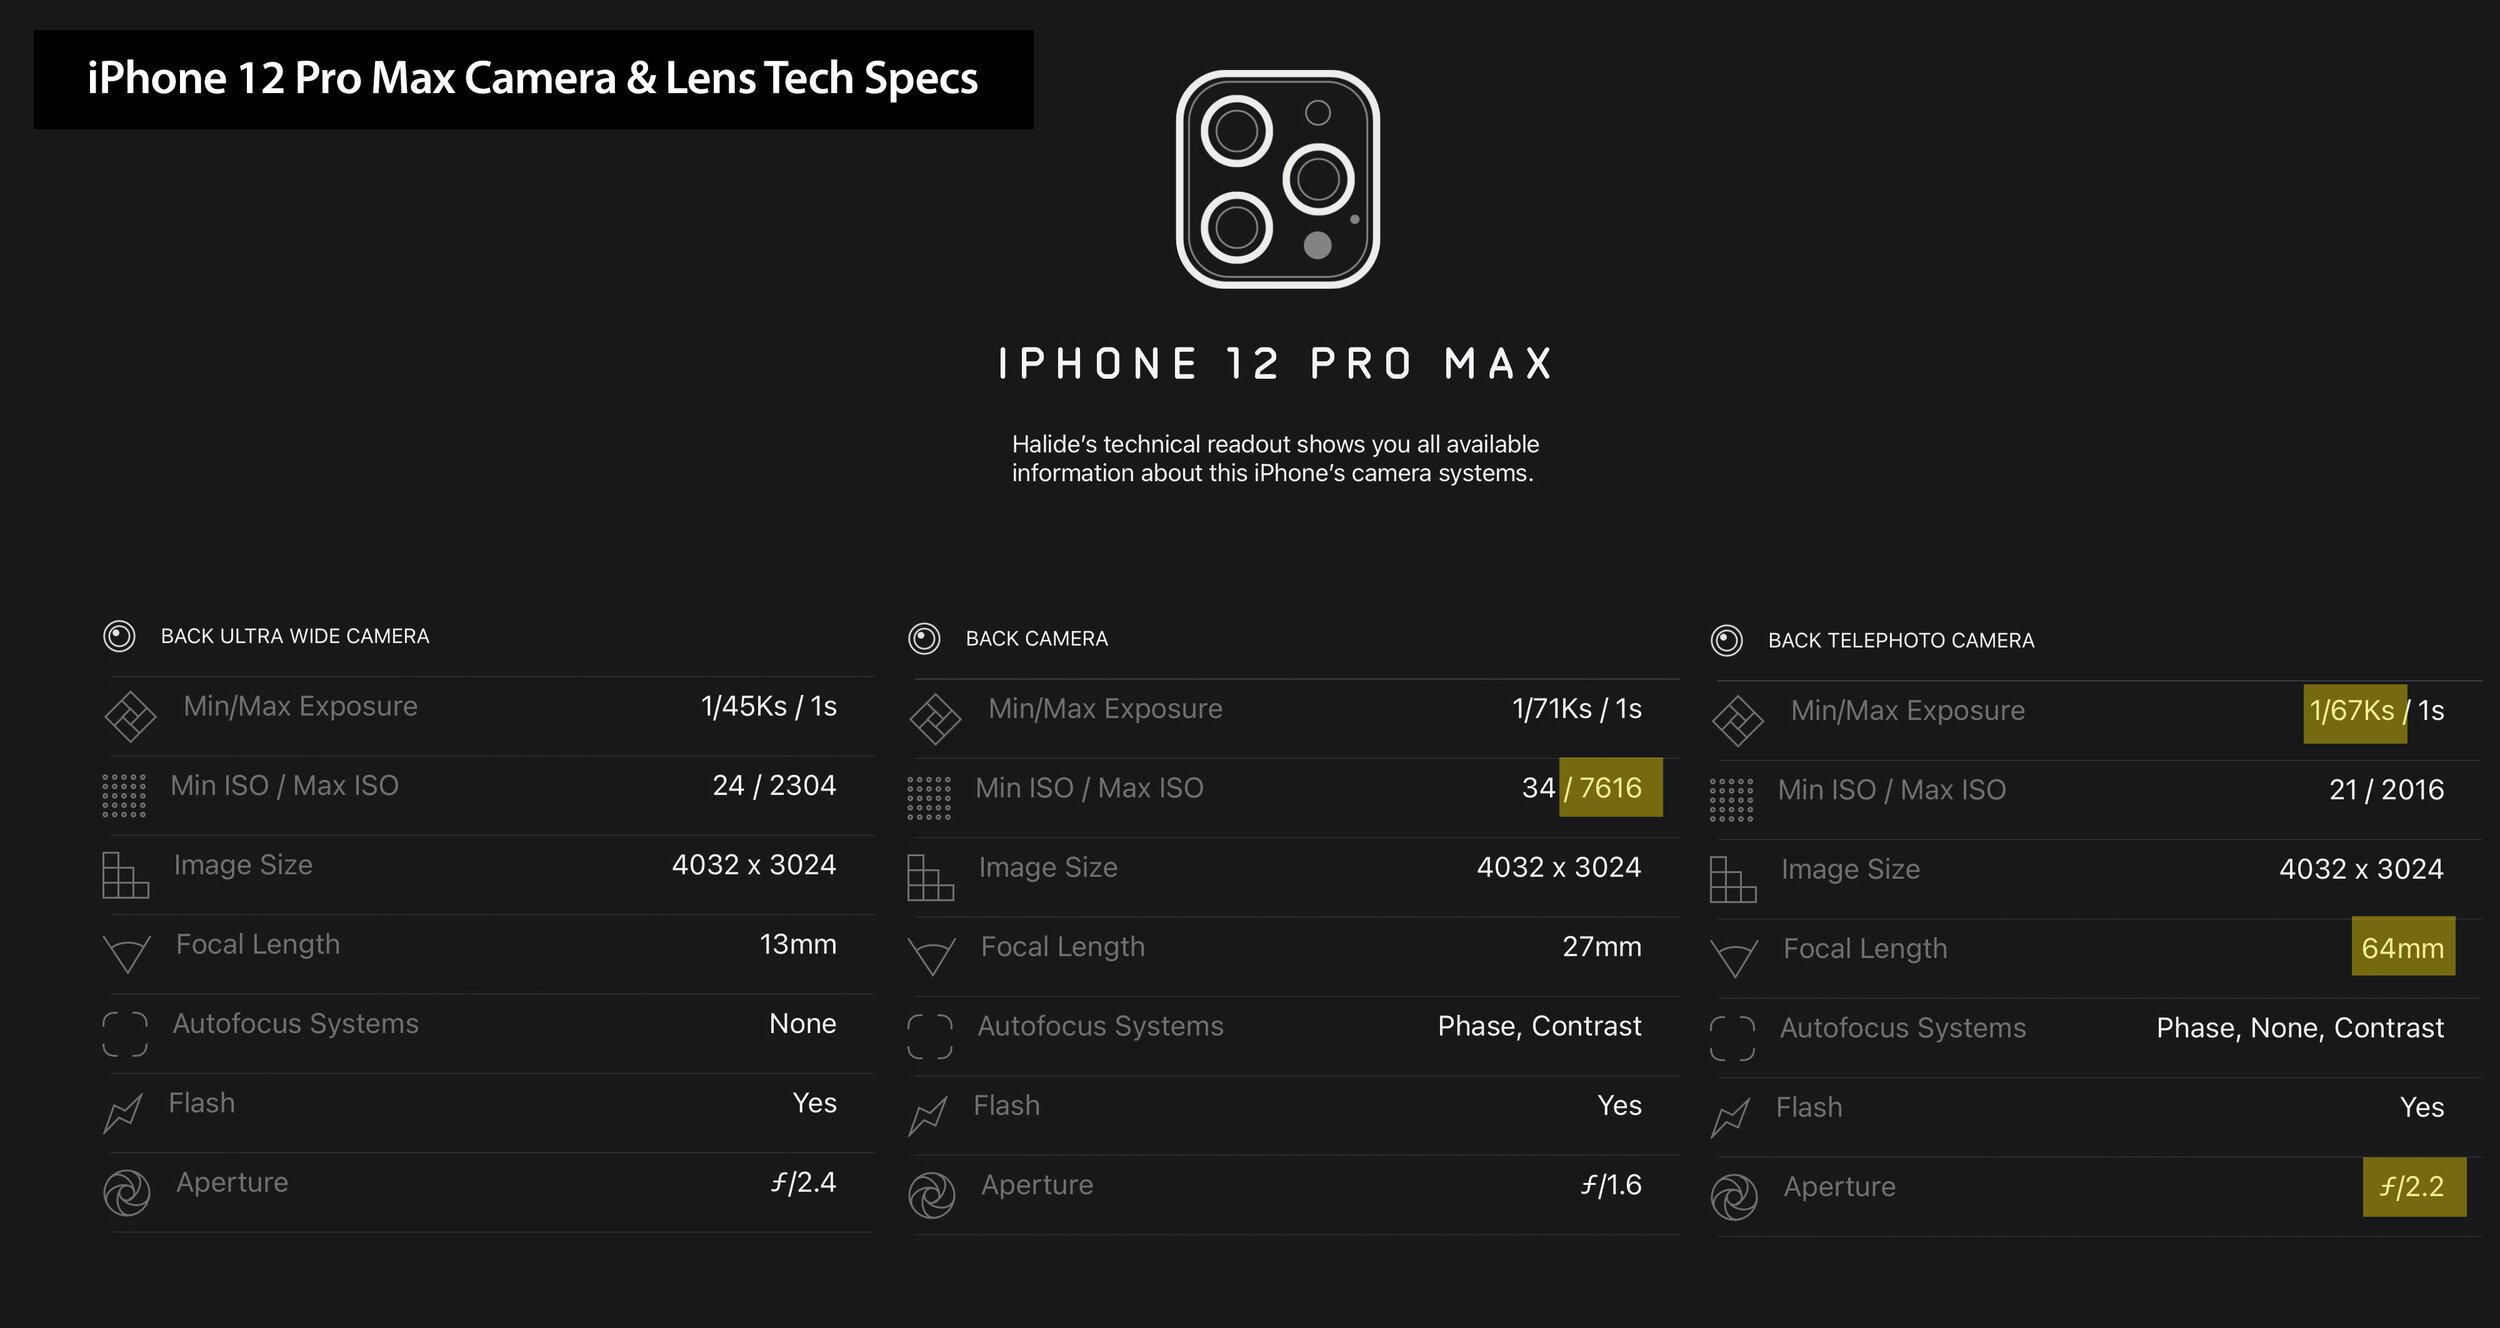
I used their Technical Readout feature to reveal the various hardware changes inside the Max.
This readout shows a handful improvements, even over the iPhone 12 Pro. The most dramatic change is the back camera’s Max ISO of 7000+, significantly higher than even the iPhone 12 Pro, which was a big jump from the iPhone 11 Pro. This means better light sensitivity, which is most helpful in dark shooting conditions.
We can also see the new telephoto lens has a faster minimum shutter speed, longer focal length, and smaller aperture.
The Ideal Camera for The Narrows
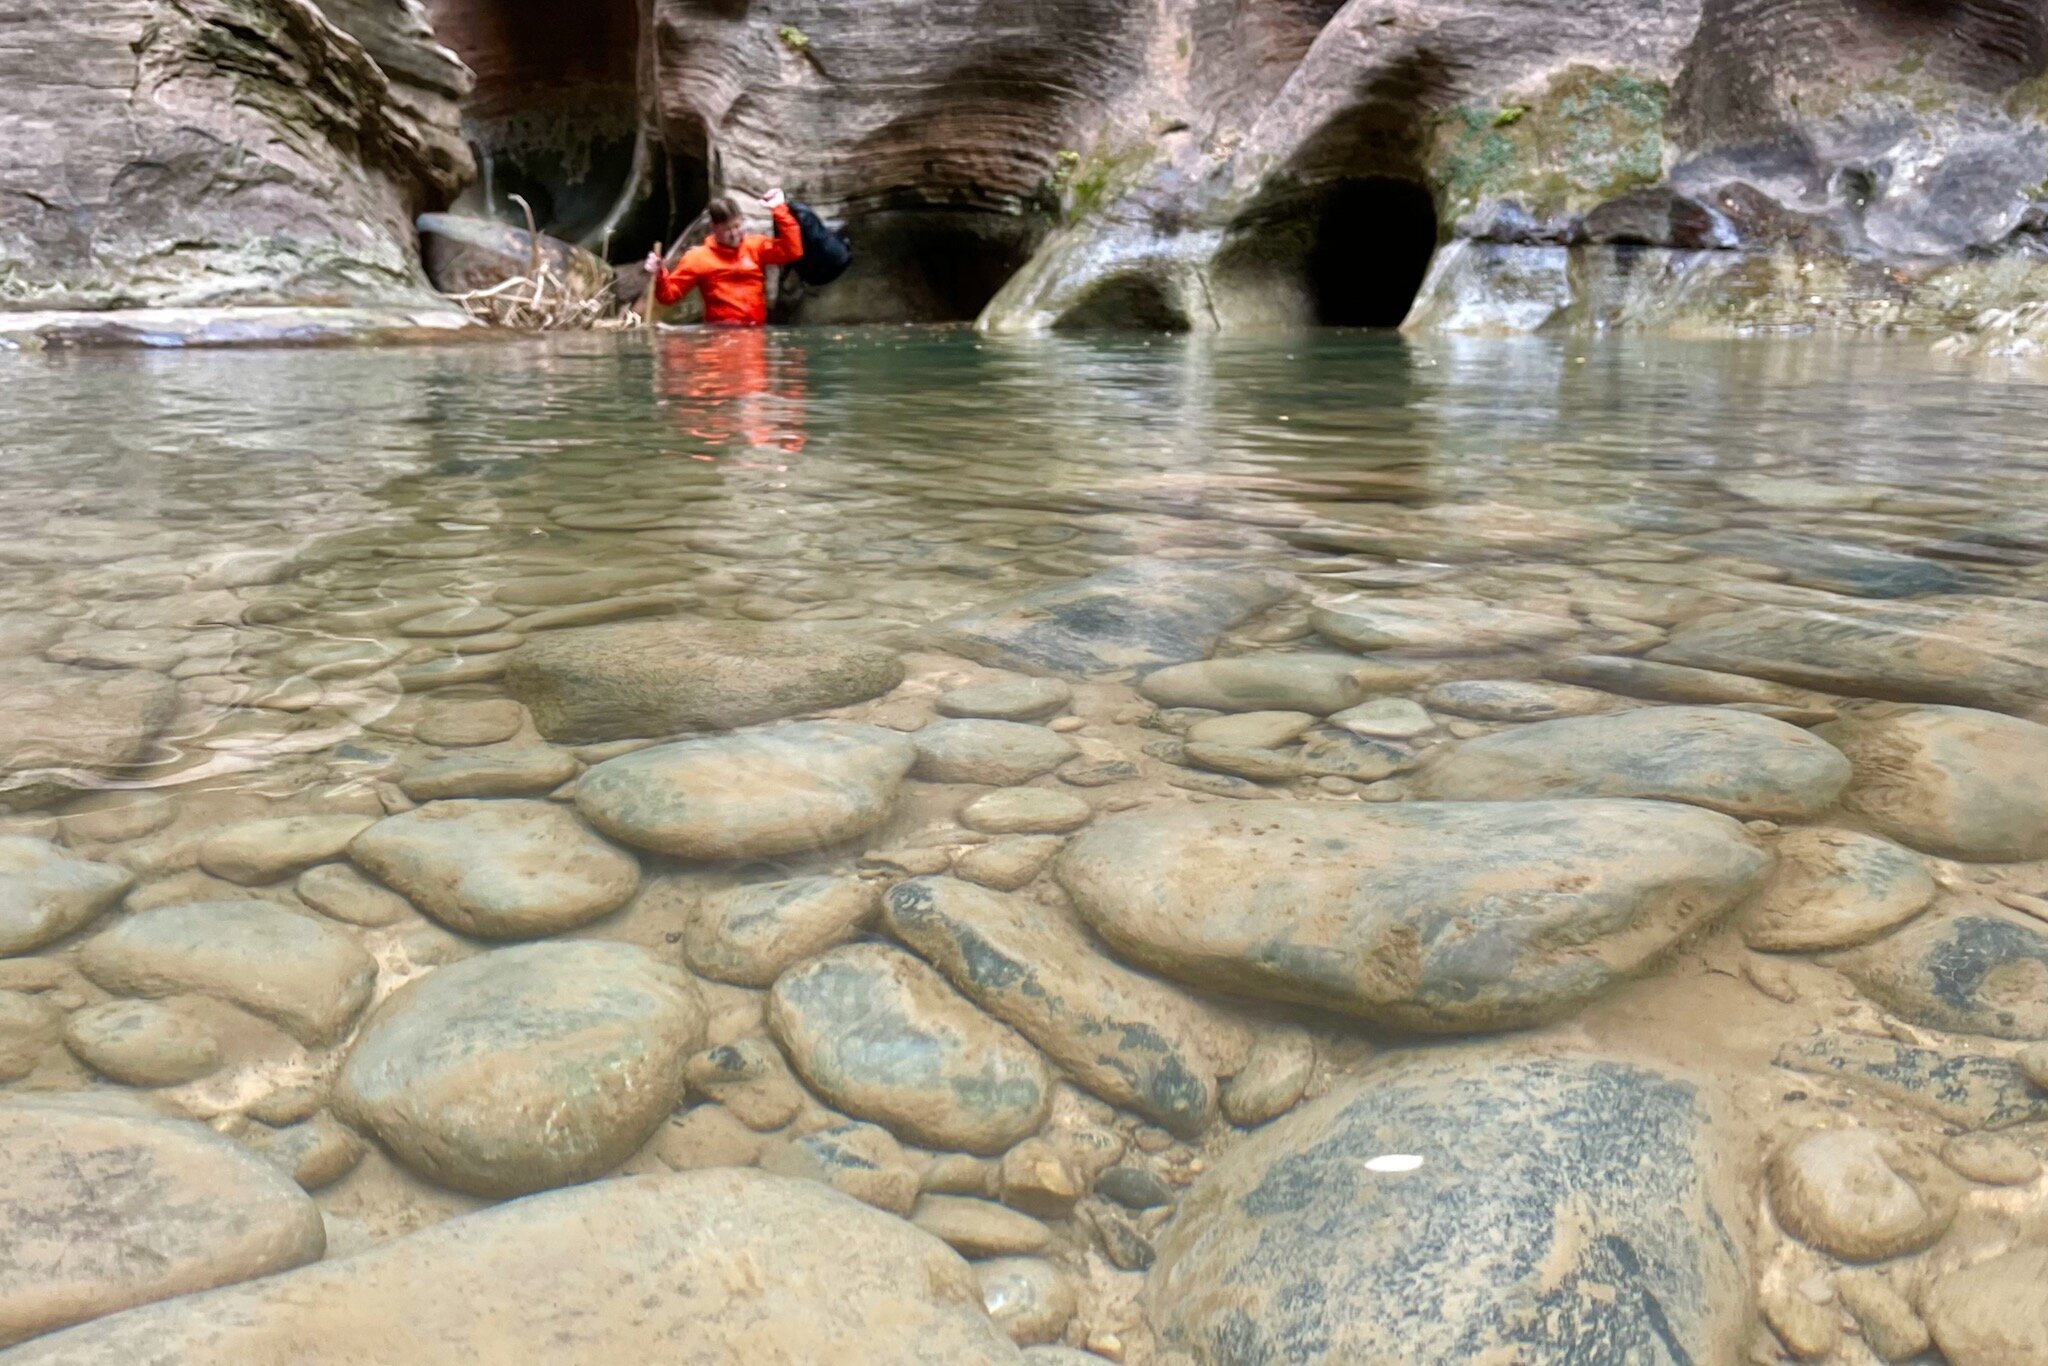
One of the most famous hikes in America is The Narrows in Zion National Park. This beautiful trek requires hikers to wade miles upstream in a river through the narrowest sections of the Zion Canyon (just 10 feet wide at the narrowest).
The lighting and shooting conditions are extreme and diverse, so below I’ll share a few photos demonstrating why I think iPhone 12 Pro Max is the ideal tool to capture this adventure (whether you’re a pro or not).
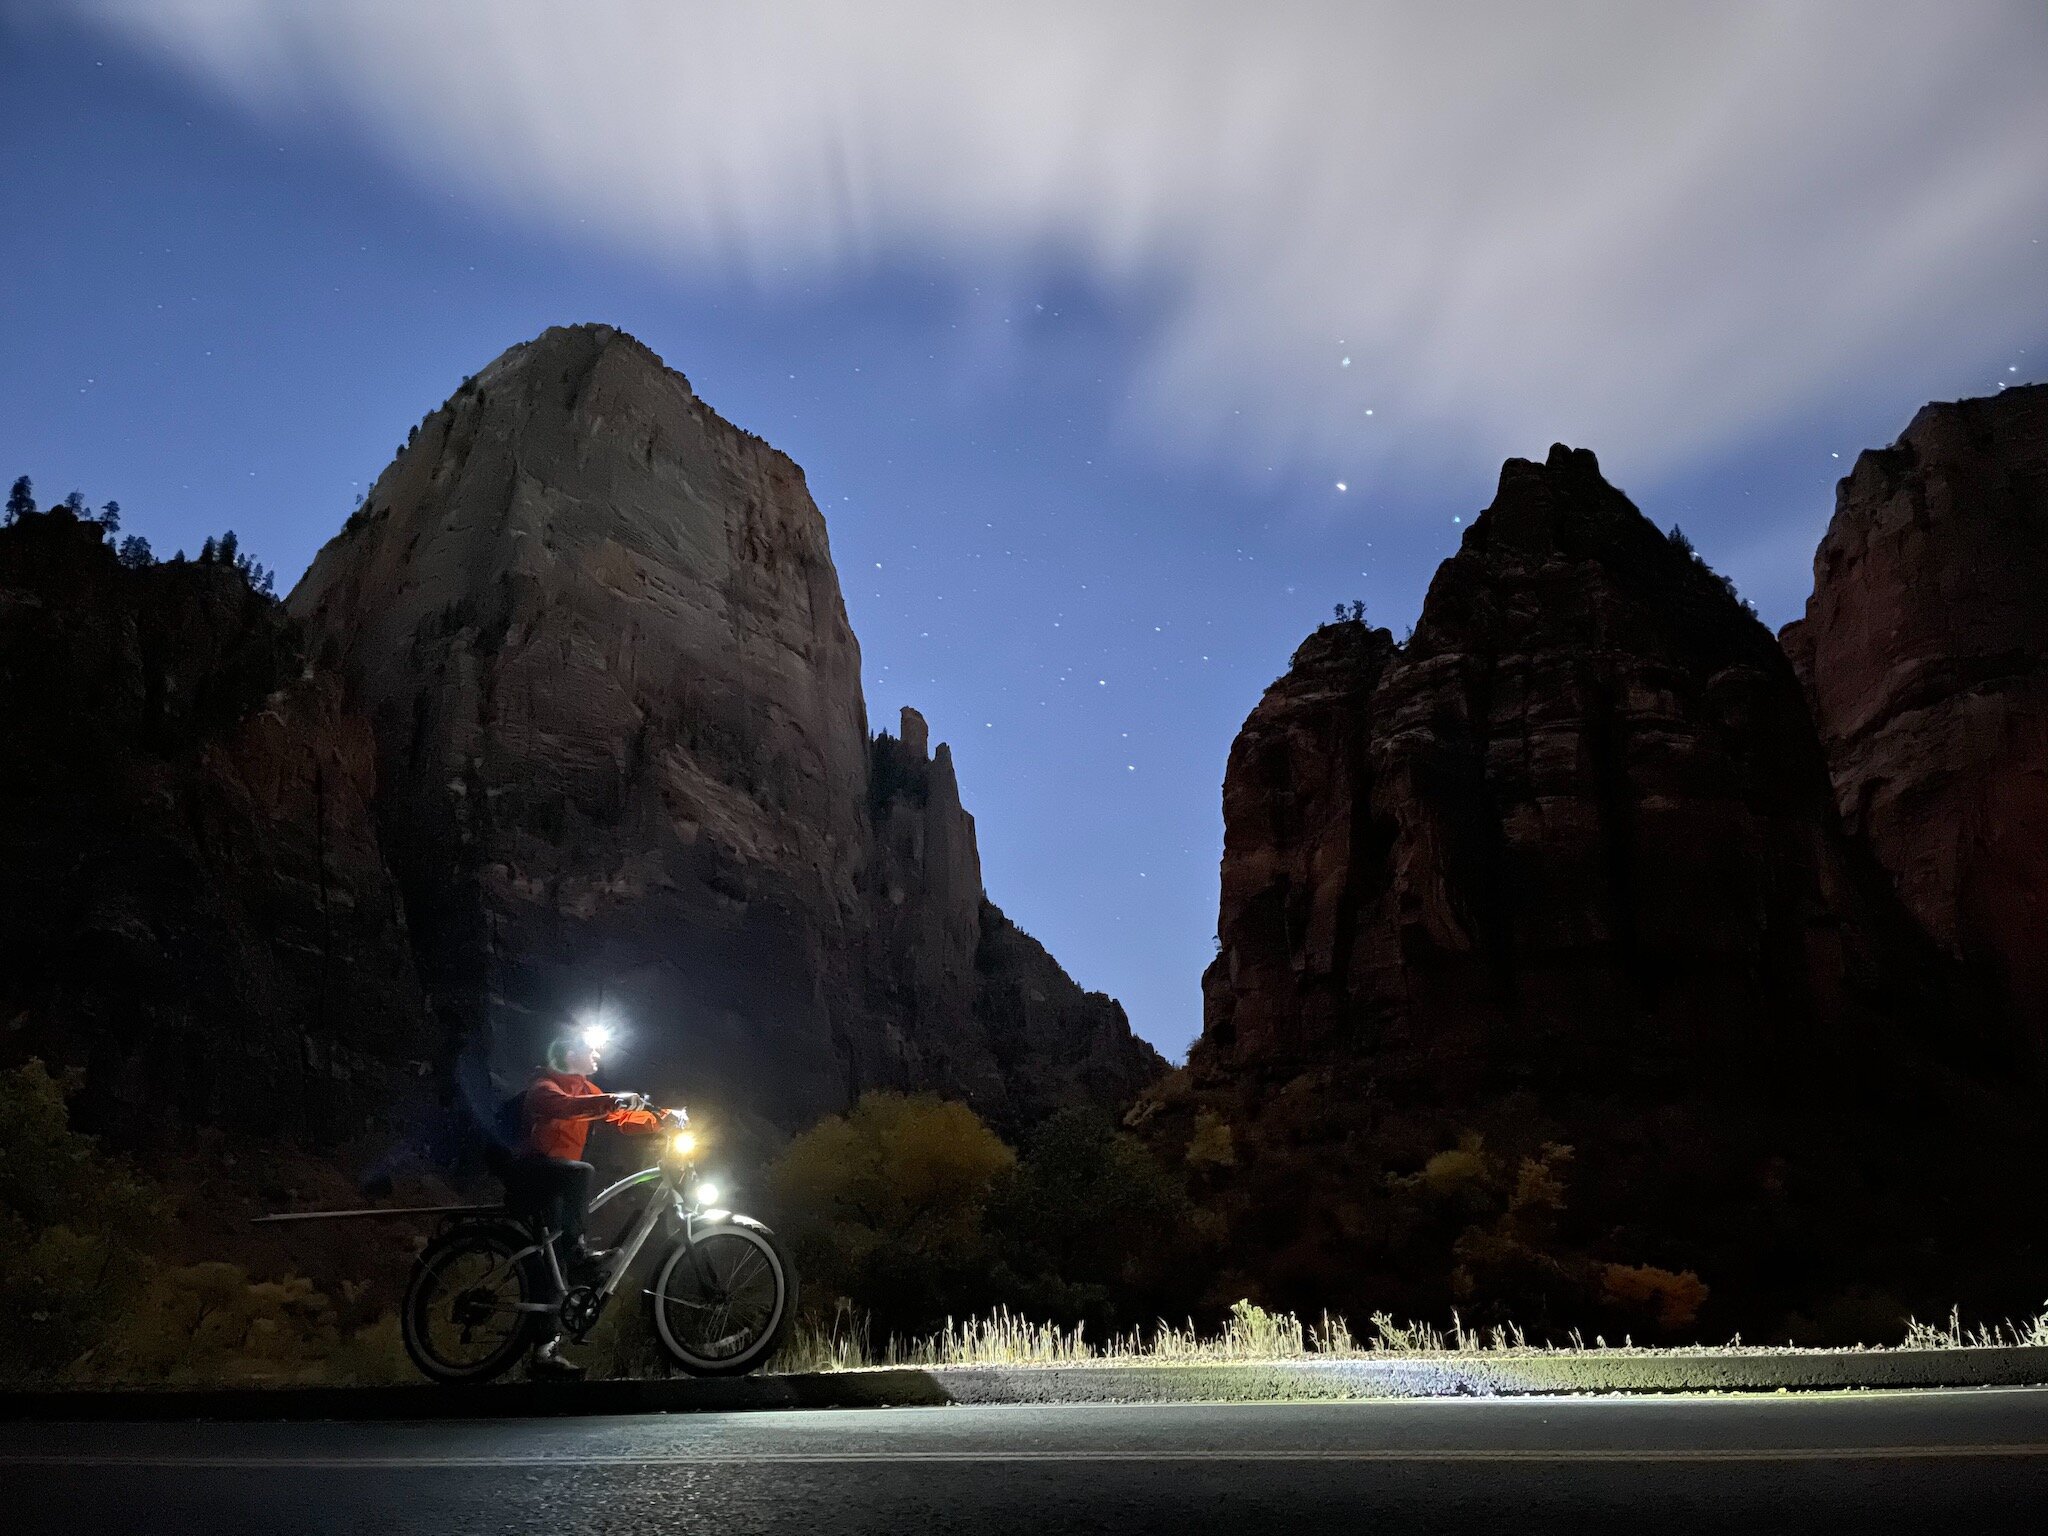
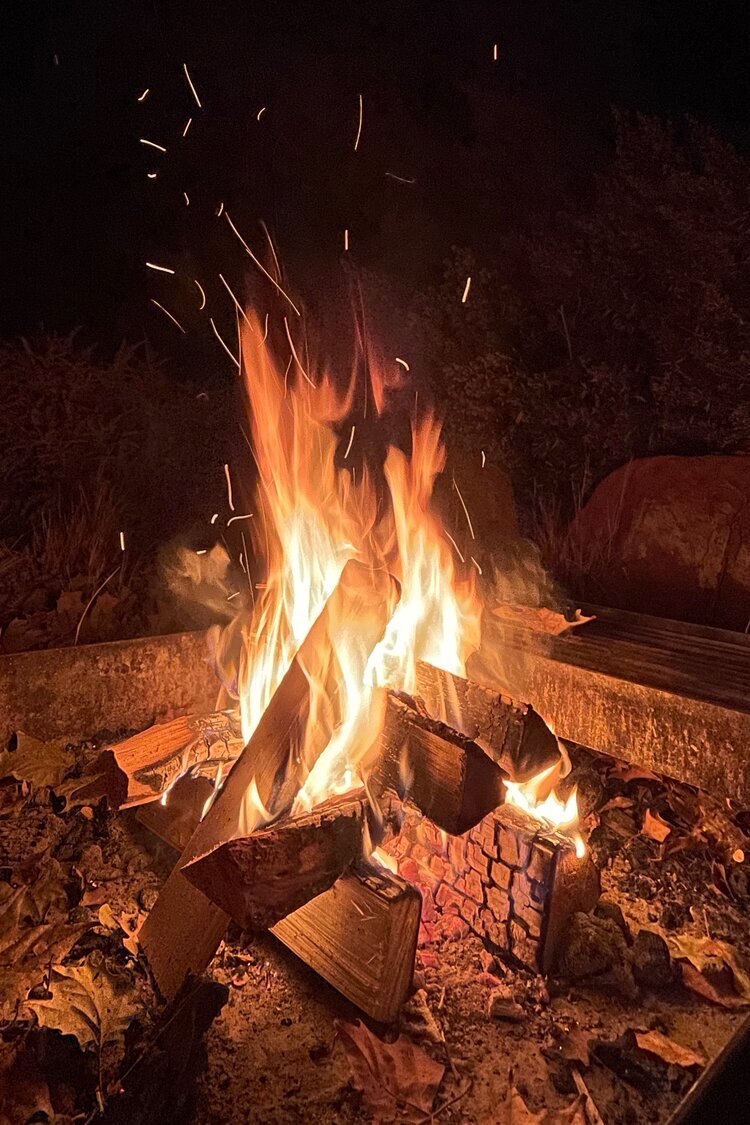
First, we had to get started super early and rode eBikes to the trailhead a couple hours before sunrise. I used the iPhone 12 Pro Max on a little Ultrapod w/ Studio Neat’s Glif to shoot this moonlit night photo.
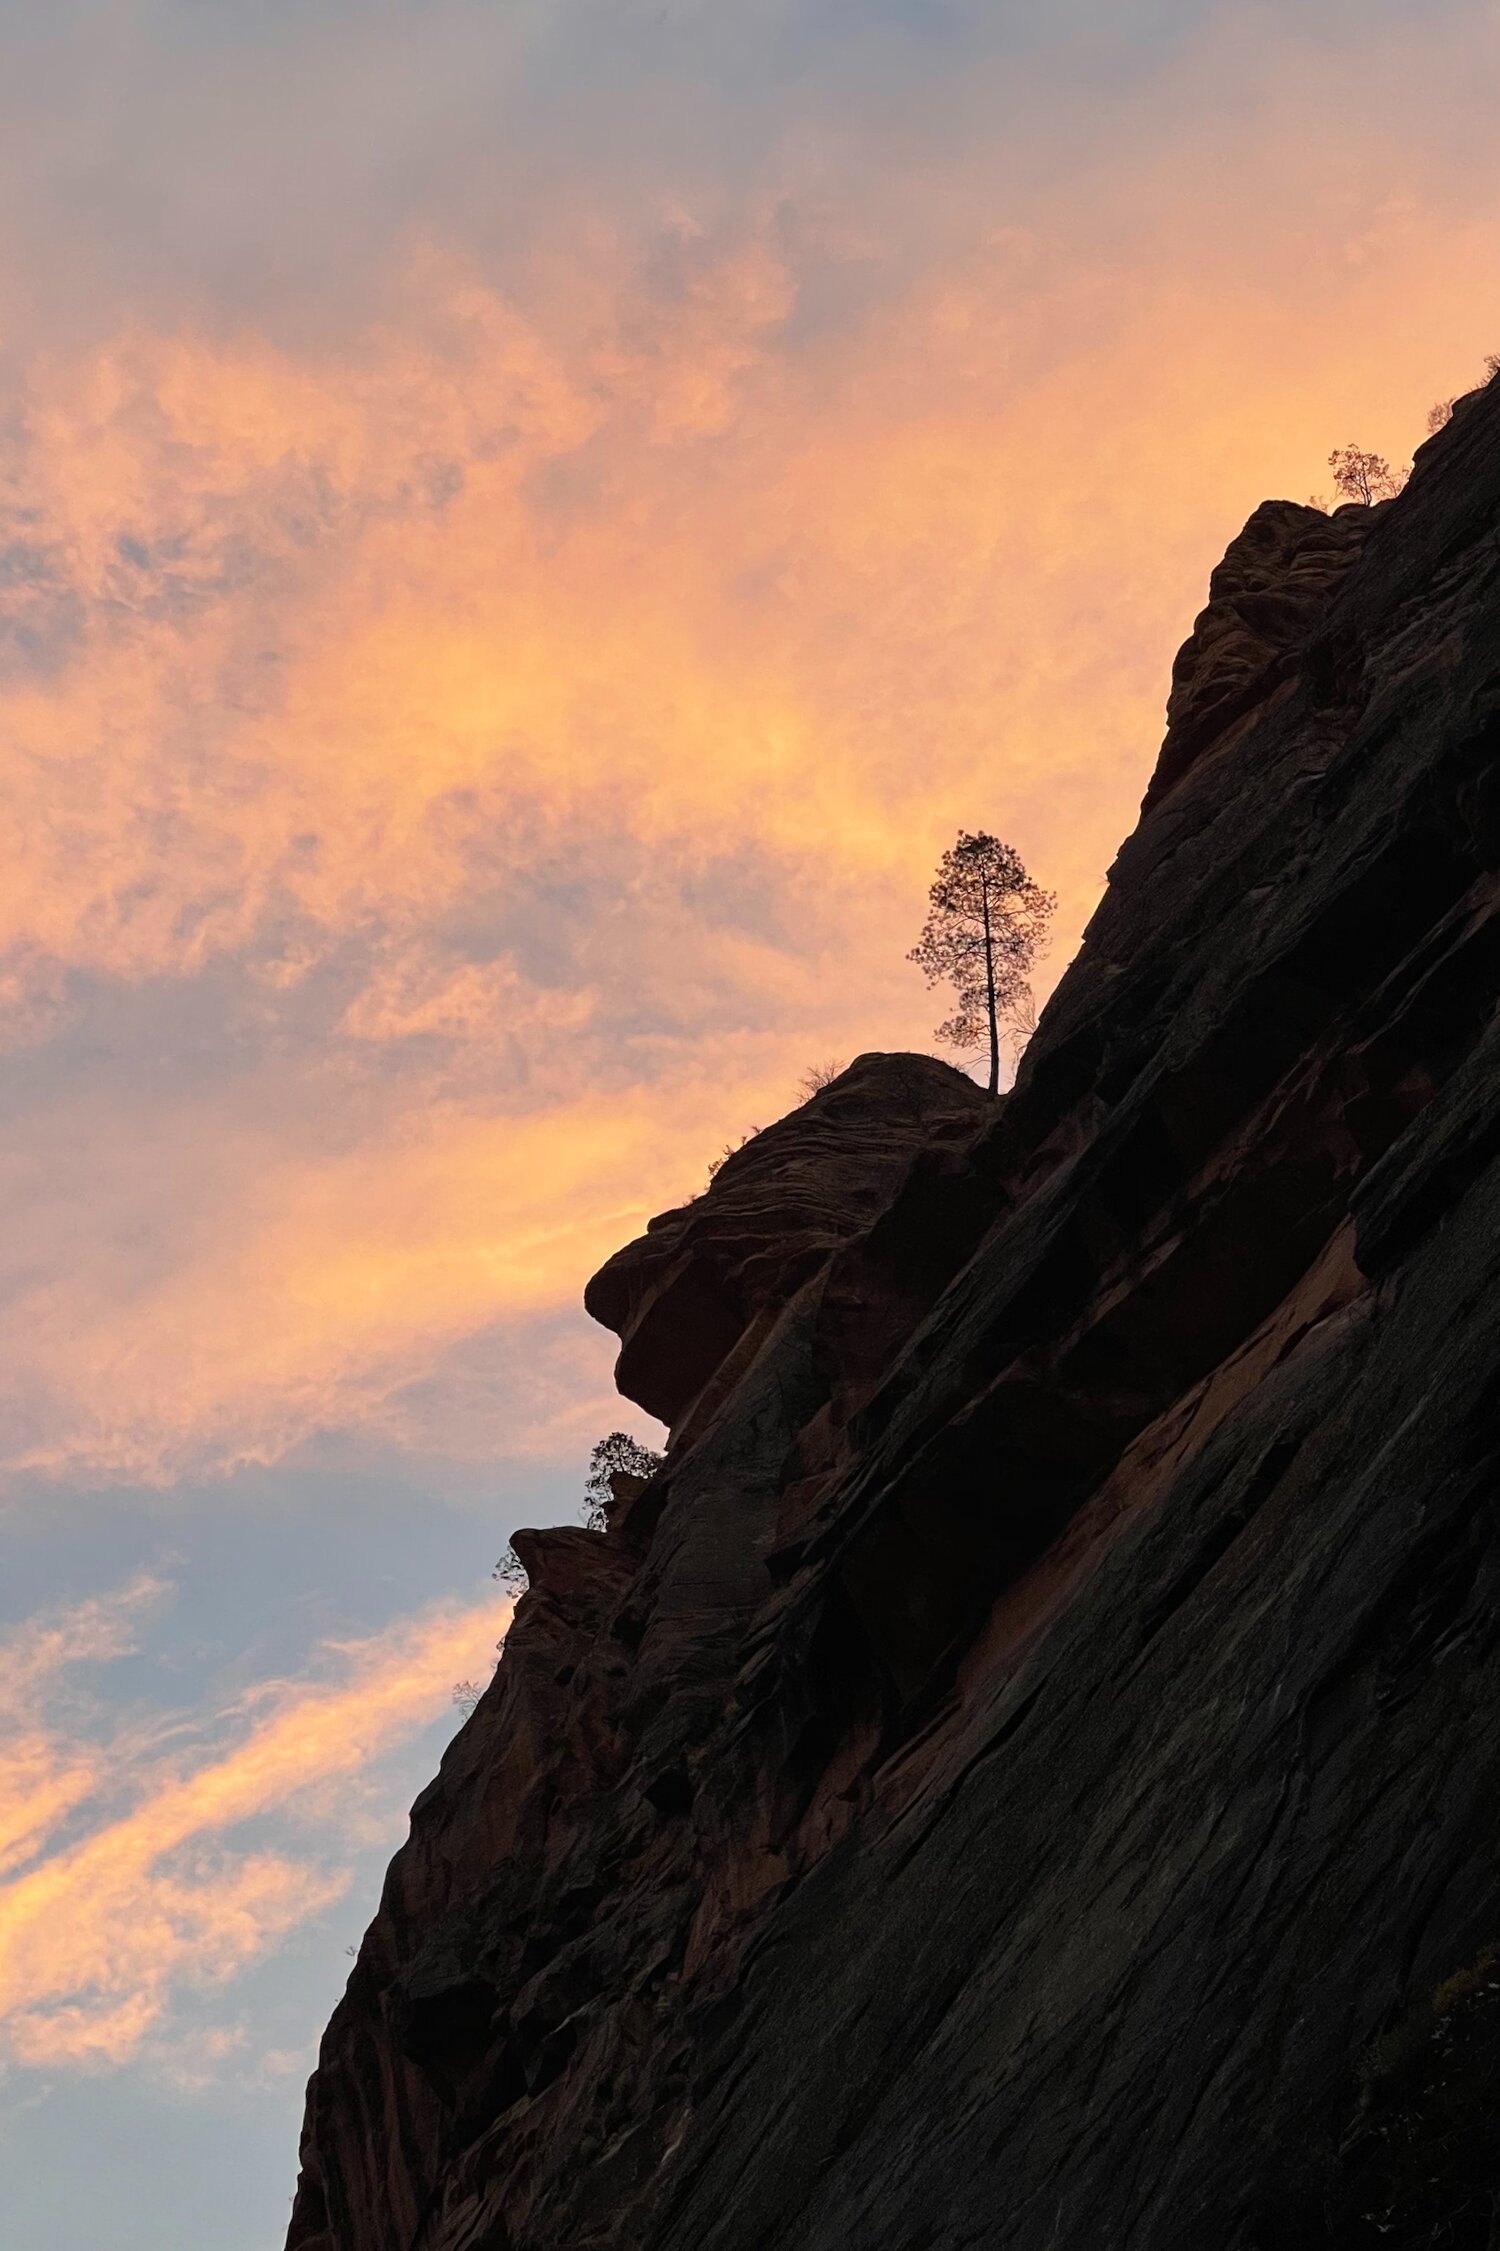
After getting started on the hike, the sun began rising. It was still super dark in the canyon, but I could see the golden clouds overhead, so I used the 2.5x (65 mm) telephoto lens to punch in on a tree against the warm clouds.
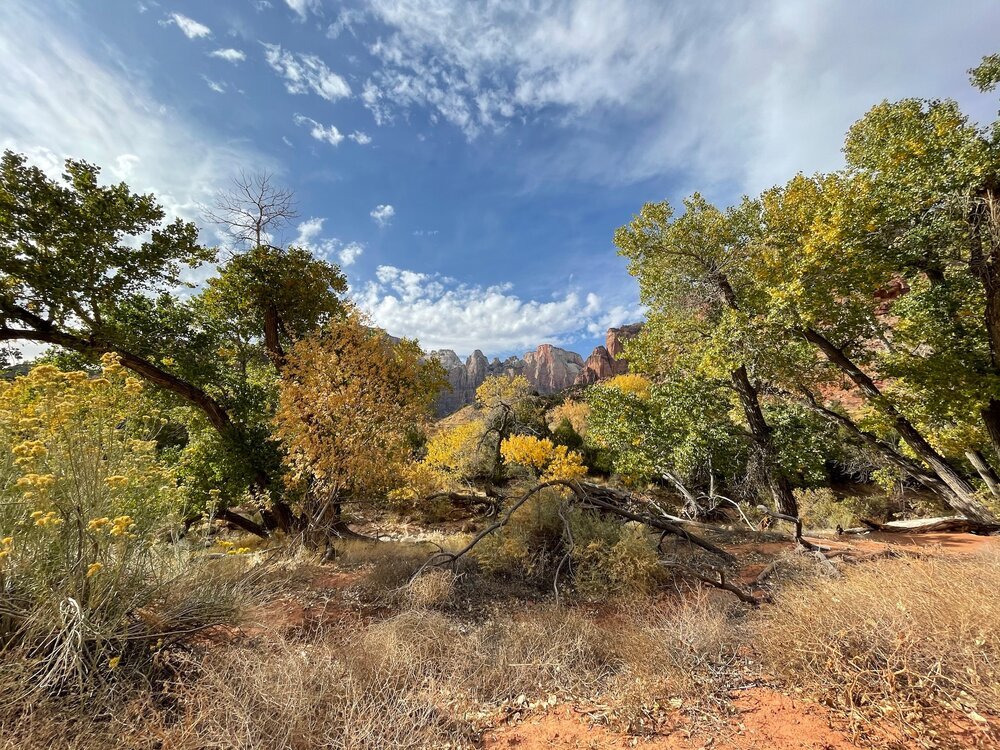
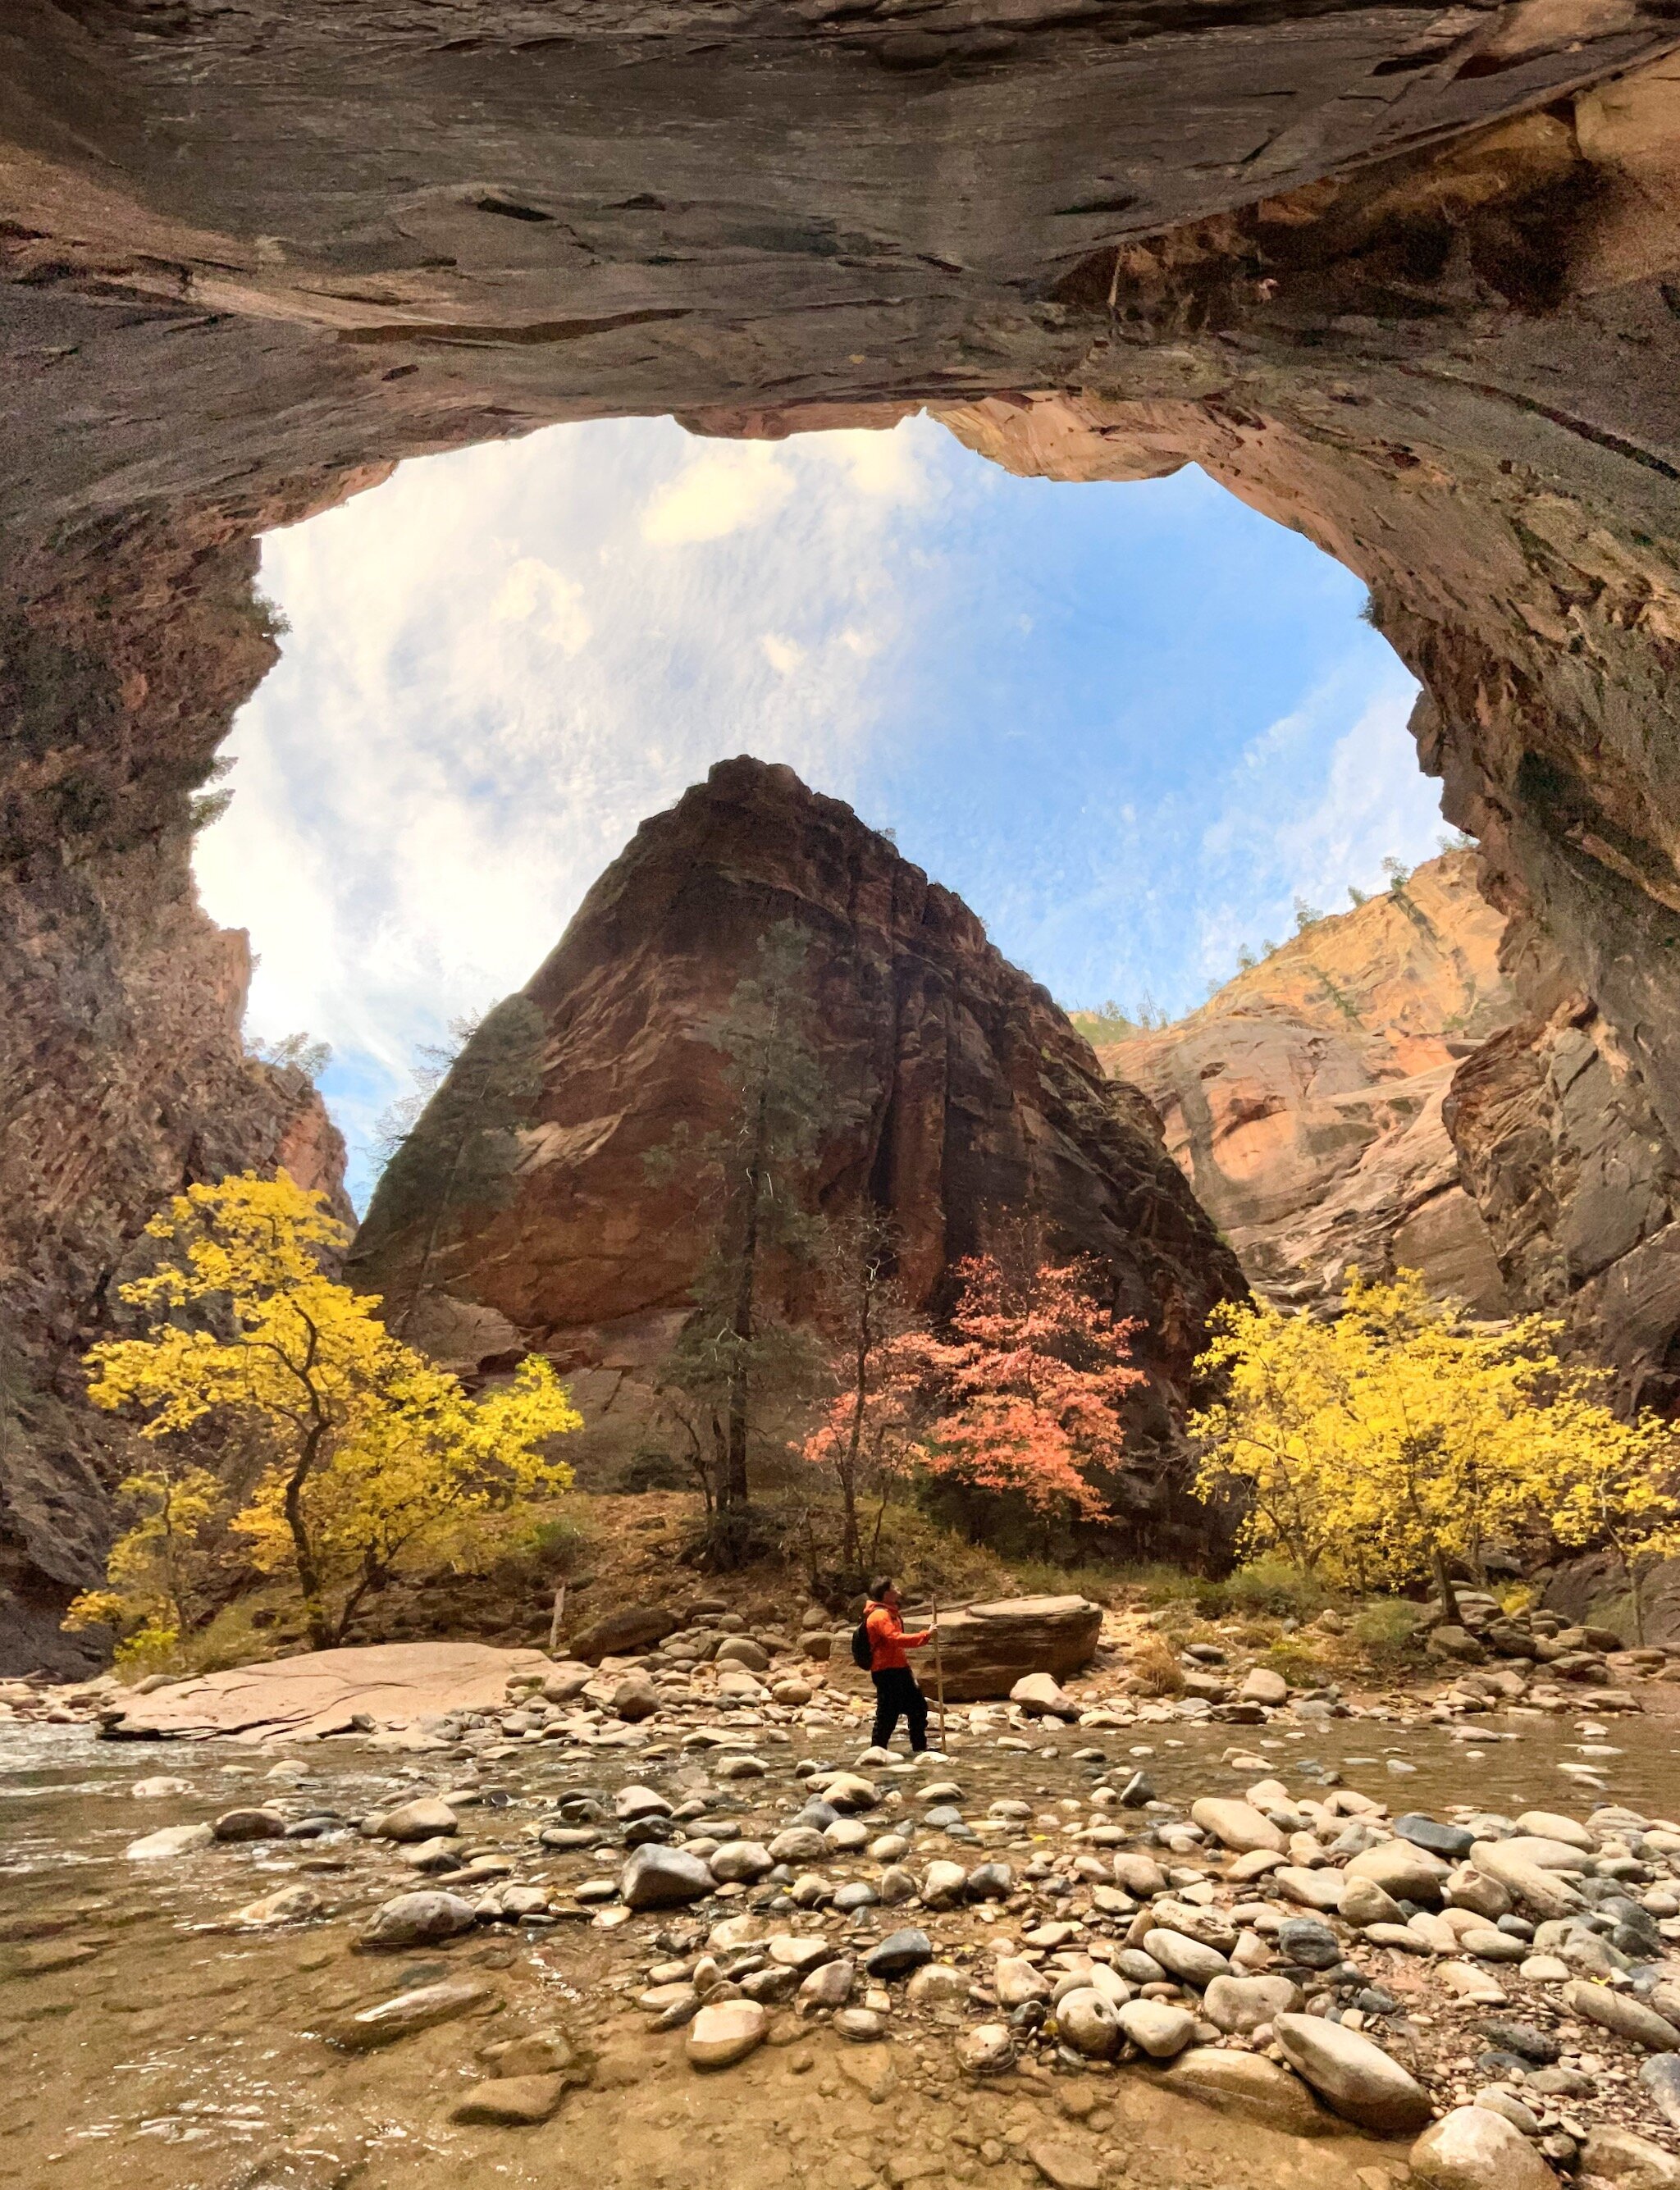
Shortly after the gentle glow of the sunrise, the sun can get very harsh overhead, creating extremely diverse lighting — from the super bright skies overhead to the shadows deep in the canyon and everything in between. This is where Smart HDR 3 can really shine. (Notice the blue sky in the distance and the detail in the dark rock on the right.)

Hiking upriver presents challenges and photographic opportunities for your camera. Many photographers love dragging the shutter to capture the motion of water in their landscapes. I used the iPhone’s Live photo Long Exposure effect to capture the river in motion (handheld).

Of course, shooting in a river for hours, you’re bound to get your gear wet one way or another. The IP68 water resistance is great assurance that your camera is going to survive.
Note: It does not float, and shooting underwater is not advised!
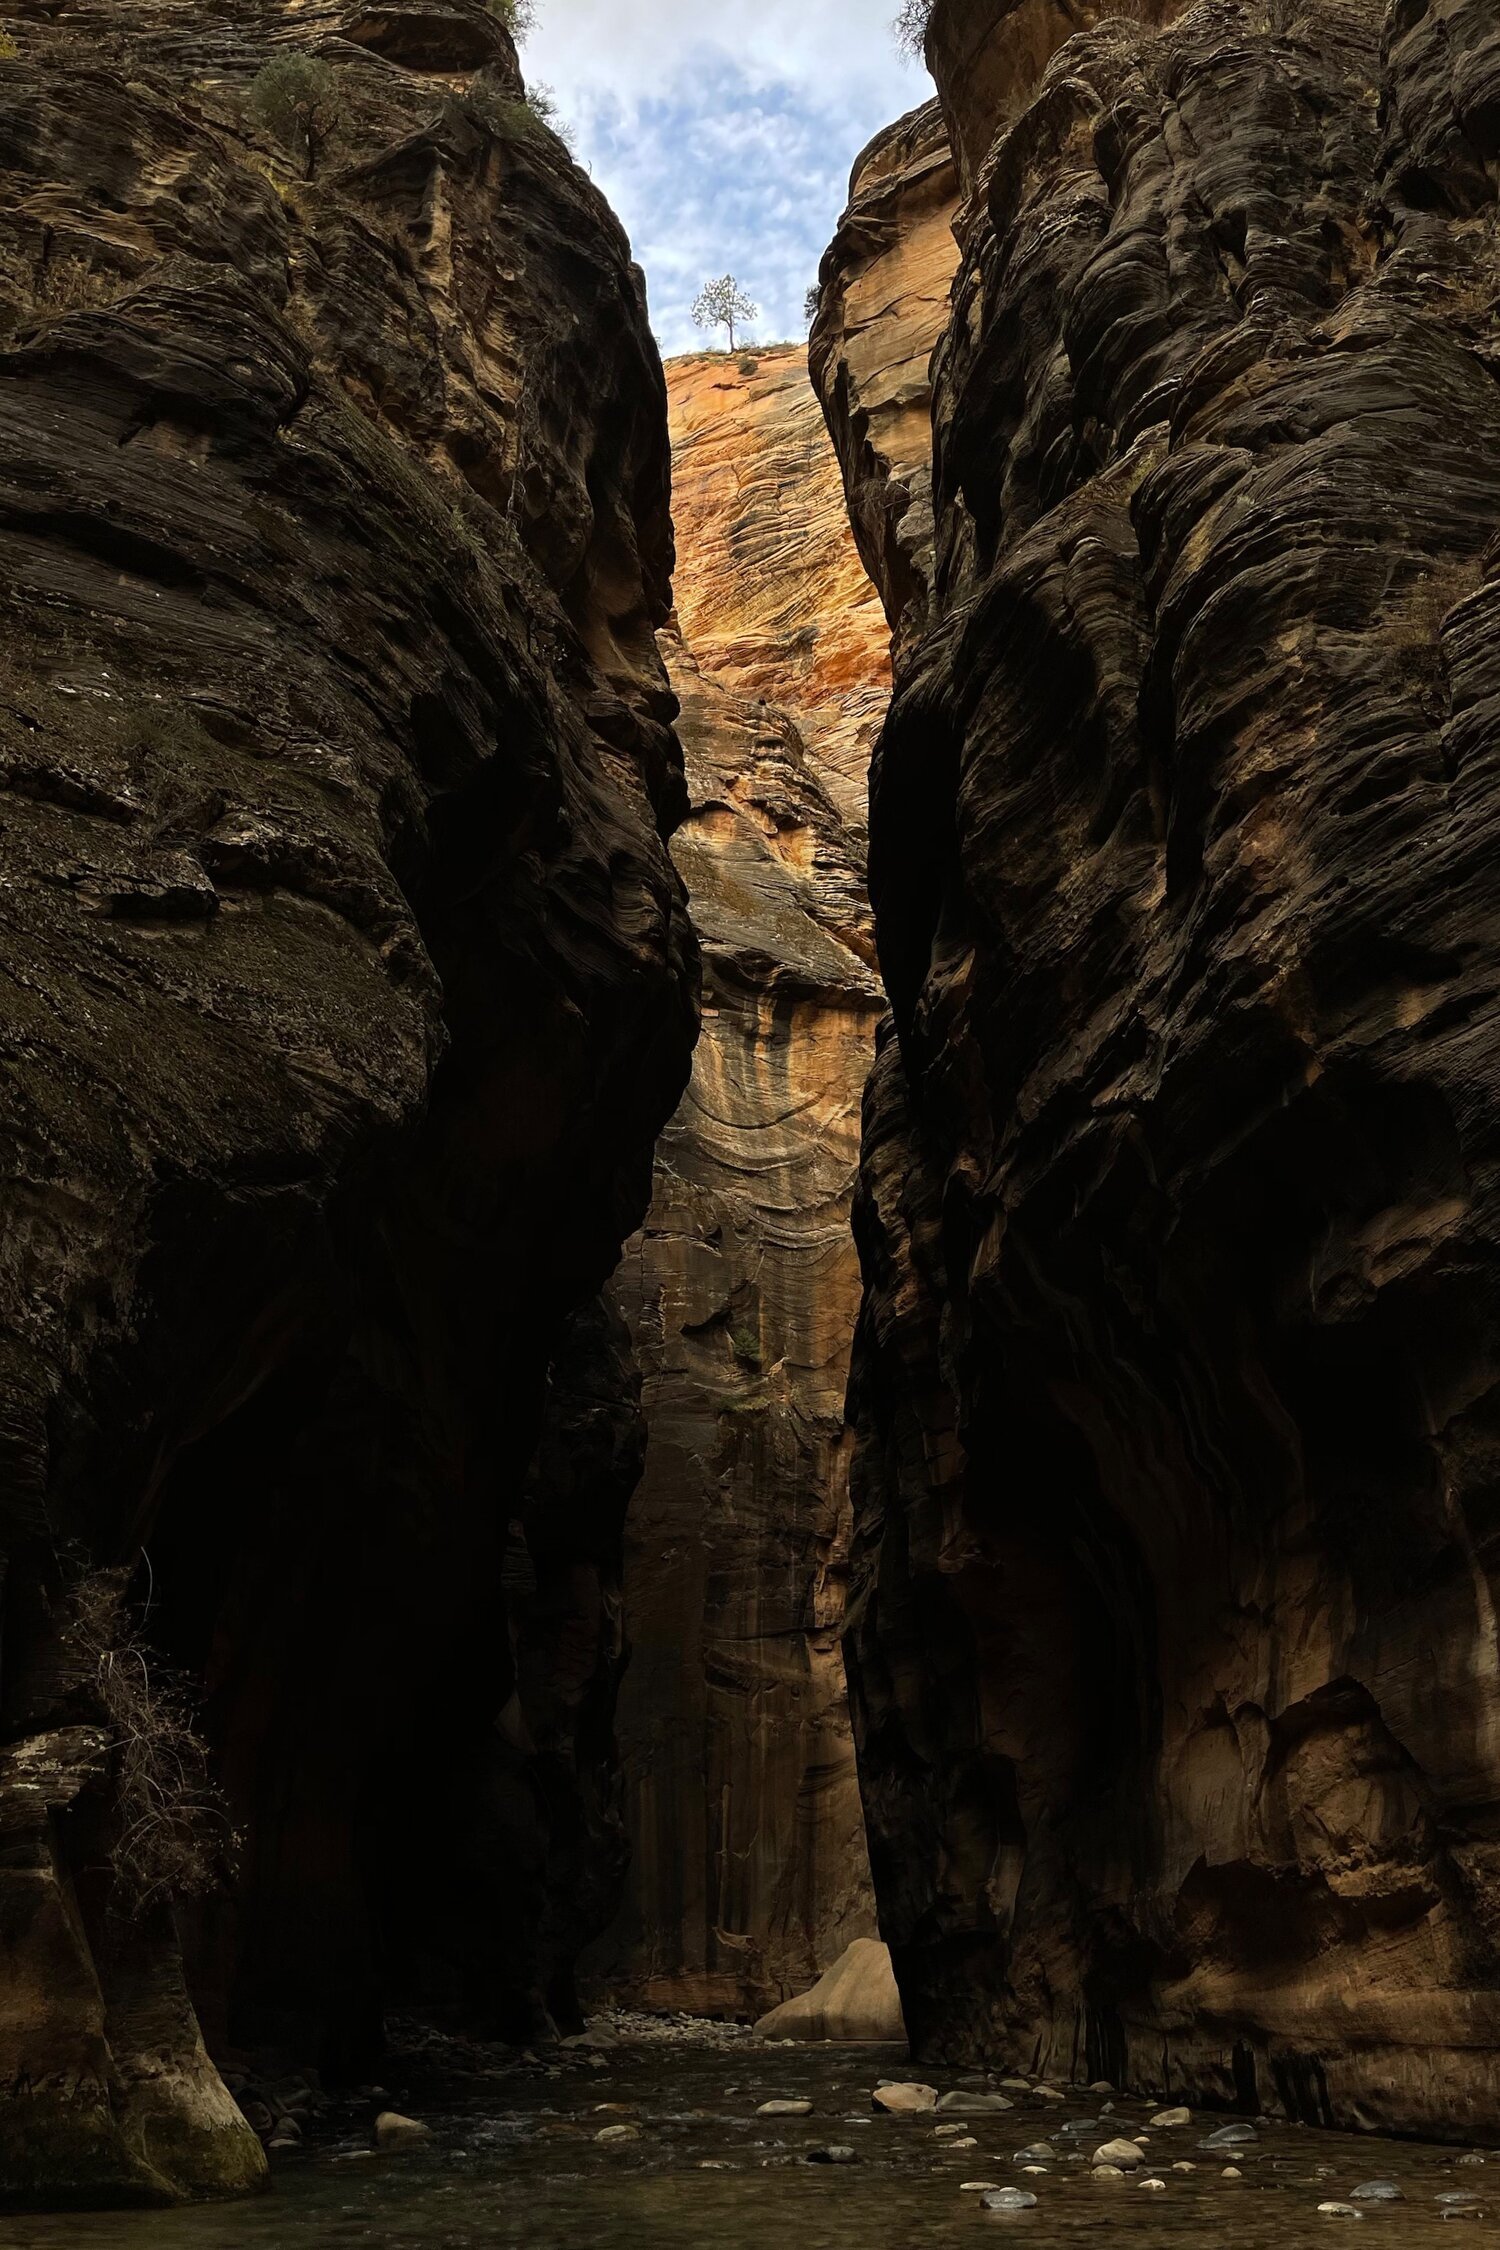
The canyon is over 1000 feet tall at places, yet very narrow. I think it is safe to say this is an extreme vertical and super hard to capture, so I used the Ultra Wide lens in Pano mode to shoot a vertical panorama, allowing me to capture this scene in a perspective I simply couldn’t on other platforms.
In other areas, I just shot vertical images on the Ultra Wide camera to capture the overcast light pouring into the canyon more traditionally.
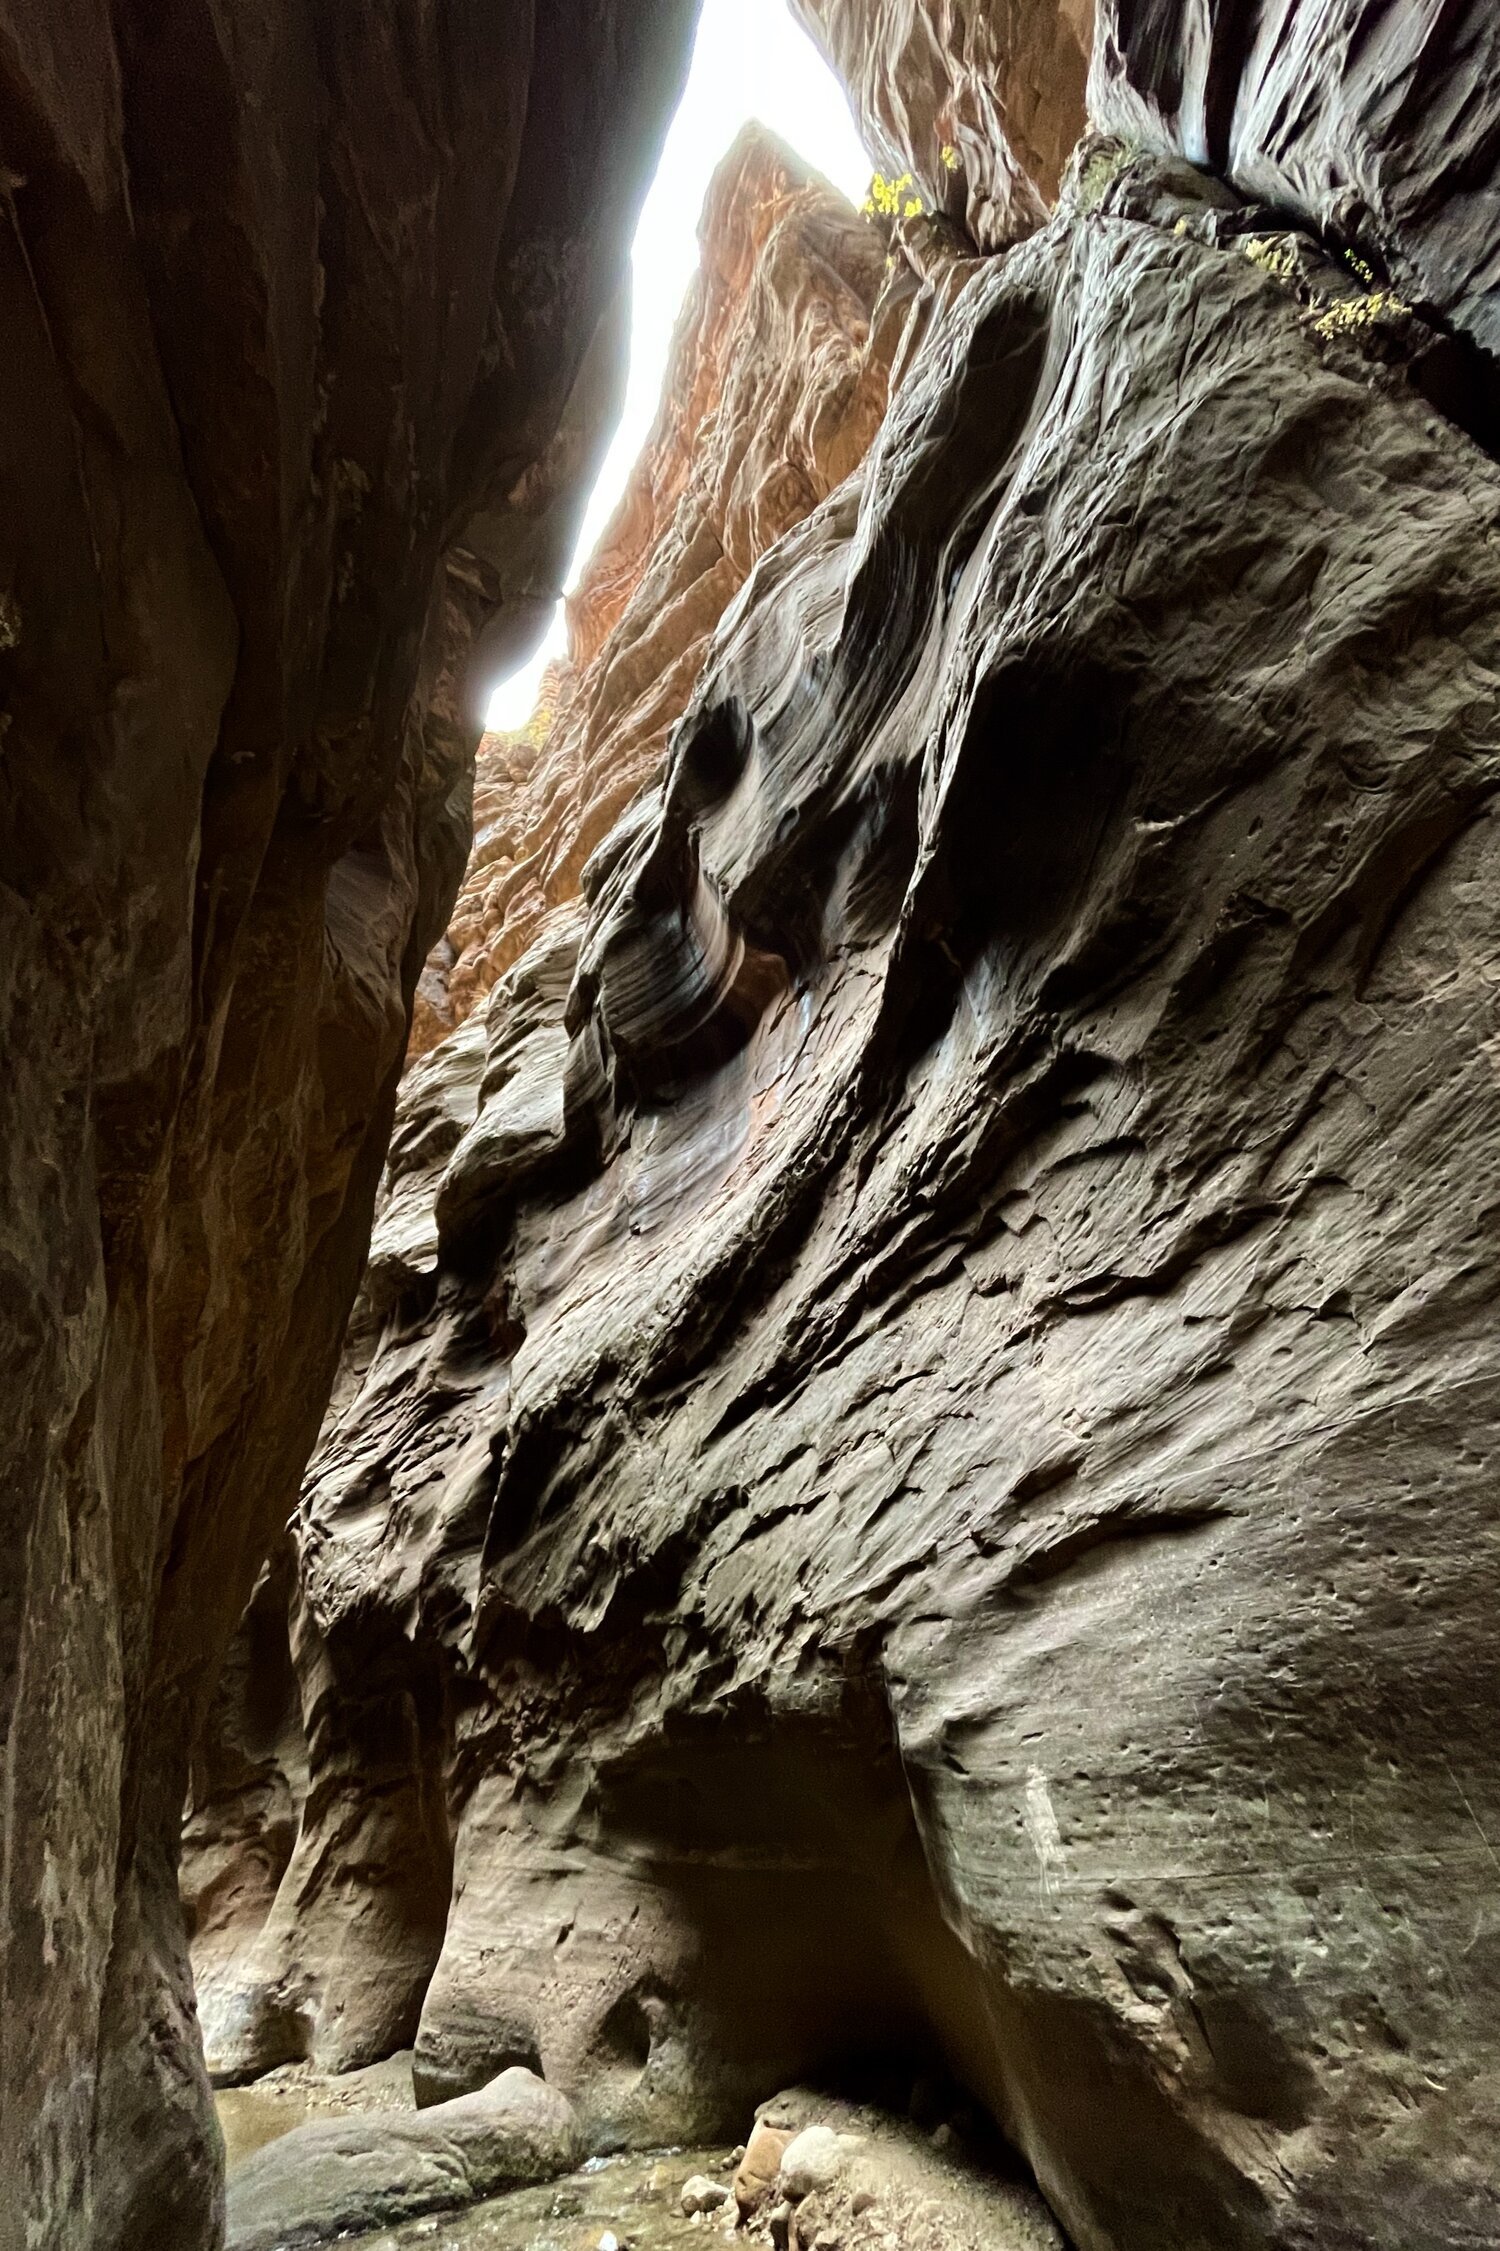
There’s also a great amount of detail in the walls, and in some spots a lot of depth in the canyon. I used the 2.5x Telephoto to compress this depth and pull out a lot of texture in the image below.

Hiking upriver for hours, I really appreciated the lightweight and agile nature of the iPhone instead of lugging a bigger camera with me. The agility meant it was also easy to quickly capture unique perspectives, like this one just above the water’s surface.
Beyond the still visuals, at times I found myself drawn to motion and audio elements of the canyon scene, so I shot a few videos like this one (sound on).
And this one (sound on).
All in all, this was one of the most unique and beautiful hikes I’ve ever been on. You really should go experience the splendor for yourself — but for now, the iPhone 12 Pro Max served as an excellent camera to capture and share this adventure with you.
a few wishes
1) Night mode on 2.5x telephoto.
I’m so glad to get Night mode on the Ultra Wide lens this year, and I would also be thrilled to have it on the new 2.5x telephoto lens. I shot with it a TON in decently lit conditions, but learned to avoid using the telephoto in low-light conditions.
2) More EXIF data!
I really wish we had better EXIF data — especially when experimenting with Night mode. My creative process involves shooting a bunch with my cameras, dumping the images, and then reflecting on the settings of what worked really well and what didn’t. This helps me find my camera’s limitations and helps me replicate similar shots and effects (which is important if a client asks for a shot similar to something I’ve created in the past). What were my exposure preferences? How long was my Night mode exposure? Where was my focus point? These are the type of questions I’m asking when reviewing on my MacBook Pro.
3) Hold on-screen shutter button for Burst.
I’m really glad we got Burst mode back with the Volume Up button, but I also wish I could Burst using the on-screen shutter button without sliding. I have never found holding to record video to be useful and still wish I could shoot bursts this way instead.
tips for iphone photographers
shooting in low light
When shooting at night, turn on your iPhone’s Dark mode to help preserve your night vision. Go to Settings > Display & Brightness > Appearance: Dark
Use Night mode’s “Max” exposure length feature for the most detail in low-light settings. It renders significantly less grain with sharper detail than “Auto” Night mode shots (when on a tripod). To select Max in Night mode, tap the Night mode icon and drag the time slider all the way to the right.
Spend a serious amount of time experimenting with your camera to better understand how it works, even if that’s just in your basement. Next time you are somewhere beautiful, you’ll be really glad you know how your camera works.
Invest in a solid but nimble tripod like the Travel Tripod from Peak Design.
buying advice for photographers
Is the iPhone 12 Pro Max camera worth the extra size and financial investment? This is a really tough one for me — I came into testing this expecting the 12 Pro Max to outperform the 12 Pro across the board, but I really only found a substantial improvement in very specific scenes.
Perhaps this highlights how much the iPhone camera primarily relies on software to create excellent images — it’s those computational upgrades that have a dramatic impact on our images, as I wrote about in my iPhone 12 Pro review.
I did really enjoy using the extra focal length of the Telephoto and pushing the Max in low light, but it feels massive in my hand and it’s hard to operate as a single-handed camera, so I’m still debating which iPhone is right for me.
In my brainstorm of which iPhone to choose for myself and which one to recommend to photographers like you, I created a mind map/decision tree. I didn’t intend to share it, but as I write this, I realize it may be helpful to you.
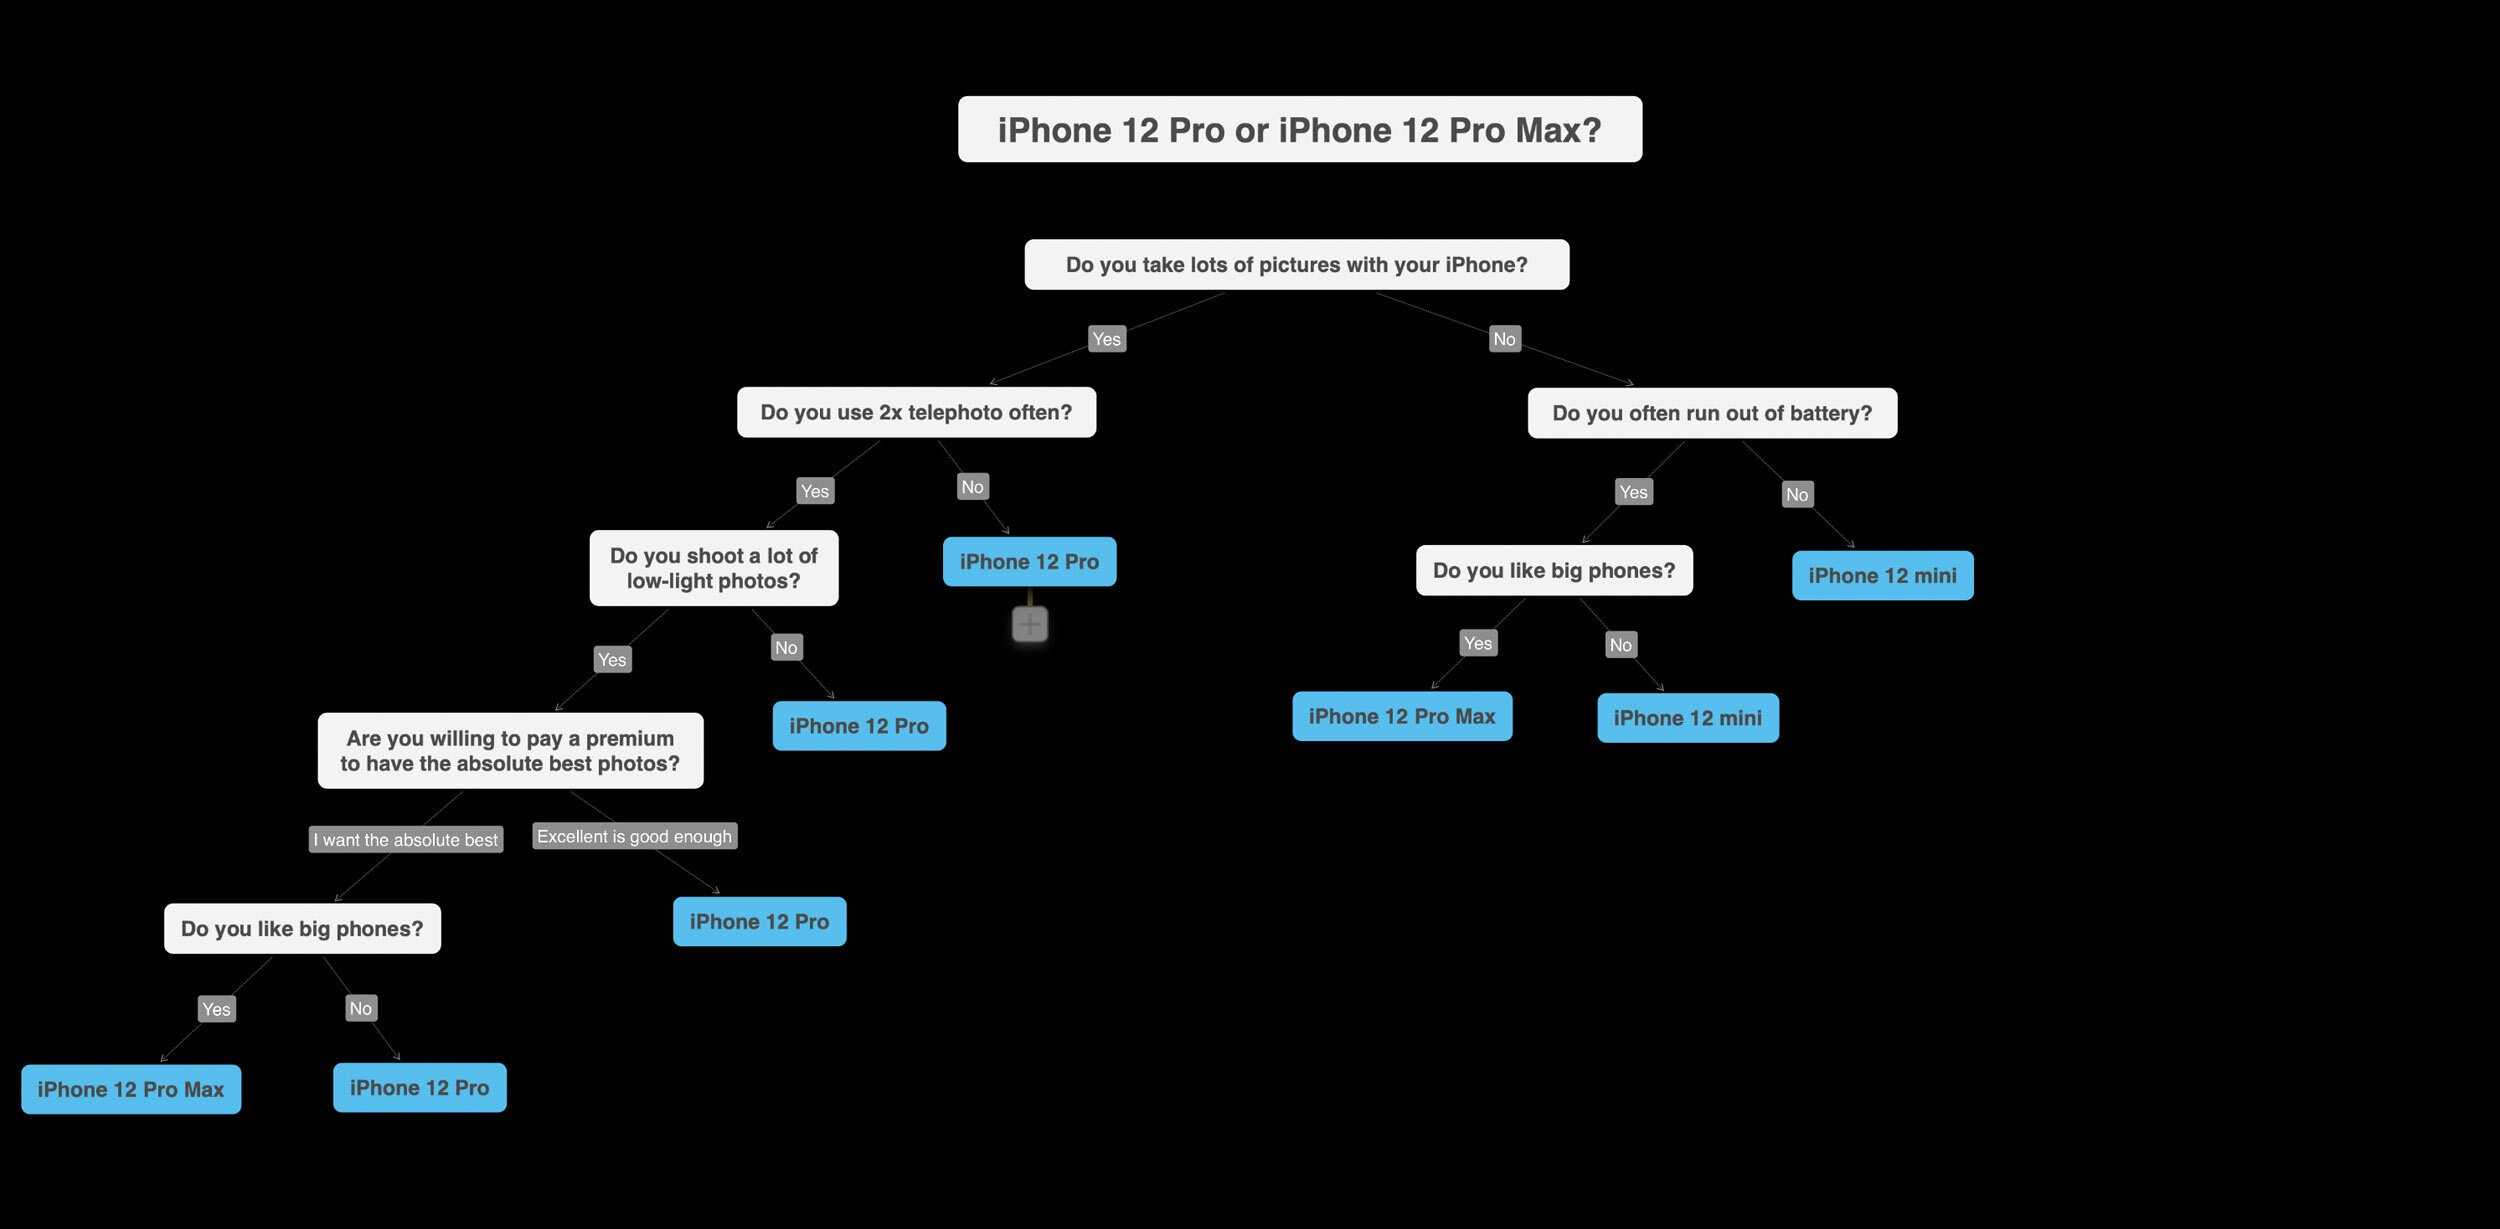
For me, I slide down the left side of that decision tree until I get to the last question. Am I OK with a big phone? I don’t know yet.
What I do know is both the iPhone 12 Pro and 12 Pro Max are a massive jump in imaging capability compared to previous years, so regardless of your decision between this year’s models, I know you’re going to thoroughly enjoy shooting with this new iPhone camera.
coming soon…
As the iPhone camera has become more and more powerful over the years, I’ve found these images have grown increasingly beautiful in print. Many of you have asked about collecting my work in print for your walls and I’m excited to share we’re now curating a selection of Shot on iPhone panoramic artworks and will be making them available in partnership with my print lab, ProDPI.
If you’d like to be the first to know when my next collection is released, join my collector’s list:
Ask Me Anything on Instagram Stories
I’ll be doing an AMA on Instagram Stories shortly and will be happy to answer any questions you might have about iPhone 12 Pro Max, travel, or anything else. Join me there for more insight or to ask a question of your own.


Special Thanks


Thanks to Airstream, ProDPI, and Halide for supporting this review.
Thanks to Taylor McKay for the beautiful video
and to Ker & Downey for travel advice.
Essential Tools & Apps
Halide Camera
Hands down the best third-party camera app for iPhone. Simple interface, yet powerful features. Still my go-to app when I need fine-tuned manual camera control.
ProDPI
The best way to print your iPhone photos.
Studio Neat Glif iPhone Tripod Mount
I love the quick-release and vertical mount options.
(Use coupon code “austin” to get 10% off a Glif.)
UltraPod II Mini-Tripod
Lightweight yet durable plastic, and the velcro strap is very useful.
Peak Design Travel Tripod
A great full-size but compact tripod with a built-in iPhone mount.
Peak Design Travel Backpack
I’ve taken this bag to 30+ countries and love it.
have a question/comment?
More questions about the iPhone 12 Pro Max? I’d love to hear your thoughts and I’ll be replying to every comment below.