ProRaw is here!
Today Apple officially released their new image format for creative professionals, Apple ProRAW. It marks a monumental leap forward in digital imaging on iPhone and I can’t wait to share a bit more about it.
I’ll cover why ProRAW matters, how to shoot ProRAW, and some of the best tools and apps for your iPhone ProRAW workflow.
If you follow my work, you know I’m a travel photographer and I’m usually testing my camera gear in extreme environments, so I designed a few tests for ProRAW in this same vein and that’s where I saw this image format really shine.
This is an exciting day for the creative pro community!
Big thanks to Halide for supporting this post — don’t miss there deep dive into ProRAW here.
Enjoy.
My conversation with Rene Ritchie about ProRAW.
What ProRAW Is and Why It Matters
Pro photographers traditionally choose to shoot in RAW because it offers more control. Where there is more data (more color, more range, more everything), there is more latitude to push an image to achieve a vision, and now with ProRAW we have this luxury built right into the native iPhone camera app.
Honestly, I never thought we’d see a RAW format from Apple on iPhone, because I understood how important the computational aspects of iPhone photography are and I didn’t imagine a world where we could utilize that computational power AND still get the control we’ve wanted and needed.
Good news: the team at Apple is much smarter than me and figured out how to do both! With ProRAW, the iPhone camera only leverages the computations that are absolutely necessary for accurate imaging, but gives us complete control over preference parameters like white balance, noise reduction, sharpening, and more.
Shooting the Stars in Night Mode + ProRAW
Last night I went out to shoot the Geminid meteor shower with iPhone 12 Pro Max in ProRAW. My brother-in-law Brian and my nephew Boone joined me despite the well-below-freezing cold temps! I’ve always loved light-painting (shooting long exposures and using a flashlight to paint the scene), and now that we have Night mode + ProRAW, the iPhone is a great camera for light-painting experimentation.
Here’s an image we created together — it’s a 30-second Night mode exposure, shot on iPhone 12 Pro Max in ProRAW. Boone used his flashlight to paint light on the rock during the long exposure.
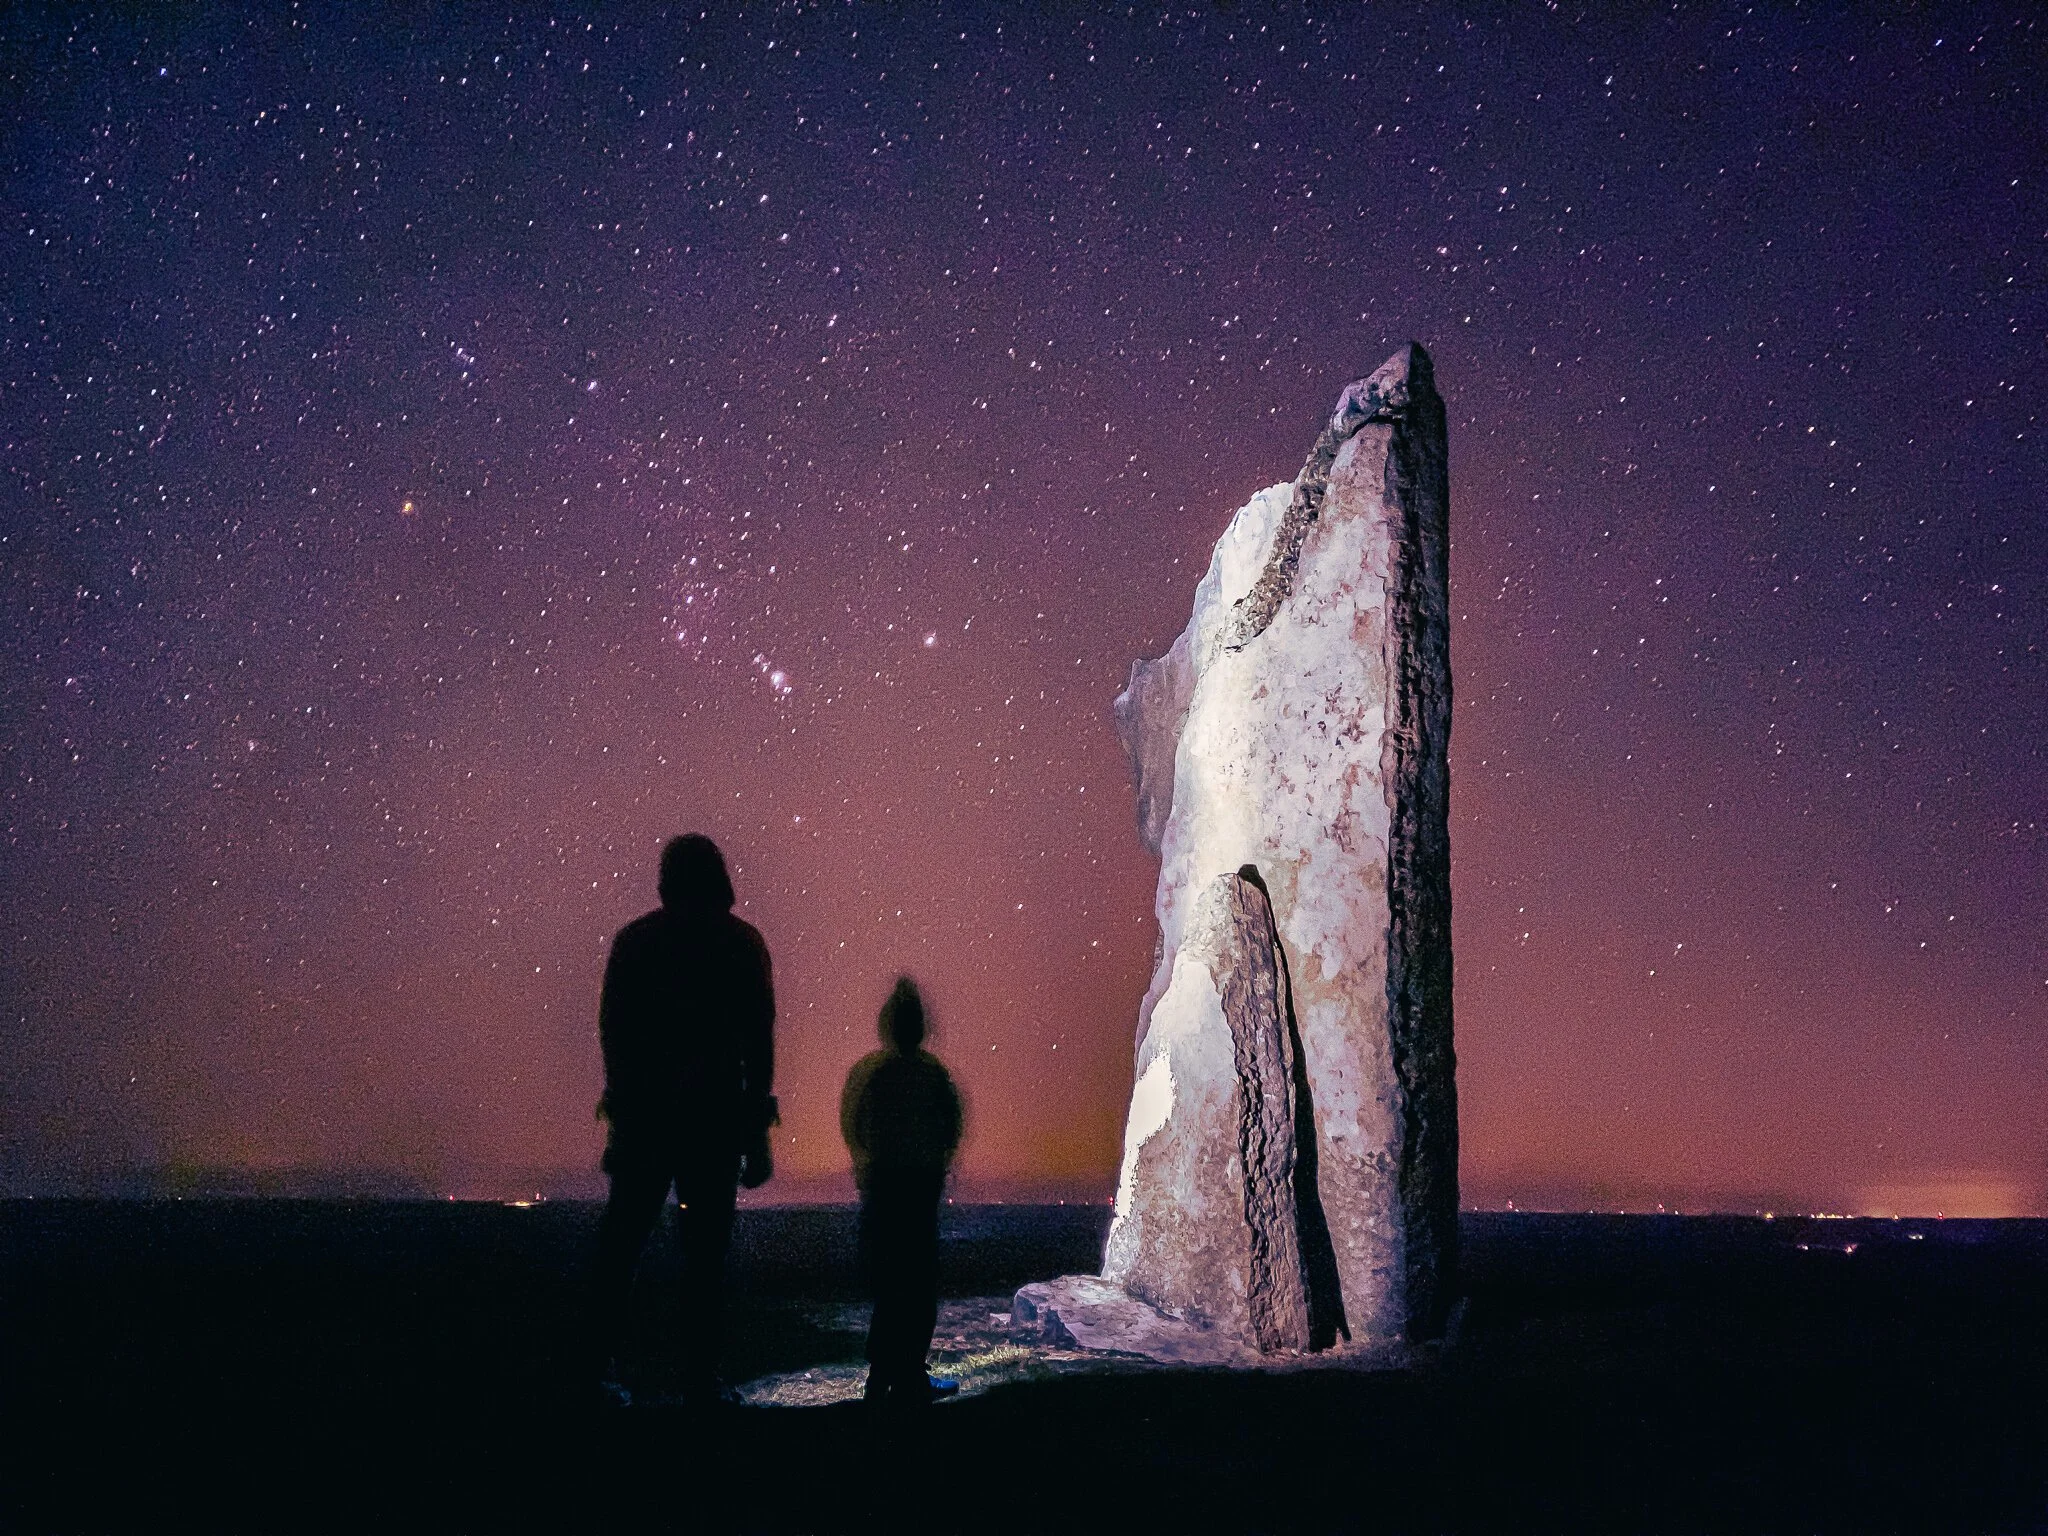
Shot on iPhone 12 Pro Max w/ ProRAW (Edited in Adobe Lightroom on iOS)
Take a look at the comparison here — both of the images below have been processed in Lightroom. Take note of the dramatic difference in detail in the rock and the sky. (You can see far more stars in the ProRAW image because they haven’t been erased by noise reduction algorithms.)
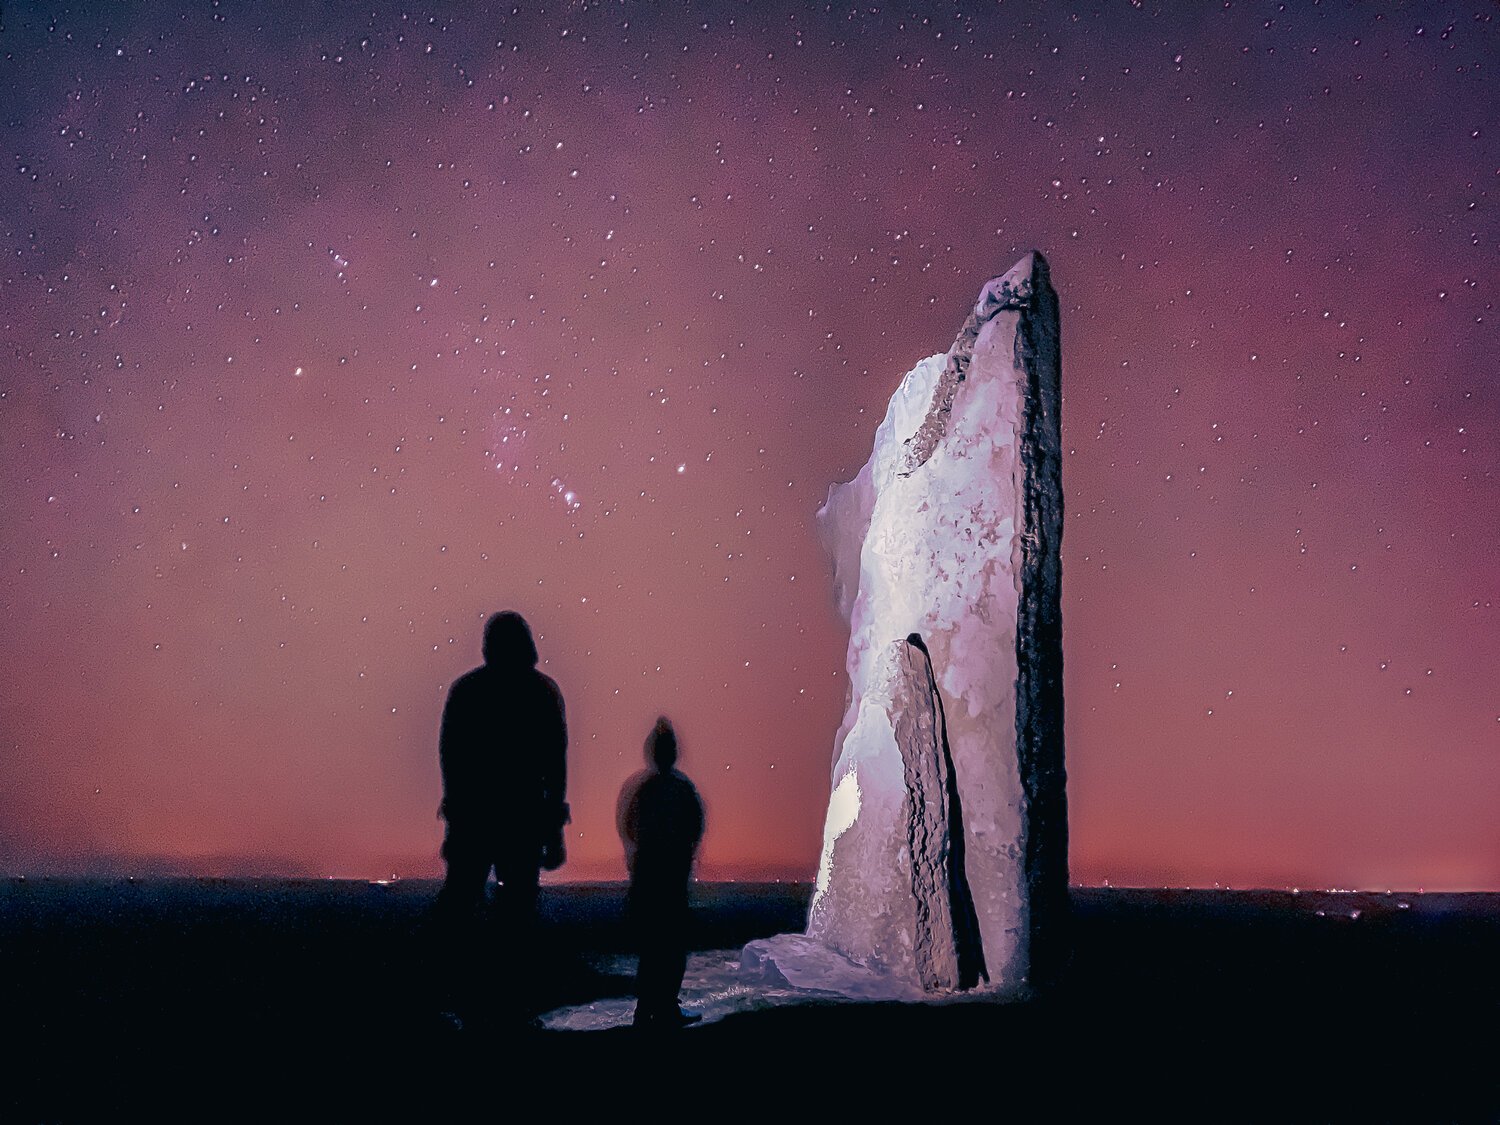
Edited HEIC (Standard) File

Edited Apple ProRAW File
Here’s another example below. I’ve edited both of these files using Adobe Lightroom, but when I open the HEIC file, there’s substantial noise reduction applied to the sky. This makes it difficult to recover the detail I saw that night. On the right, the ProRAW file, I was able to process the image and maintain the clarity of the Milky Way without dramatic noise or artifacts.
Remember, these images are shot on the exact same device (iPhone 12 Pro Max) with the exact same settings. The only change is I shot the right image in the new ProRAW format.

Edited HEIC (Standard) File
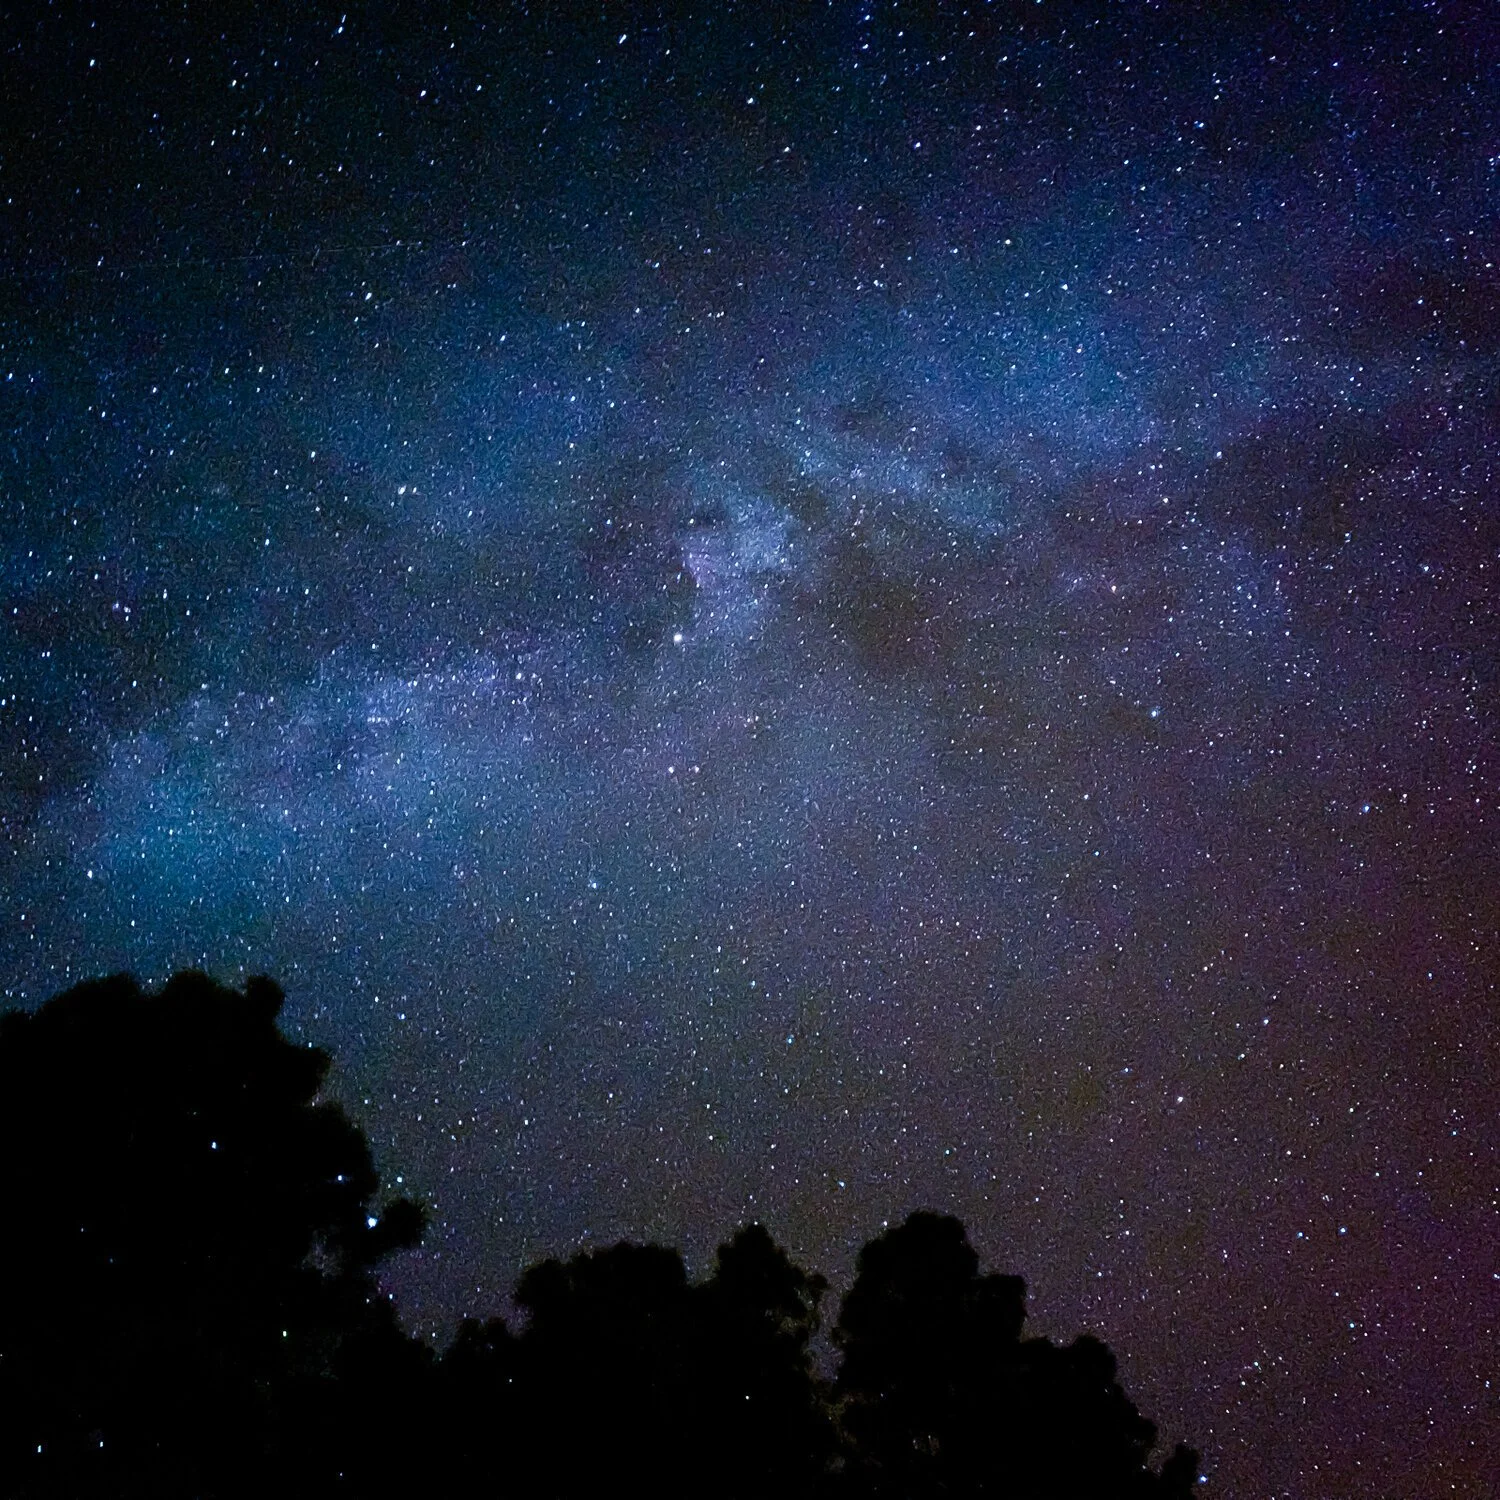
Edited Apple ProRAW File
Using ProRAW to Capture Tricky Lighting
Apple boasts 14 stops of dynamic range using the ProRAW format (which rivals today’s best pro camera sensors). This kind of range is super helpful for scenes with bright sunlight and shadows. It helps to maintain detail instead of blown out highlights and crushed shadows.
In the screen recording below, I go into further detail and demonstrate the advantages of the more fine-tuned control we get in ProRAW.
Click the image to see full size, and use your arrow keys to scroll through the image comparisons.


Thousands of Colors
What does 12-bit mean? Well, HEIC is limited to 8-bit color, which gives us 256 different shades of red, green, and blue. 12-bit expands this range to 4,096 shades of red, green, and blue, which basically means ProRAW can render far more nuanced shades of each color than lossy formats like JPEG or HEIC.
Take a look at the example below and pay attention particularly to the shades of pink in the deli meat, and the shades of yellow in that delicious wedge of dutch cheese.

HEIC (Edited)

ProRAW (Edited)
Viewing these images side by side on Apple’s Pro Display XDR shows a dramatic difference in color depth and I imagine this will be substantially better in print, too.
How to Shoot and Edit Apple ProRAW on iPhone
As of now, December 2020, you must be using an iPhone 12 Pro or iPhone 12 Pro Max to capture in ProRAW, and you must be running iOS 14.3 or later. Go to Settings > Camera > Formats and turn on Apple ProRAW.
After initial setup, follow these steps:
Open native Camera app
Tap “RAW” in top right corner
Shoot the image
Open Lightroom on iOS to manually import the photo from my Camera Roll (I don’t use Auto-Import). You’ll see the designation DNG in the upper right corner of the thumbnail.
Make desired edits and then share from Lightroom. (Opening Lightroom on your Mac, you’ll see this DNG file there, as well.)
Tips and Insights for Shooting in ProRAW
You’ll see the most significant impact in extreme scenarios — ones where the general algorithms can’t do all the work. Shooting scenarios like indoor mixed lighting (cool and warm), extremely low light (like shots of stars), super high dynamic range images (like shadowy foreground with sun-lit red rock in the background).
Think of ProRAW as not ready — to be shared or printed or anything. You must process this file first.
Shooting in ProRAW is not yet possible in Portrait or Pano mode.
There’s actually a regular JPEG file baked into every ProRAW file. For instance, if you share the unedited ProRAW file in an iMessage, the regularly processed JPEG file will be shared. But if you open this same file into Photos and click Edit, you’ll see the actual RAW preview.
After you turn on ProRAW, it doesn’t stay on forever. It’ll stay on for that session, and even if you lock your iPhone and return to it within a few seconds, ProRAW is still on. But after a few minutes, ProRAW is turned off. This is probably a good thing because ProRAW isn’t essential for all iPhone pictures, but keep an eye on this if shooting in ProRAW is important to you.
Lastly, you can now double your iCloud storage to 4 TB using Apple One. (https://support.apple.com/en-us/HT211784)


This extra storage came just in time — it’ll be super helpful for the ProRAW workflow!
Apps and Tools for a ProRAW Workflow
Halide (iOS): The Halide team has been working hard to support ProRAW, and the latest version of their manual camera app already supports ProRAW. They’ve got some powerful additional features like the ability to shoot JPEG + ProRAW simultaneously, and tools like bit-depth reduction to keep RAW file sizes manageable and more. If you want maximum creative control in shooting and editing your photos on iPhone, look no further than Halide.
Lightroom (iOS + Mac): Adobe’s Lightroom is a simple and fast way to edit and organize Apple ProRAW files. The files are stored in Creative Cloud, so I can quickly access them on my Mac to further fine tune the images on my Pro Display XDR.
RAW Power (iOS + Mac): If you liked Aperture on the Mac, you’ll probably like RAW Power. It syncs with your iCloud Photo Library and gives you tons of tools to edit and organize your photos. RAW Power and Halide integrate well together.
When to Shoot ProRAW (and When Not to)
It’s important to understand ProRAW and when to use it. ProRAW is not simply a magic switch you can flip on to make your photos better. In fact, the non-ProRAW file initially looks much better than the ProRAW file, so shooting ProRAW really only makes sense if you intend to spend the time fine-tuning the image in post.
I suggest turning on ProRAW when you are shooting in extreme conditions of any kinds (extremely low light, extremely high dynamic range with super bright highlights and dark shadows, mixed light temperatures, and so on). Also, use ProRAW if you plan on enlarging the images (on screen or in print).
And try flipping on ProRAW any time you are shooting and something just doesn’t look quite right. For example, although Smart HDR has gotten so much better, we’ve all seen how it sometimes renders skin tones or pink clouds in kind of weird ways. Any time you see something that looks unnatural or just inaccurate, switch to ProRAW. This will reduce the computational decisions your iPhone is making and give you as much control as possible.
The Bottom Line
With 12-bit color, 14 stops of dynamic range, and dramatically more creative control, Apple ProRAW is a massive leap forward in professional imaging with iPhone. I’m now comfortable relying on my iPhone 12 Pro to capture a strong photograph in virtually any light conditions because I know I’m able to custom tailor the processing to my taste, instead of relying on computational generalizations designed for most users.
With each of these upgrades, we’re seeing the iPhone continually evolve into a device capable of delivering what the pros need in their most demanding creative workflows, and it’s exciting to consider what’s next with ProRAW at the center of photography on iPhone.
Ask Me Anything on Instagram Stories
I’ll be doing an AMA on Instagram Stories tomorrow and will be happy to answer any questions you might have about shooting ProRAW on iPhone 12 Pro. Join me there for more insight or to ask a question of your own.
