MacBook Pro m1 max for photographers

100 image stack, composited in Starry Landscape Stacker on MacBook Pro M1 Max.
macbook pro m1 max for photographers
Hello from Flagstaff, Arizona!
I’m here scouting an upcoming commercial shoot, cycling in the forest, and spending time with my wife and her mom who lives out here. I’m also testing the new MacBook Pro M1 Max w/ 64GB RAM and 8TB SSD! This thing is nuts and I love it.
Before I jump into it, I’ve been asked this question several times:
“is the upgrade just for pros,
or is it for everyone?”
My resounding answer is that the upgrade in the M1 MacBook Pros will substantially affect absolutely everyone. The battery life is not just slightly better, it’s on a radically different planet. This machine stays cool and handles whatever you can throw at it, whether that’s making a family photo album in Photos or rendering an animation in After Effects.
This machine is just plain fun to use, and enjoying the process of creating work on your Mac fundamentally affects how you express yourself as an artist. So, yeah, it’s a solid upgrade for everyone.
Let’s jump in.
hello (again)
Any time a bold design decision is made, especially by Apple, I always try to get into it as I trust they’ve been deeply thoughtful about how they’ve shaped a product.
Over the years, I’ve learned that oftentimes these decisions pan out (like excluding the floppy disk on the original iMac or eliminating physical keys altogether on the iPhone).
That said, when I first learned the 2016 MBP w/ Touch Bar had no ports except USB-C, I thought to myself, “OK, hmmmm… Sounds a little audacious, but could this be great?”
Turns out, it wasn’t great, and some of the assumptions the 2016 MBP was built on just never panned out. I’m really glad the team at Apple has listened intently to the creative community and been willing to backtrack a bit on the physical interfaces of the machine—while also rocketing into the future with Apple’s new silicon.
hello (again), magsafe!
I’m glad to have a new and improved MagSafe on the MacBook Pro M1 Max. I always appreciated this thoughtful design and the assurance it gave me that my MacBook Pro wouldn’t be violently ripped off a table as someone tripped over my charging cable.
The extra power feels like a turbo charger. I went from 0% to 50% charge in 28 minutes, 58 seconds, while lightly using the device (writing this text in Notion and downloading some app updates for Keynote, Numbers, and more). I ran this same test on the previous generation 16" MBP w/ 96W USB-C charger, and after 30 minutes (not using it at all) my battery was at 24% (so roughly 2x faster).

New 140W MagSafe connector with braided cord, shot on iPhone 13 Pro w/ Halide Mark II Macro mode.
Some folks say ABC (Always Be Charging), but my philosophy while traveling, especially in the developing world, has always been ABCWYCBC (Always Be Charging When You Can Be Charging). The reason is, sometimes you think you’ll have access to power and you don’t. Maybe there’s a citywide blackout, or it’s cloudy and you don’t have the solar power you thought you might, or you assume there will be power on the airplane and there’s not.
With the new 140W MagSafe charger, even a few minutes of charge can be really meaningful, and that is important for someone like me with such unpredictable access to power.
And I’d forgotten how delightful it is to check charge status via the green/amber indicator light on the MagSafe charger.
hello (again), hdmi!
I rarely use HDMI, if ever, but I’ve spoken with a few friends who are glad to have this back, particularly filmmakers and speakers/presenters.

HDMI and SD card slots on MacBook Pro M1 Max, shot on iPhone 13 Pro w/ Halide Mark II Macro mode.
Filmmakers are excited for the HDMI because it means they can easily connect their MBP to a TV or projector to share a recent edit or screen a final cut.
For speakers, they carry around just about every dongle to make sure they have the right connector to interface with the house A/V system, and HDMI is probably the most ubiquitous of them all.
hello (again), sd card reader!
My wife, Esther, clapped with joy when I told her the new MacBook Pro M1 Max comes with an integrated SD card slot. As a photographer, she shoots everything to SD card and is always tracking down her reader to offload images.
As for me, I switched to CF Express when I switched my main workflow to the Sony A1. These smaller cards are much faster (R 1700 MB/s, W 1480 MB/s) which allows me to take full advantage of the A1’s ability to shoot stills at 30 fps, and of course it’s really nice when offloading media, too.
What I love about the Sony A1 is it accepts both SD and CF Express in the same slot, so I do carry some high-capacity SD cards in my bag just in case I run out of storage on CF Express. I also still use SD cards when working with the Hasselblad X1D II and the DJI Mavic Pro 2.
A handful of cameras are shooting to CF Express now, including Canon’s R5 and R3, Nikon’s Z6/Z7 and D6, and Panasonic’s S1, and I expect there to be more soon.
I’d love to see a slot that accepts both SD and CF Express in a future MBP model, but for now, I’ll still be carrying around my blazing fast ProGrade CF Express reader, and I’m perfectly fine with that.
and hello (for the first time),
full-size esc and function keys!
I really tried to get into the Touch Bar.
In my 2018 article on the 2.9 GHz MacBook Pro, I wrote: “I spent 45 hours working on this machine and I still haven’t been able to adapt. (I wish I could still feel my Escape and Function keys. I found myself accidentally pressing them multiple times a day.)”
Sadly, this never changed. Even to this day, I still have to look at the Touch Bar every time I use it, which breaks up my creative flow and eliminates any benefits it might otherwise offer.
I’m glad to have a row of physical keys back, and I’m even more excited that, for the first time ever, we now have full-size and full-height Escape and Function keys on MacBook Pro.
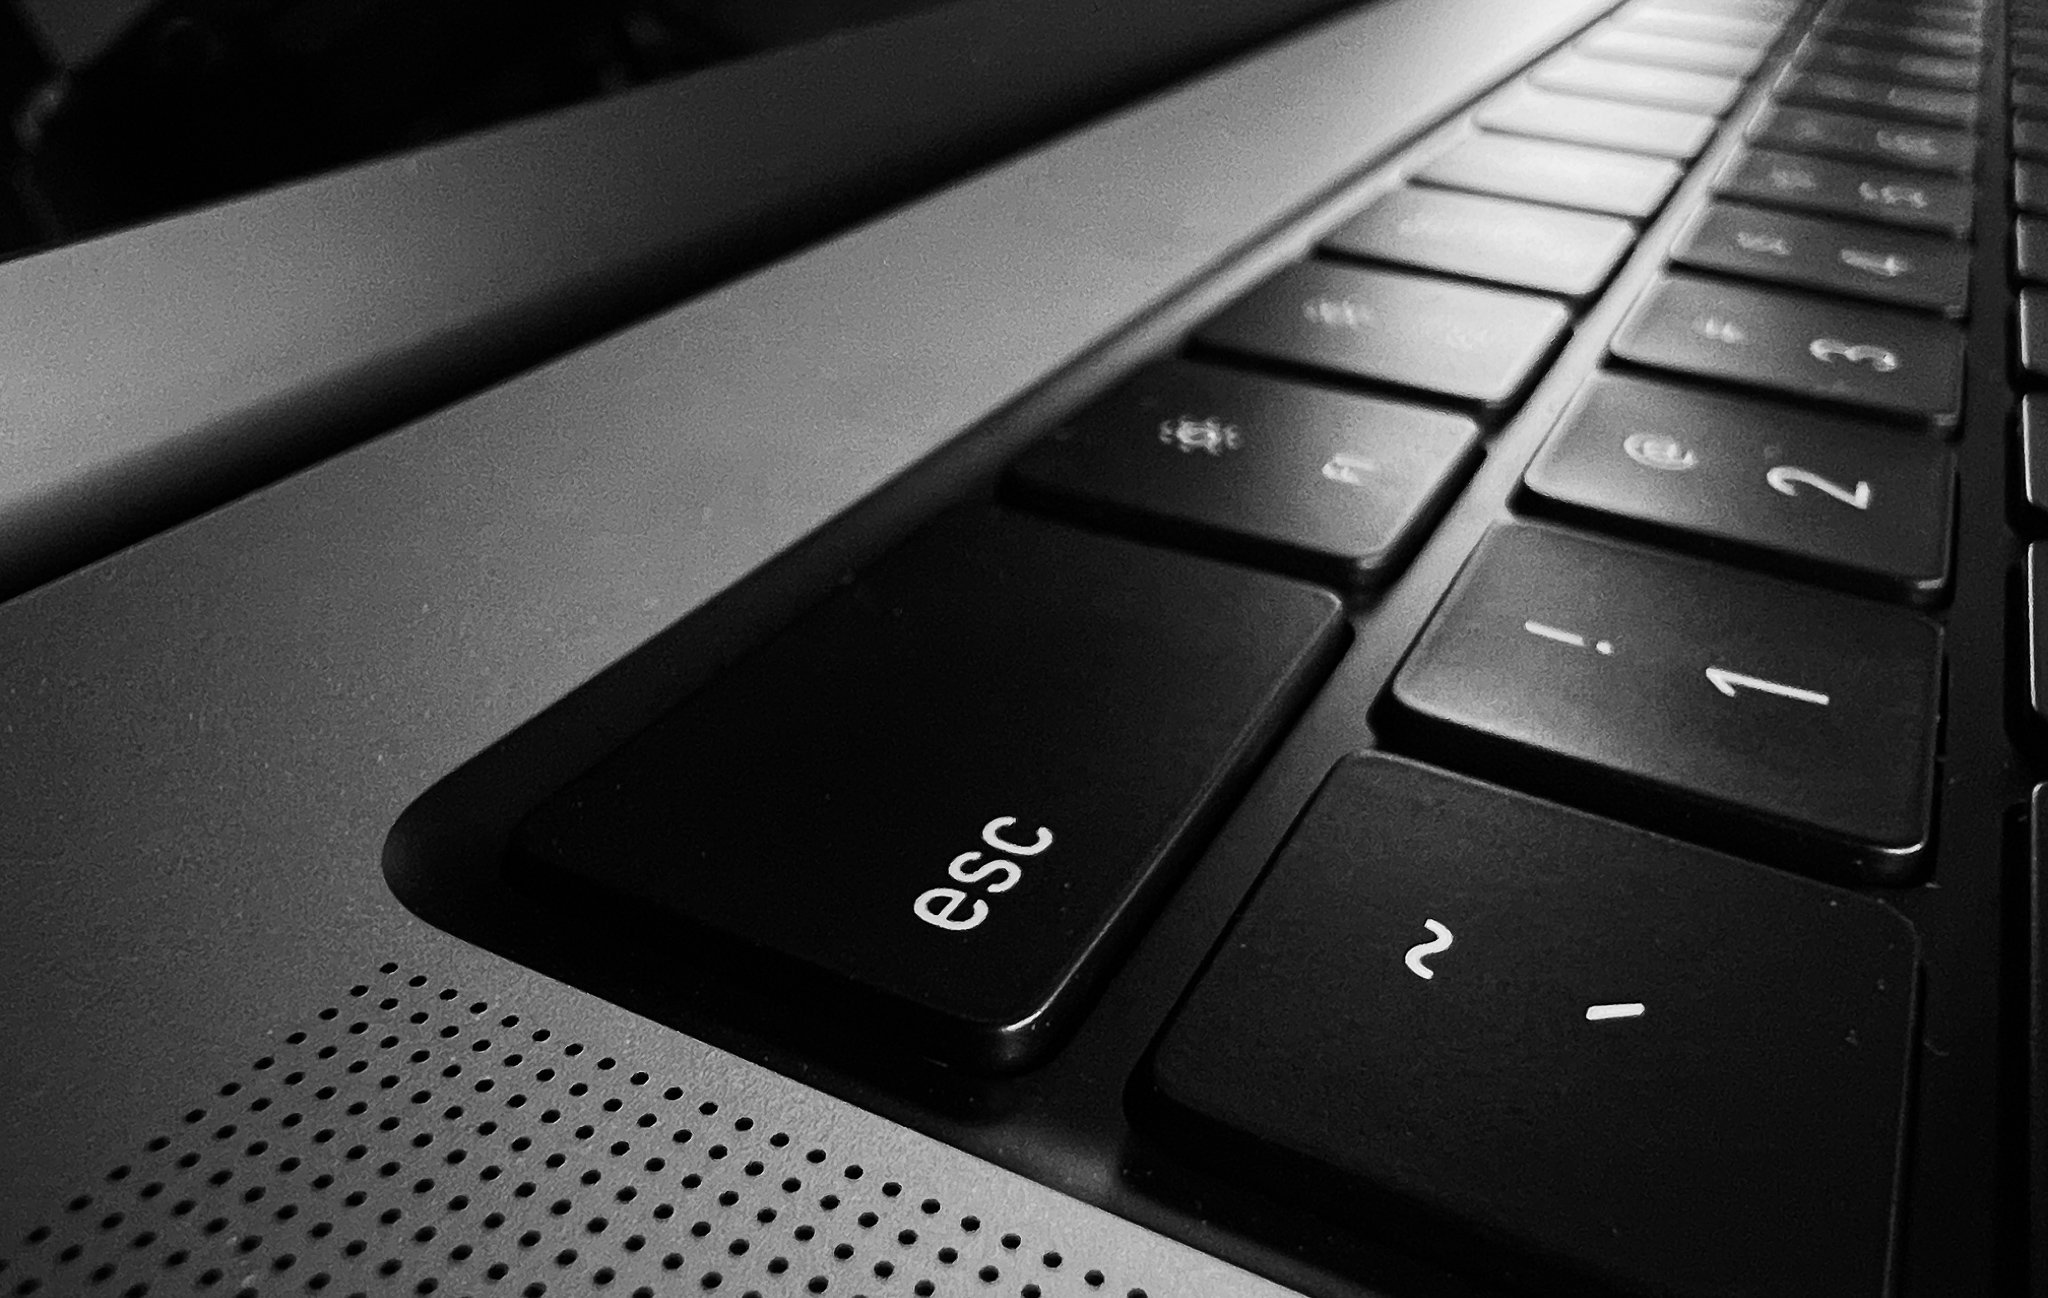
Full-size Esc and F keys on MacBook Pro M1 Max, shot on iPhone 13 Pro w/ Halide Mark II Macro mode.
I use Keyboard Maestro like crazy to program custom keyboard shortcuts, and now with full-height F keys I’m able to use all my standard shortcuts on MBP without a problem.
goodbye, dongles.
(at least for the most part)
speed and power efficiency
The MacBook Pro M1 Max is fast—really fast. I’m sure there will be plenty of in-depth benchmarks released, but I wanted to share a few of my tests from a photographer’s point of view.
Here’s a couple speed demos I shot and posted on my Instagram, along with a bunch of other insights:
While speed is always attractive, I’ve been most curious about the efficiency and power management, so I ran a few non-scientific tests. One of them went as follows:
I charged the 16" MacBook Pro M1 Max to 100% and then disconnected from power.
First, I ran an image stack in Starry Landscape Stacker on 100 TIFF files (150MB each). It took 4m 24s to render and battery life was still at 100% (the fan remained inaudible).
Stacking 100 TIFF files (150MB each) took 4m 24s.
Second, I ran a Cinebench test, which finished in just a few minutes and still the battery was 100%.

Third, I went back the 100 TIFF image files and opened them into StarStax and processed a "Gap Filling" blend of all 100 TIFF files. This intensive process took another 2m 36s and still the battery was at 100%.
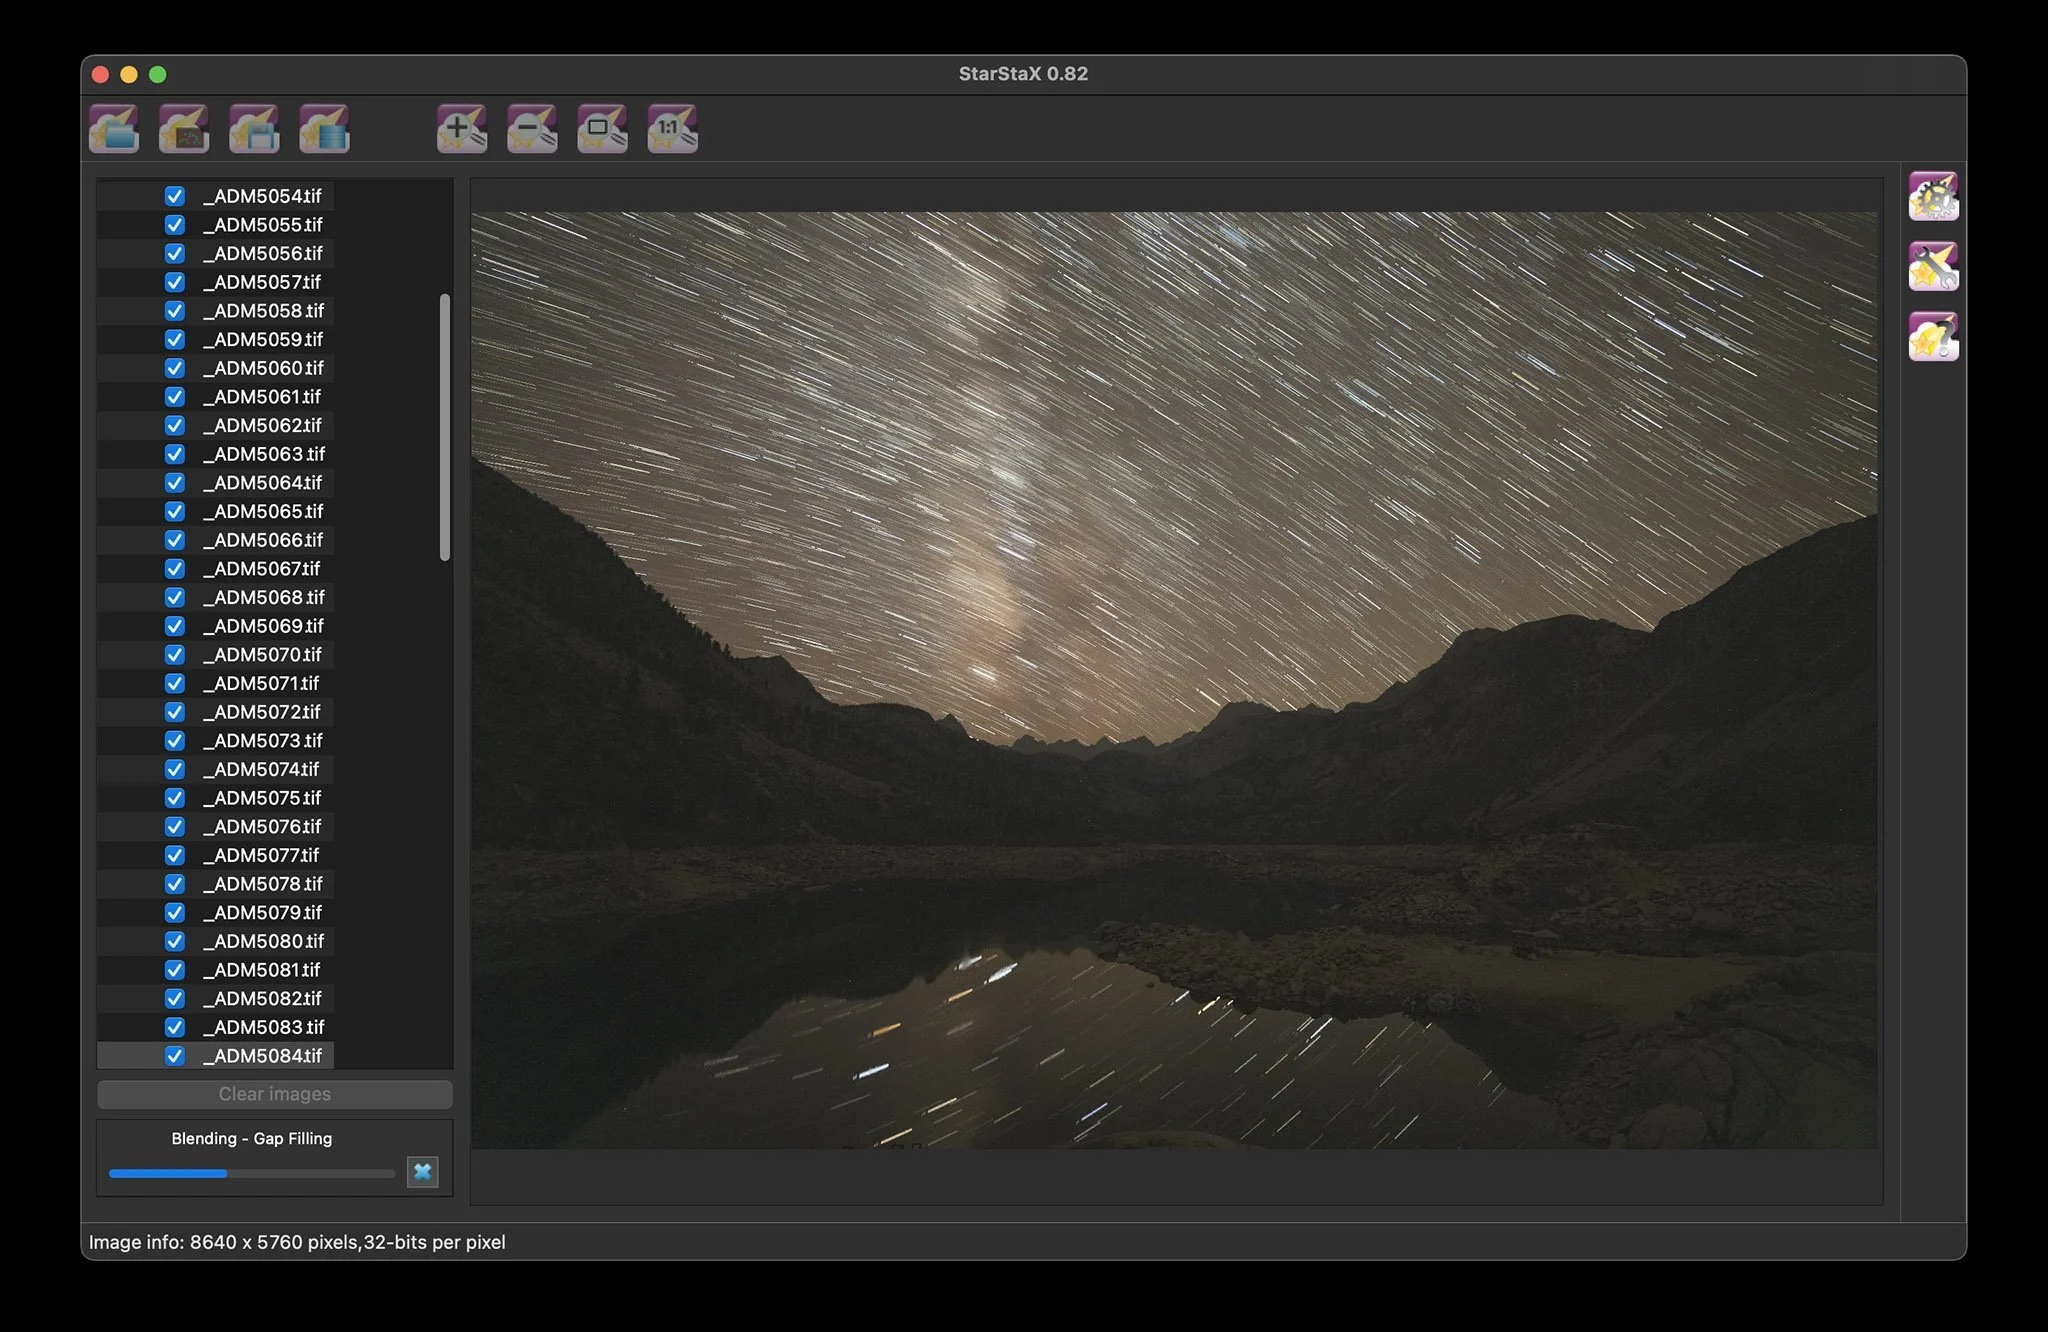
Blending 100 TIFF files (150MB each) with Gap Filling in StarStax took 2m 36s.
So I opened eight images into Adobe Camera Raw and used Photomerge to create a giant panorama. This happened quickly, and you guessed it, the battery life still showed 100%.
At this point I kind of ran out of options, so I went back to Cinebench to run the test again on loop. About 2.5 minutes into that test, the battery life finally dropped down to 99%.
For reference, I ran this process on my previous gen 16" MacBook Pro (which has decent battery health of 85%). After completing step three (“Gap Filling” StarStax process), the battery was at 71%. Also, fans spun up to max RPM during step one and never went back down.
In summary, the most impressive performance from the new MacBook Pro M1 Max wasn’t just speed (it was about twice as fast), but it was insanely efficient in how it managed both its power and heat, which matters as much or more than pure speed.
—
Oh, and in case you’re wondering why I stack images of stars… by capturing multiple images at a lower ISO and stacking them (instead of one high-ISO image), I can create images of the stars with very low noise, but very high detail.
Here’s the final output of those processor-intensive star-stacking tasks, after processing in Photoshop. Check out the detail in the Milky Way below

We’re always talking about the next fastest thing. For whatever reason, we’re obsessed with speed, but most of us don’t know why. After these tests, I spent some time really reflecting on how this kind of mobile power will affect me (beyond just plain fun). I realized I rarely process star stacks like the ones above while I’m in the field. It just takes too long and I don’t have the energy to go through all that, so I save it for another day—theoretically while I’m back home or at the studio, but sometimes it never happens at all.
The ability to quickly assemble these kinds of complex images means my feedback loops have shortened dramatically. I can quickly view an assembled panorama or star stack while I’m still in the field, and if I need to capture it again or tweak something, I can. In my previous process, I wouldn’t view the final assembled product until weeks or months later, which left me completely unable to tweak my image captures
The New Liquid Retina XDR Display
Apple says the new “Extreme Dynamic Range” display in the MacBook Pro M1 Pro/Max is the best display ever in a notebook. It’s vibrant but not oversaturated, and it beautifully pairs with Apple’s giant Pro Display XDR.
Every display is factory calibrated, and I’m told this display is so accurate out-of-the-box, I may not even need to bother calibrating for most use cases.
On XDR and RAW Editing
All RAW photos have an extended dynamic range that most displays don’t render (like the highlights in a really bright sky or the texture in really dark shadows). With the XDR display and software that supports it, we can see this detail without cranking the RAW sliders.
In testing, I noticed Adobe’s software doesn’t yet fully support XDR, but I was happy to see Pixelmator Pro has a feature called “EDR mode” specifically for rendering this highlight/shadow detail while processing RAW photos.
Below, I used Pixelmator Pro to open a RAW file shot on Hasselblad X1D II (15 stops of dynamic range) in Acadia NP. This is a perfect example where editing on the new Liquid Retina XDR display with Pixelmator’s “EDR mode” turned on will show me extra detail in the blown out clouds.
UPDATE: Adobe just officially added XDR support in Photoshop this week at Adobe MAX, more on that here.
The MacBook Pro M1 Max Liquid Retina XDR display is capable of rendering expanded detail in highlights using Pixelmator Pro’s EDR mode.
Rendering this detail was previously not possible on the MacBook Pro. It’s going to be really nice to have this display power with me in the field as it’s helpful to know what detail is there and how far I can push an image.
The New Display Preferences Panel
I also really enjoyed jumping into the new display configurations in macOS Monterey via System Preferences > Displays.

It’s clear Apple had the creative pro in mind in the redesign of this panel. It’s easy to choose from a variety of different factory presets and also to fine-tune the white balance and luminance precisely to your liking.
Perhaps my favorite aspect of these new configurations is when switching to a preset other than the default “Apple XDR Display,” the True Tone and Night Shift features are disabled, and Brightness is manually set and not adjustable. This is exactly the way it should be for color consistency. Previously, I’ve turned off True Tone/Night Shift permanently (despite the clear benefits) just because I don’t like the idea of shifting color, but now I’ll gladly leave those features on for general use.
Also, you can now quickly change display presets via Control Center > Display > Built-in Liquid Retina XDR Display.
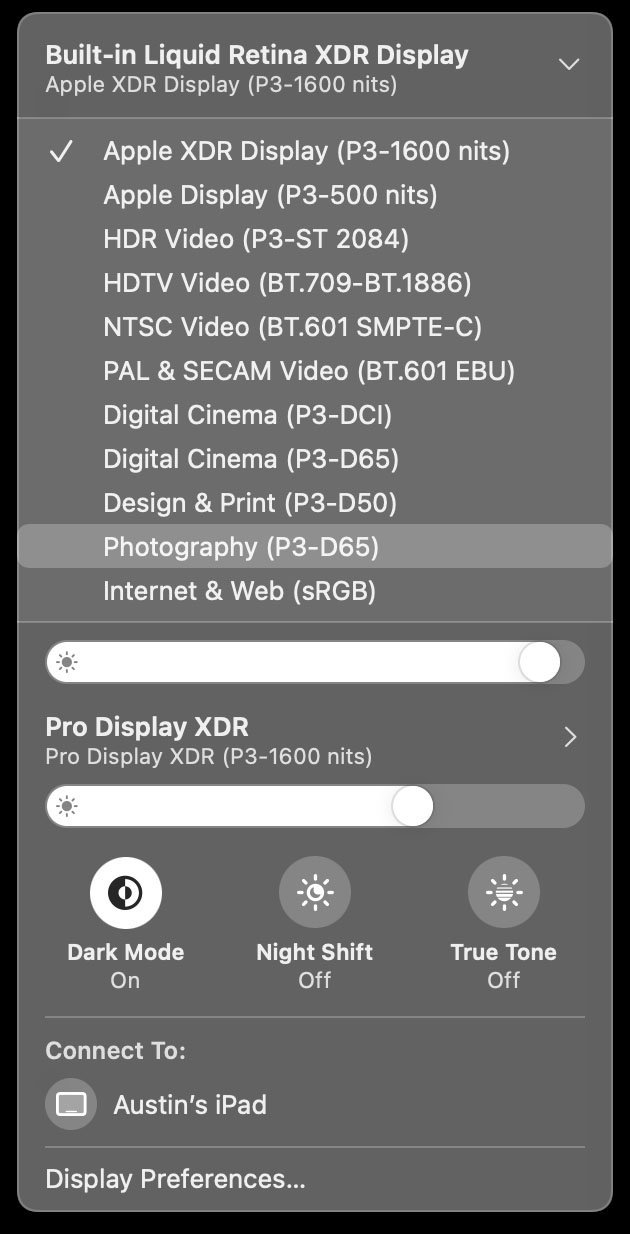
I suspect I will alternate the most between the preset “Apple XDR Display” for general use (w/ auto-brightness, True Tone, and Night Shift) and the unwavering preset “Photography” for when I’m in long editing sessions where I need both brightness consistency and color accuracy.
A Few Wishes
This machine is pretty much everything I ever hoped for (and then some), but I do have a few wishes.
1) I wish the SD card slot was similar to the slot in the Sony A1, which takes both SD and CF Express. This would be really handy for me today and I think more practical and useful for most creative pros in the near future.
2) I really wish there was a matte/non-glare screen option. Years ago, this was an option on Apple’s laptops, and with the recent Pro Display XDR “nano-etch” anti-glare option, I was crossing my fingers we might see something similar on the MacBook Pro.
Thankfully the screen is brighter, which makes it easier to view the screen in bright environments, but a non-glare option would help tremendously for someone like me who is constantly using the display in varying lighting environments.
3) I use my MBP connected to the Pro Display XDR often—I usually use a wireless keyboard/mouse which means I can’t use Touch ID. I really wish Touch ID was built into the wireless keyboards, as well (or if it had to be wired, I’d be fine with that too).
UPDATE: I’ve been informed Apple has already released a wireless Magic Keyboard w/ Touch ID earlier this year—I guess their team was a step ahead of me on this one and I’m glad they were! Check out the wireless Magic Keyboard w/ Touch ID.
Note: You may remember in my 2018 article on the previous-generation MBP, I wished for a physical Escape key. It’s clear the team at Apple is listening to the feedback of the creative community and I’m glad to see it making an impact on the products we use every day.

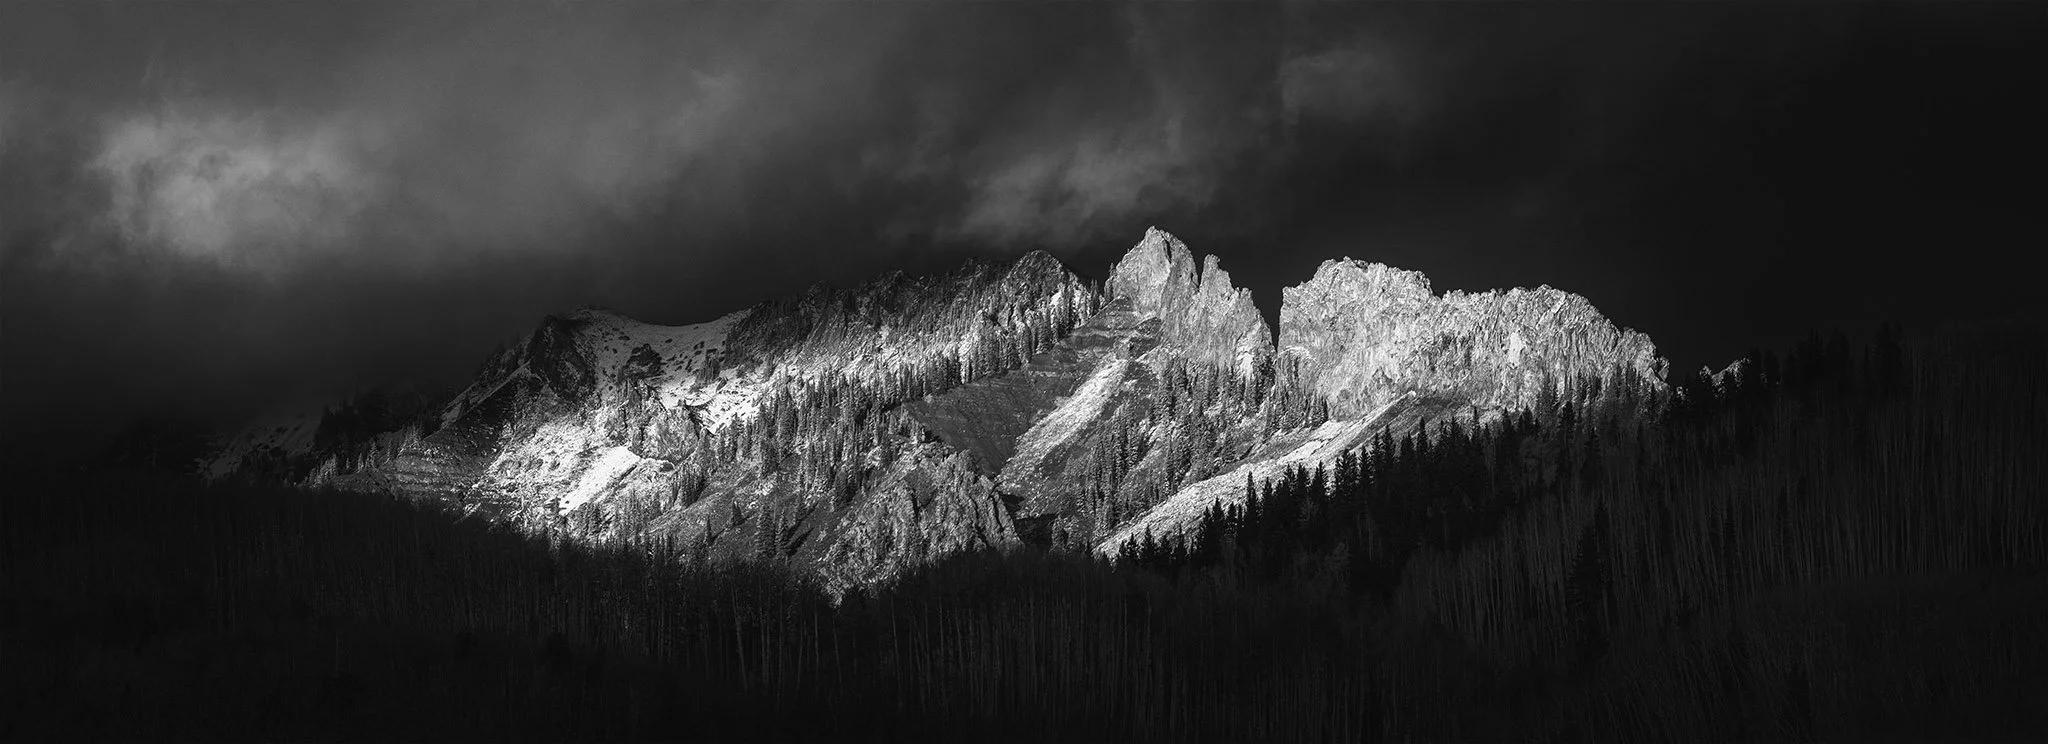
Shot on Sony A1, edited on MacBook Pro M1 Max in Adobe Photoshop.
A Few Other Observations
1) The login screen is on the instant I lift the lid—no delay whatsoever.
2) Connecting to the Pro Display XDR is super fast and feels much more tightly integrated than previous MBPs. There’s no delay between the devices figuring out what to do. It just works.
3) When using the MacBook Pro M1 Max on my lap (like, a laptop), it feels great. It doesn’t burn my legs and I don’t feel like I need to jump into a swimming pool to cool down.
4) A quick press of the Touch ID button at the top right right instantaneously locks the screen. Another press unlocks it. Really quick and easy.
5) The Touch ID button is subtle in real life. In photos, it looks like it really pops out.
6) The “notch” up top is quite noticeable. I’m sure it will eventually fade out of consciousness, but for now I’ve set my desktop background to solid black and I essentially never see it.
7) You can still charge the MacBook Pro M1 Max over USB-C (via your display or other USB-C power source), which could come in handy if you’ve forgotten your MagSafe charger at home.
8) The new speakers actually are noticeably better—we watched a movie and I was pleasantly surprised at the fullness of the bass.
Shot on Sony A1. Panorama stitched on MacBook Pro M1 Max in Adobe Photoshop.
Buying Advice for Photographers
My machine of choice will be the 16" MacBook Pro M1 Max with 64GB RAM and 8TB SSD. I really debated the 14" as it has every bit of power as the 16" in a smaller form factor, but at the end of the day it was the promise of a little more battery life that made me tip toward the larger model.
There’s been some talk about the 16" and High Power mode online, so I tried it out. In my very limited testing with Cinebench, I actually found the performance to be ever so slightly faster when in Automatic mode compared to High Power mode, so if you are considering the 16" solely for the idea of this “turbo” feature, you might reconsider.
Also, if you are considering the smaller 13" M1 MacBook Pro for serious creative work, remember it’s not just speed that separates these new M1 Pro/M1 Max MacBook Pros. They also have a far different port set (the 13" only has two USB-C ports, and no MagSafe), and that can be super limiting in any serious creative workflow.
I think it's worth investing in as much internal SSD space as you can afford. The internal drive will be your most convenient and fastest read/write speed of any drive. I keep about 6TB of media on my internal drive, and it’s my primary working drive.
For home/studio setup, pick up a wireless mouse and keyboard and an external display (the M1 Max plays very nicely with Apple’s Pro Display XDR, but if you can’t justify the price tag there are many other color-accurate options at a more reasonable price like LG's UltraFine 5K display.
This setup will offer you almost everything you could ever want, both at home and on the road, and will spare you the hassle of working across multiple machines.
Ask Me Anything on Instagram
I’ve already answered a bunch of your questions about the MacBook Pro M1 Max over on my Instagram and will be answering more soon. Join me there for more insight or to ask a question of your own (or post your Q in the comments below).
The Bottom Line
The MacBook Pro M1 Max keeps its cool, literally and metaphorically, no matter what you throw at it. Using the previous generation MacBook Pro, I often felt like I was finding the limit of the machine (you know, when you’re trying to export some photos and it sounds like it’s about to take off like an airplane, and it’s so hot you can barely touch it). I really don’t enjoy finding the limit of my gear. I want to know I’ve selected the right piece of equipment that can handle anything I can handle. Ultimately, I’d rather my own capability be the weak link in my workflow, not my equipment.
The MacBook Pro M1 Max can show me images faster than I can look at them, process panoramas bigger than I’ve ever needed (so far), and the battery life lasts way longer than I can work in a single session. Its capabilities broaden my horizons and make me feel like the only limiting factor in my artistic process is my own creative vision, not my gear—and this exactly the way it should be.
Apple products at their best are fun to use—elegant, powerful, and functional. With the return of a practical port set and Apple silicon inside, the new MacBook Pro M1 Max strikes a great balance, and I’m sure you will absolutely love this new era of Mac.
Special Thanks
Thanks to Halide, the best third-party camera app for iPhone, for supporting this post.