iPhone 12 Pro Camera Review: glacier np
Hello from Glacier National Park!
I’ve been exploring this area, based out of our Airstream, testing the camera of the new iPhone 12 Pro in all kinds of conditions from bright and sunny to dark and snowy. (And all very cold!)
As always, Apple delivered a presentation with a punch and a lot of the focus was on the camera, especially the iPhone 12 Pro Max Camera. (Spoiler alert: that review will be coming in a few weeks and I can’t wait to see what the hardware in that thing can do.)
My driving question remains:
My driving question remains:
how will this new tech make
our pictures and videos better?
The iPhone 12 Pro’s upgrades really rely on software, whereas the iPhone 12 Pro Max gets all the software upgrades and a major hardware upgrade. With the iPhone 12 Pro in hand this week, a lot of my focus has been on Ultra Wide Night mode, LiDAR autofocus, and exploring new capabilities in the software.
Big thanks to my friends at Airstream, ProDPI, and Halide for supporting this review and for making great products for the creative pro community at large.
Enjoy!
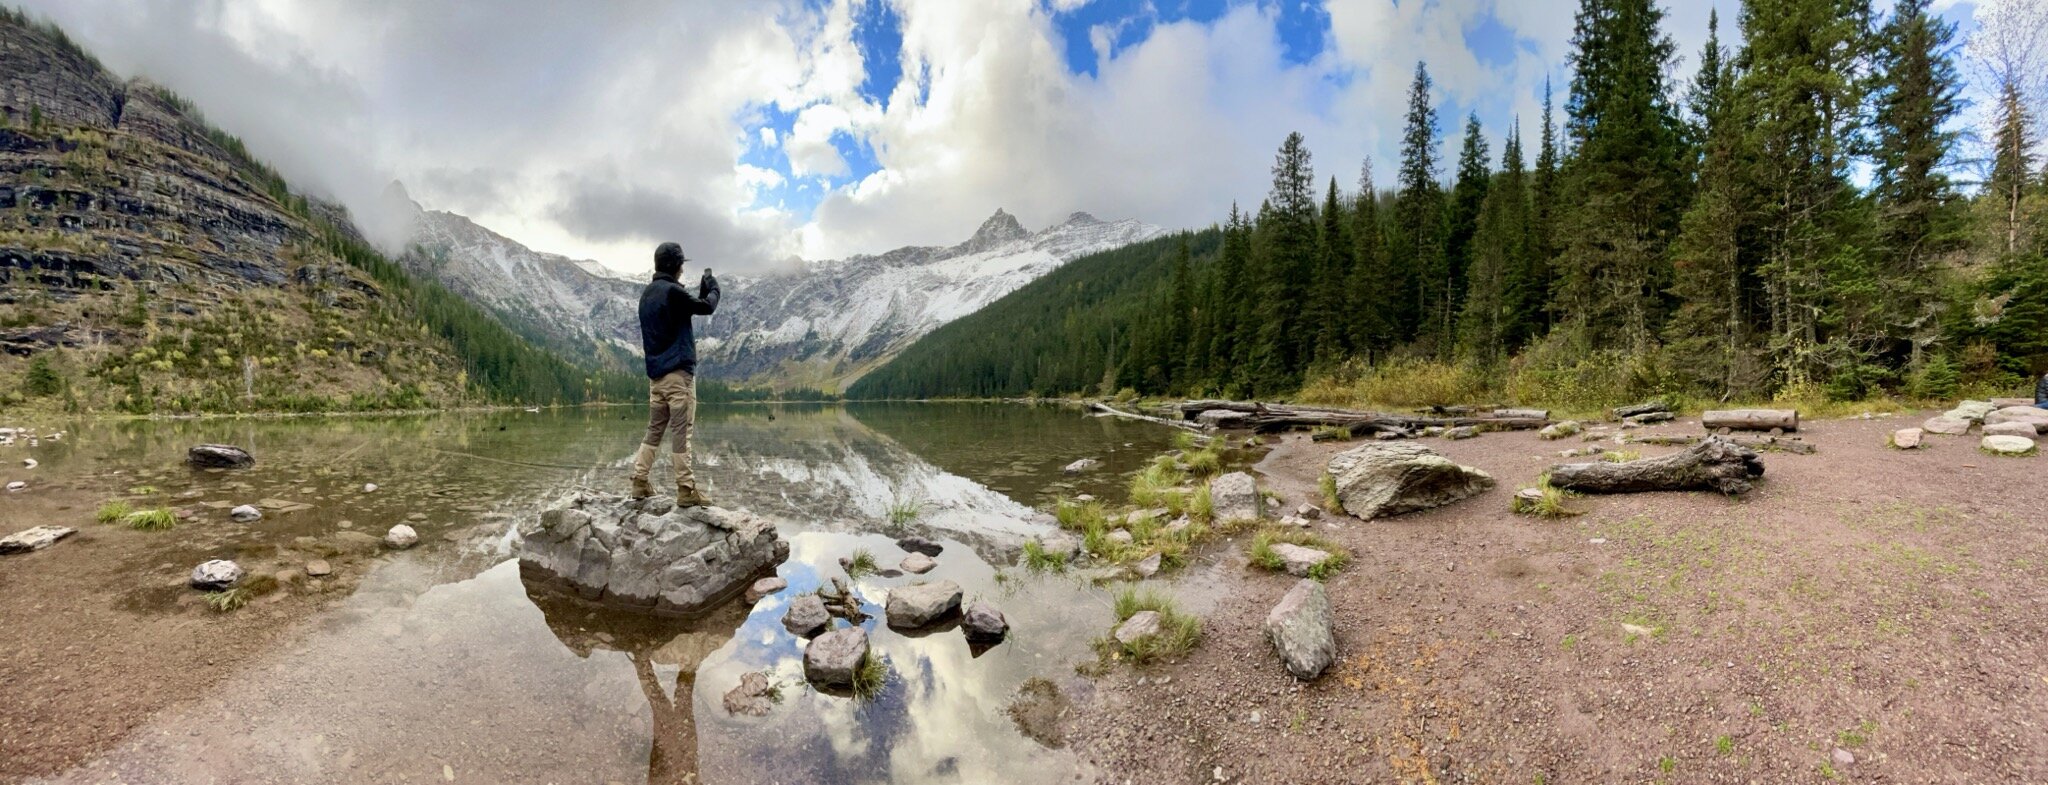
Shot on iPhone 12 Pro in Pano mode w/ Ultra Wide lens
a wide upgrade
For the first time in several generations, we got an upgraded Wide (26 mm) lens this year (now f/1.6 instead of f/1.8). This means the lens hardware will perform slightly better in low light, and it’s also a 7-element lens, which Apple claims offers better edge-to-edge sharpness.
Last year, we experienced a huge leap forward in low-light performance with the release of Night mode (software), and this year in the iPhone 12 Pro we’re getting better low-light performance from a faster Wide lens (hardware).
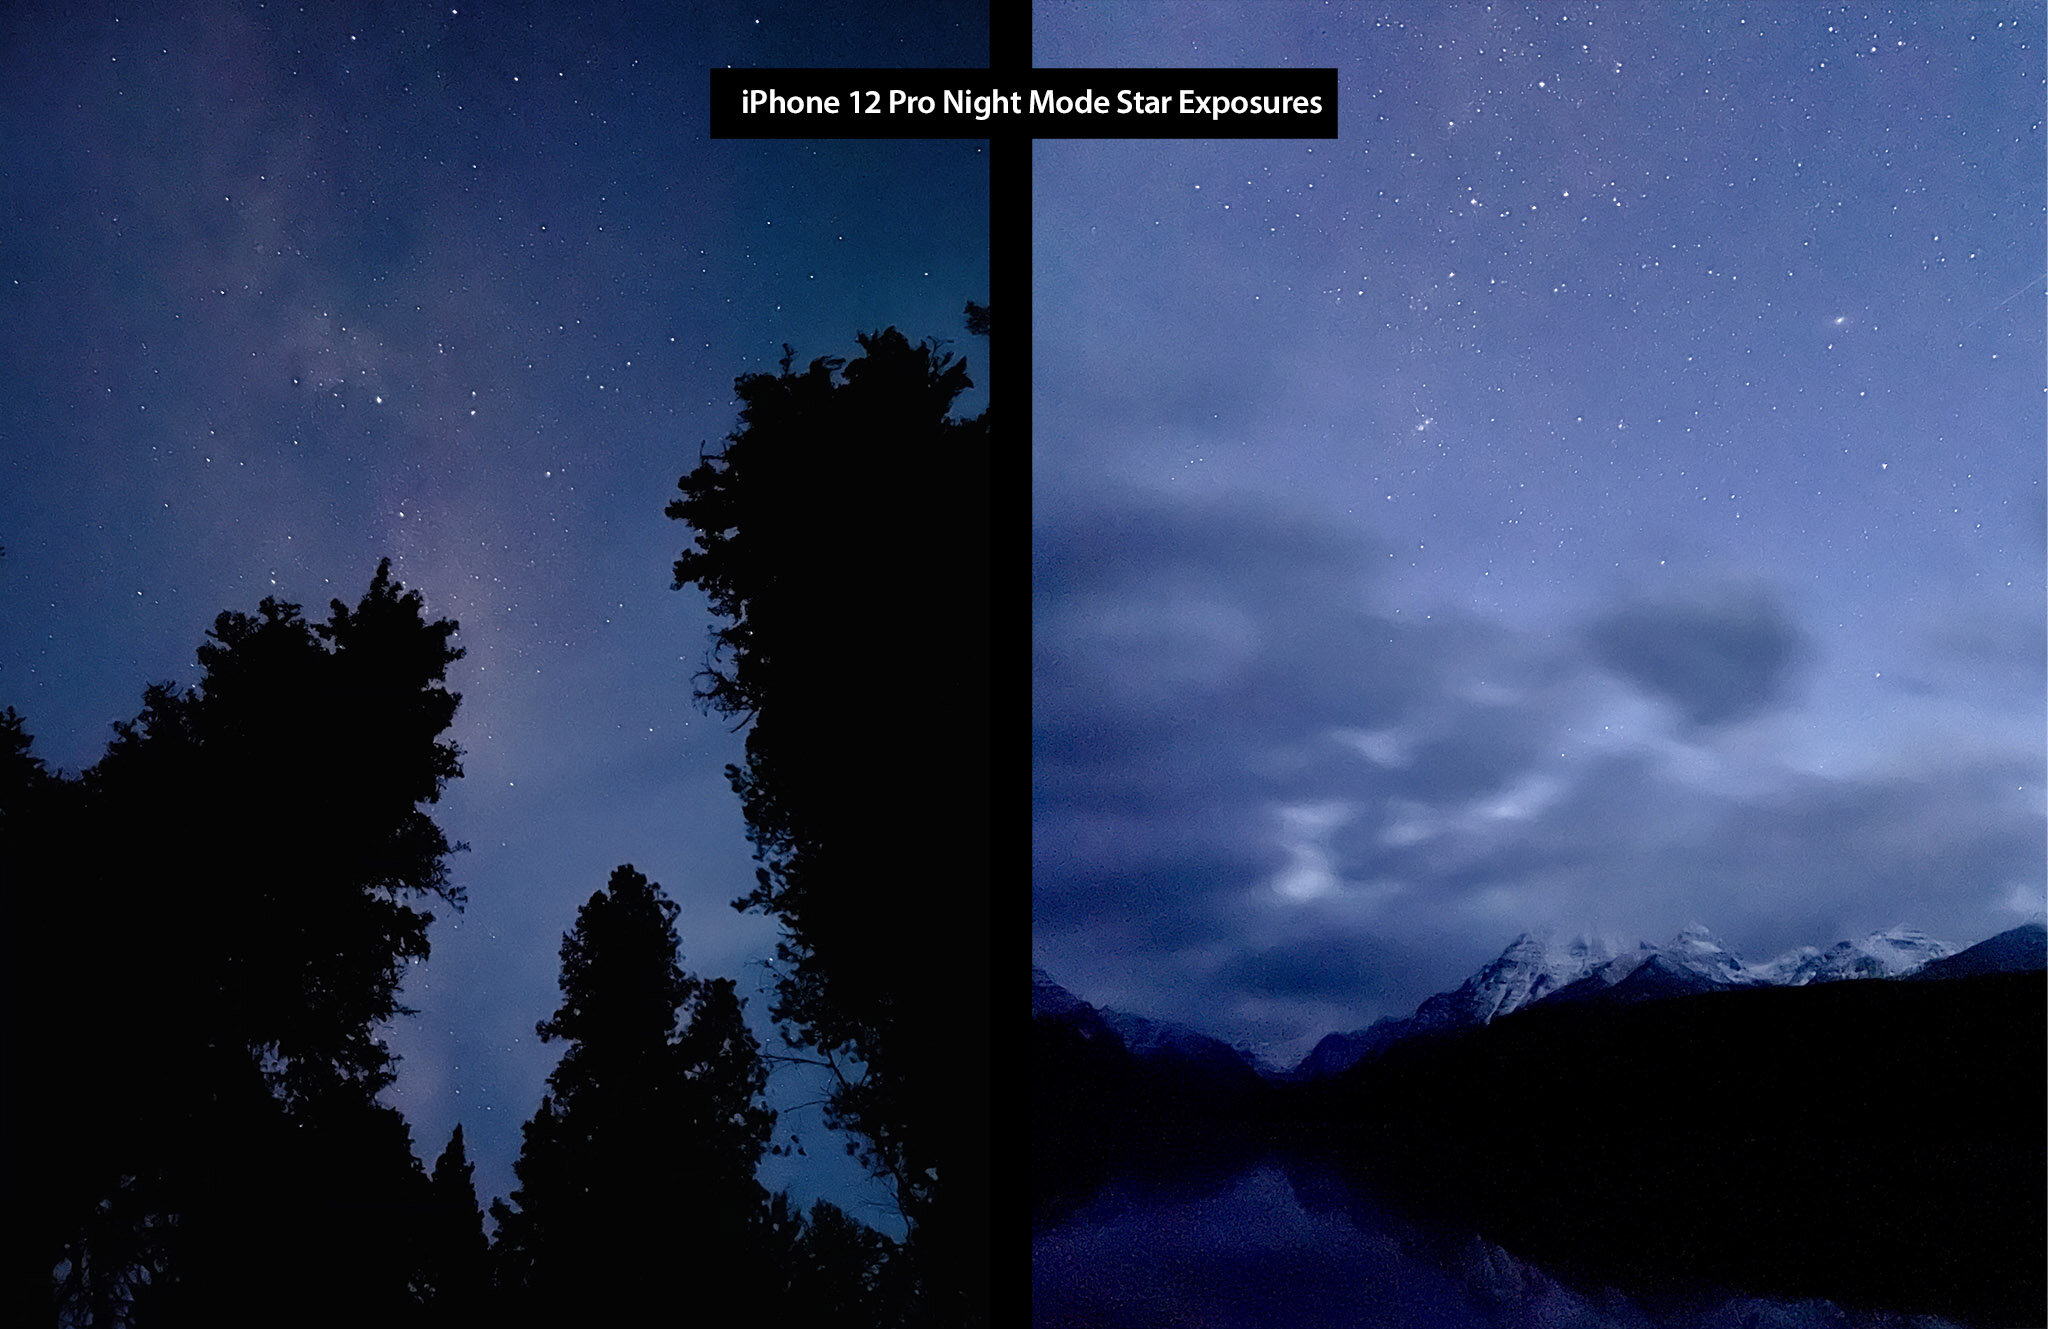
Below is a 30-second exposure shot on a tripod with nearly no visible light. For context, I couldn't see the blue or green colors with my naked eye, so I found this shot to a great demonstration of how Night mode and the new Wide lens work together. Notice the cloud movement over the 30-second exposure.
Shot on iPhone 12 Pro w/ Wide lens in Night mode (on tripod).
Here are a couple more shots using Night Mode with the new f/1.6 Wide (26 mm) lens:
Beyond low-light performance, I was also curious about the edge-to-edge sharpness of the new 7-element lens, so I shot a few tests with lots of detail at the corners of the frame and found the sharpness to be about the same as the iPhone 11 Pro.
ultra wide night mode
I love shooting super wide with any camera, so when the iPhone 11 Pro introduced the Ultra Wide lens last year, I was stoked. While I really love the perspective, I found the quality of the Ultra Wide wasn’t up to my standards when shooting in medium- to low-light conditions, so I only used the Ultra Wide in bright, daylight conditions.
Now that Night mode is available with the Ultra Wide lens, shooting in low light has significantly improved. We got caught in a snowstorm just before sunrise and I hopped out to snap a couple shots with the Ultra Wide in Night mode.
Shot on iPhone 12 Pro w/ Ultra Wide lens in Night mode (handheld, color auto-adjusted with Photos app).
Shot on iPhone 12 Pro w/ Ultra Wide lens in Night mode (handheld, color auto-adjusted with Photos app)
Just like last year, when I first compared non-Night mode shots to Night mode shots, the results are not even in the same league. What software is doing with Night mode is truly a night and day difference. In one test, I found the Ultra Wide with Night mode on the iPhone 12 Pro captured a beautiful image where the Ultra Wide without Night mode on the iPhone 11 Pro rendered a mostly black frame full of noise.
I thought the iPhone 12 Pro version of this shot turned out gorgeous and I can’t wait to see how it looks as a B&W fine art print on the wall. Stop and consider that for a moment… because of Night mode and computational algorithms we went from “completely unusable dark frame” to “I want that on my wall.”
Shot on iPhone 12 Pro w/ Ultra Wide in Night mode (on tripod). Apple Photos “Noir” filter applied.
Another place a super-wide-angle lens is often helpful is tight, indoor spaces, but it was tough to use the previous Ultra Wide in these scenarios because they often come with lower light levels. With Night mode, we can now use the Ultra Wide indoors at night and still produce strong frames. Here’s an Ultra Wide Night mode shot of my Airstream workstation (where I wrote this review!) — while not quite as strong as the Wide (26 mm), this shot is crisp from edge to edge and definitely usable.
smart hdr 3
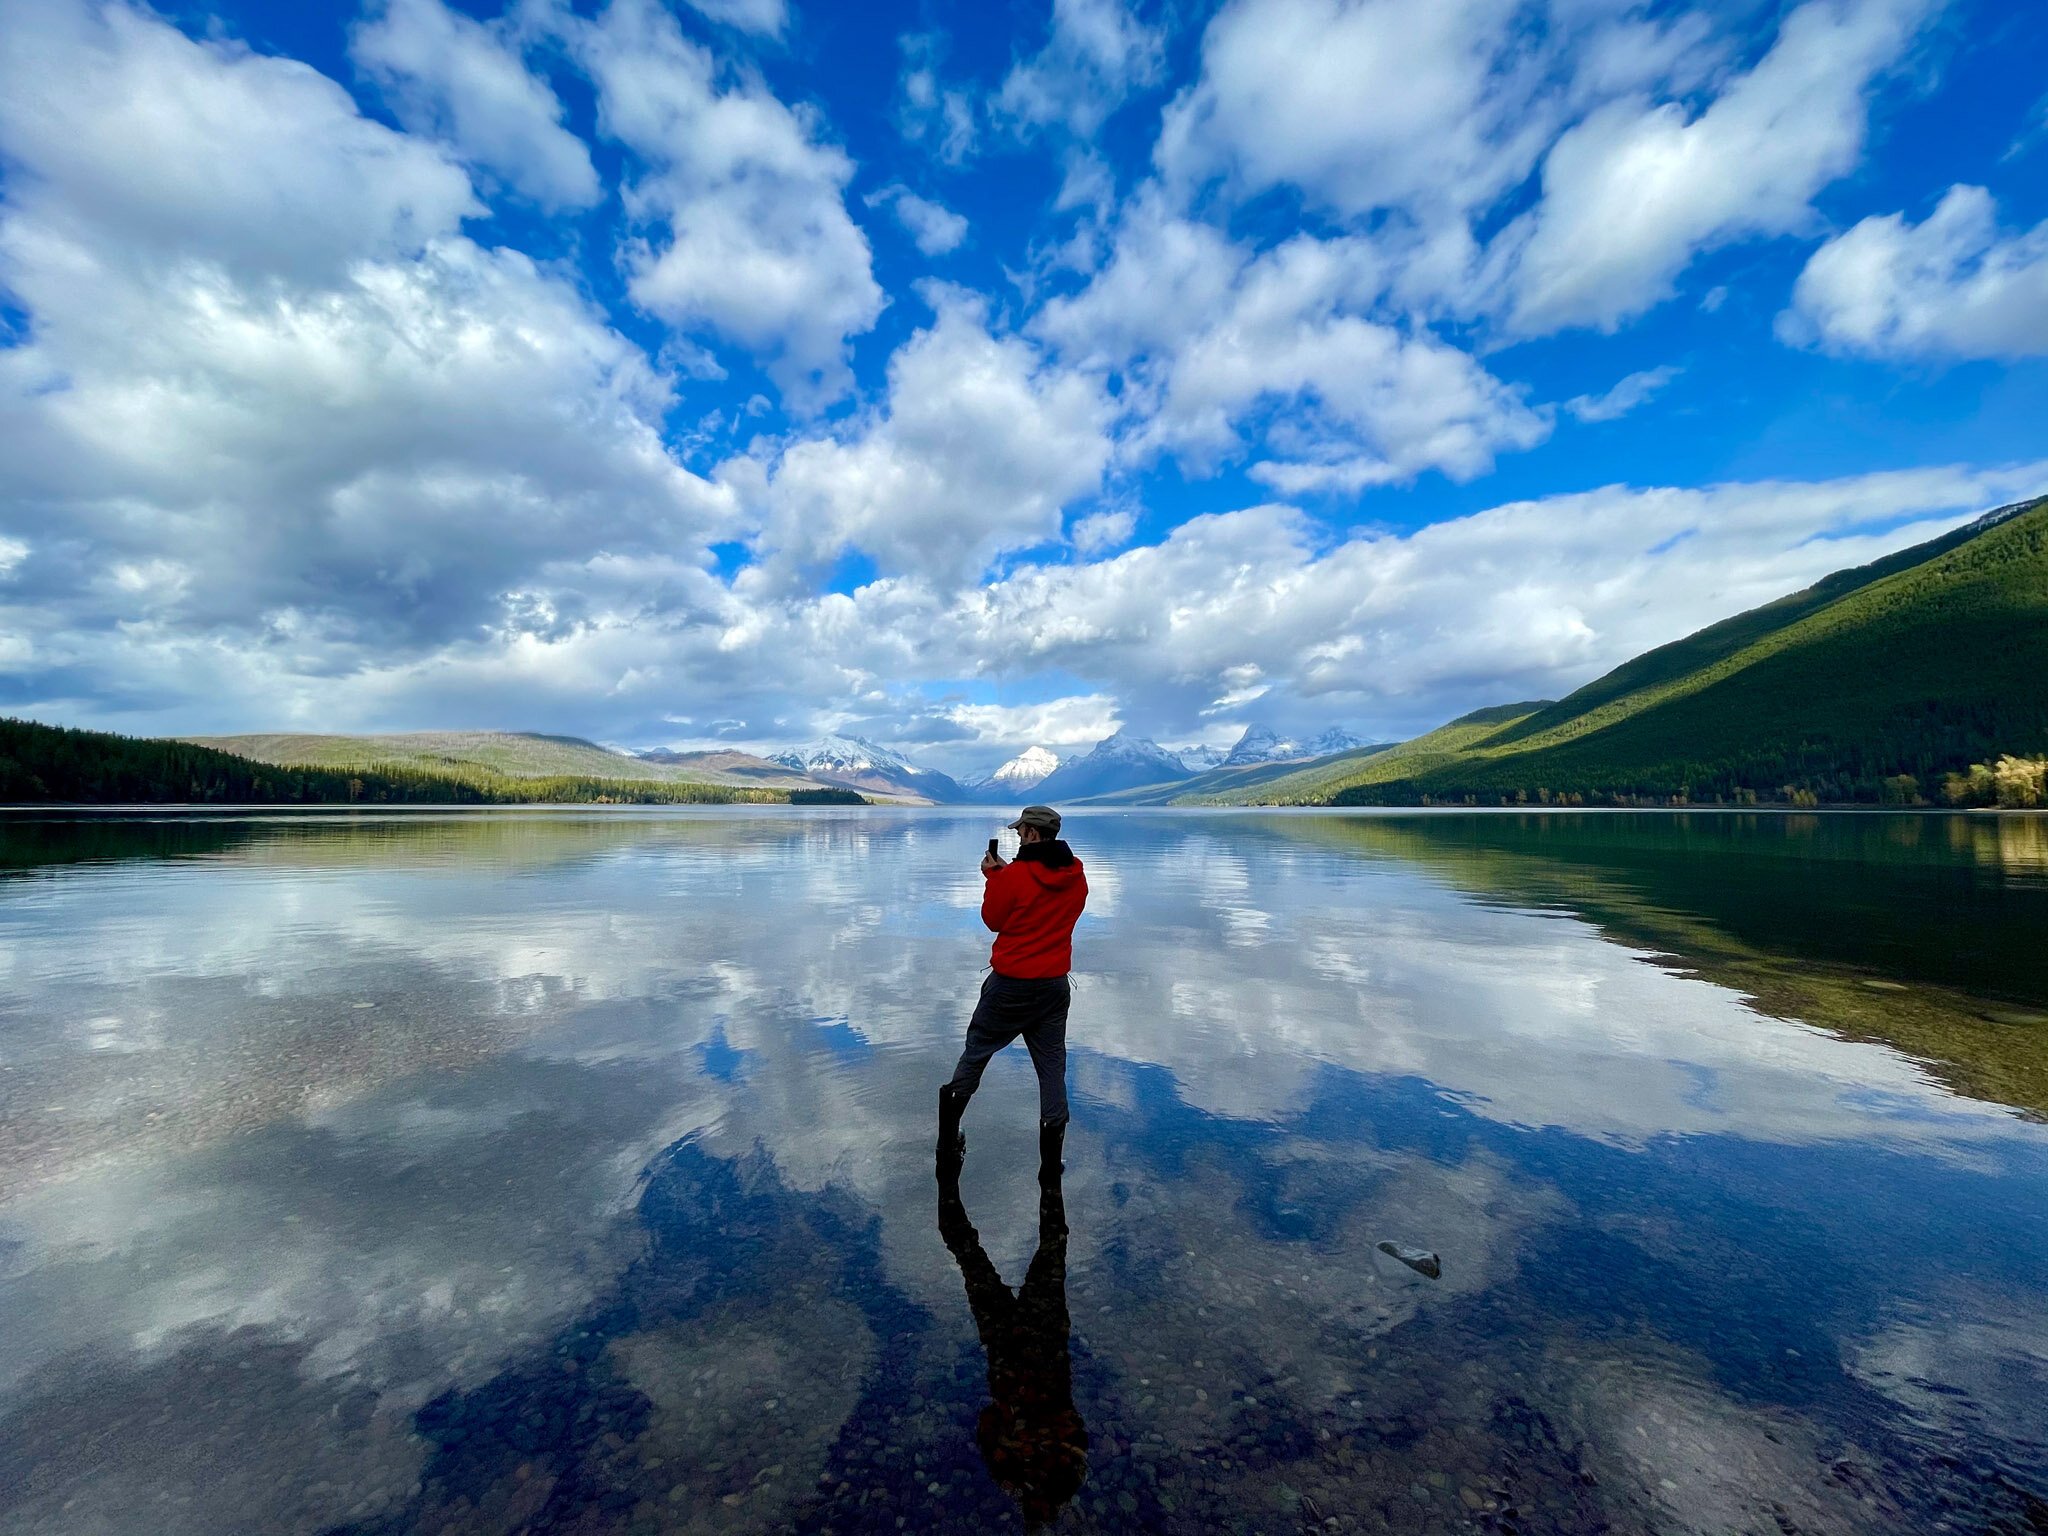
This year’s upgrade to Smart HDR yields some nice improvements. There’s so much involved in Smart HDR but at the end of the day, the aim of this technology is to help the iPhone camera capture what the eye saw. In the image below, note the detail attained in the dark shadows of the rock, while also (mostly) retaining the detail in the bright, snow-capped peaks in the distance.
You may remember me writing about how Smart HDR was so good at keeping shadow detail it actually made it difficult for me to shoot a silhouette. (This was in my iPhone XS review.) This has gotten a ton better, and when I pulled the exposure slider down to underexpose my subject, the subject got much darker as expected (thank you Smart HDR team.)
Here’s a shot with the Ultra Wide — again, notice how the underwater rocks in the foreground are properly exposed, but we still haven’t lost any detail in the sun-lit snowy peaks in the distance.
Shot on iPhone 12 Pro w/ Ultra Wide lens (handheld, color auto-adjusted with Photos app).
extreme low-light portrait with night mode
I like to push my gear to the extremes… and knowing others would likely be testing Night mode in urban environments with some available light, I decided to really push the capabilities of Night mode portraits. I shot this portrait of Esther about forty-five minutes after sundown, and it was overcast, so there was very little available light. (To give you an idea, we had to use a flashlight to see our path.)
This Portrait mode w/ Night mode 3-second exposure was shot with the iPhone 12 Pro in my right hand. Simultaneously, in my left hand, I held my iPhone 11 Pro and used the light emitting from the screen (not the flash) as an off-camera fill light for Esther’s face.
As you can imagine, there was definitely some camera shake and movement with this unstable setup but thanks to a little Night mode computational wizardry, better OIS, faster ISO, and of course LiDAR, Esther is still sharp and surprisingly color accurate.
The LiDAR worked great here — I realized later I never once messed with the focus it was just locked in on her face the whole time. Also, creating an accurate depth map around the furry hood seems like it would be really complex, but the iPhone 12 Pro did a great job.
The blurring and noise reduction is a bit less realistic and a bit more… dreamy? But it’s sharp enough where it matters, and overall I found this image to be just lovely. (And so did Esther, which is what matters most!)
Pro-Level Controls
There are a handful of new camera settings for photographers in this year’s iPhone 12 Pro (many of which are for anyone on iOS 14). Each of these controls have their own perks, but overall I’m excited to see how the iPhone camera software team is really listening to the pro community and continuing to find ways to implement their pleas for more control and customization.
Truly Locked Exposure Adjustment
I’m absolutely thrilled about this new (and hardly talked about) feature. We now have true exposure adjustment that doesn’t revert back to auto mode every time a picture is captured.
This adjustment remains even when you switch between .5x, 1x, and 2x lenses, or when switching modes. Even if you lock your iPhone and come back to it later, it still remembers your exposure settings. This is much more like working with a traditional manual camera and I love it.
An example of a perfect use for something like this is shooting in snow. Most cameras determine their auto exposure based on averaging the light in a scene, which means if you have a ton of bright light in your frame (like from snow), the meter will average this out and make the bright parts more gray by default. To compensate for this, most photographers adjust their exposure up 1 to 2 stops to get closer to true white in the frame.
I went out into the snow with my wife, Esther, and our pup, Mac, set my exposure adjustment to +1.3 stops, and shot with these settings for an hour! I love being able to set it and forget it — usually in a scene like this on iPhone, I’m re-adjusting the exposure almost every shot to compensate.
Note: This is different than the tap-and-hold AE/AF lock that we’ve had for years. This is exposure adjustment only and doesn’t lock focus.
To toggle this setting, go to Settings > Camera > Preserve Settings > Exposure Adjustment. (I leave mine ON.)
After you turn this feature on, you’ll notice a new exposure adjustment meter in the top left of your native iPhone Camera app. You can tap this meter to make adjustments to your exposure.
Turn Off “View Outside the Frame”
One of the slick camera features added last year was the ability to “Capture Outside the Frame” — basically when shooting with the Wide (26 mm) lens, the iPhone is also capturing the perspective of the Ultra Wide (13 mm) lens so you can make cropping and geometry adjustments later. This is a really cool feature and it plays to the strengths of the iPhone lens set, but my challenge with it in practice has been the in-camera preview.
Sometimes seeing objects outside of your frame can be distracting. When composing an image, I’d have trouble finding the perfect visual balance because I’d be seeing major elements just outside the edge of my frame. Now we have the choice to turn off this preview.
To toggle this setting, go to Settings > Camera > View Outside the Frame. (I leave mine OFF.)
Volume Up for Burst
Also in iOS 14, you can now choose to use the Volume Up button to trigger Burst mode in the native Camera app. With this setting on, press-and-hold Volume Up to trigger Burst mode and Volume Down to record video.
I use Burst mode frequently because perfectly timing an image capture is often one of the most important variables in creating a photograph (sometimes more so than perfect exposure or composition).
To toggle this setting, go to Settings > Camera > Volume Up for Burst. (I leave mine ON.)
Prioritize Faster Shooting
Ever try to shoot a bunch of pictures in a few seconds and miss the moment because the camera wasn’t responsive enough? I’m not talking about Burst mode, I’m talking about tapping the shutter button as fast as possible. The iPhone camera is making lots (billions?) of exposure calculations each time you take a picture, and sometimes shooting in fast succession can bog it down.
For me, I’d gladly give a little image quality to get the perfect moment.
To toggle this setting, go to Settings > Camera > Prioritize Faster Shooting. (I leave mine ON.)
other upgrades
Time-Lapse w/ Night Mode
I didn’t test this extensively, but it’s cool to see how well Night mode works for a time-lapse. I started this time-lapse well after sunset and Night mode kicked on when it was needed. Note how fluid the transition from day to night is — no flickering, just smooth exposure ramping into the darkness.
MagSafe
Up until now, I haven’t been a huge fan of wireless charging. I’ve mainly been annoyed at the slower speeds and the difficulty positioning the device properly on the charger, but it sounds like MagSafe may improve both of these issues.
It’s exciting to dream about an ecosystem of MagSafe products, especially accessories for photographers. I could imagine having a sweet LED flash, external batteries, quick-release tripod mounts, and a ton more. I can’t wait to see what the third-party community does with the new MagSafe interface.
5G Speeds and the Creative Process
I realize many feel this is overhyped, and maybe it is, but the potential speeds of 5G for a constantly-moving, media-heavy creative professional like myself is huge. You wouldn’t believe the hoops I’ve jumped through to get the speeds needed to upload photos for client deliveries or important Zoom calls. Right now, I count on very little uploading from the road, but I’m rethinking my creative workflow and backup solutions with 5G speeds on the brink. (I’ve written and uploaded a good chunk of this post working remotely in my Airstream, connected via LTE personal hotspot.)
Another place 5G impacts the photographer is pulling down images from iCloud Photo Library. I have my whole library stored in the cloud, and sometimes when I go to edit an image it takes awhile to pull the image. This little blip of waiting often has a surprisingly disruptive effect on my creative workflow. With faster speeds, the images will feel more local.
Halide’s Technical Readout
The team at Halide continues to evolve their best-in-class third-party camera app, and they’ve had Smart RAW (very similar to ProRAW in theory) for quite some time. One feature built into Halide is the Technical Readout, which basically gives you visibility of the hardware inside your iPhone camera.
Here’s the Technical Readout for the three lenses on iPhone 12 Pro:
Left: Ultra Wide Specs || Center: Wide Specs || Right: Telephoto Specs
The biggest revelation here is the dramatic increase of Max ISO on the Wide camera, which is now 5808 (just about double the iPhone 11 Pro’s maximum ISO of 3072). This means the sensor in the iPhone 12 Pro is substantially more sensitive to light (though image grain increases at higher ISO levels).
Here’s a shot primarily lit with the taillights of my Land Cruiser that takes advantage of the new higher ISO capabilities (shot at ISO 5000):
more shoot-proof
I make an effort to take care of my equipment, but I also use my camera gear in extreme environments — it needs to be up to the task. It’s rare for my iPhone screen to break, but I get occasional scratches when I’m out shooting. I’m excited about the prospect of having a harder and tougher ceramic front glass.
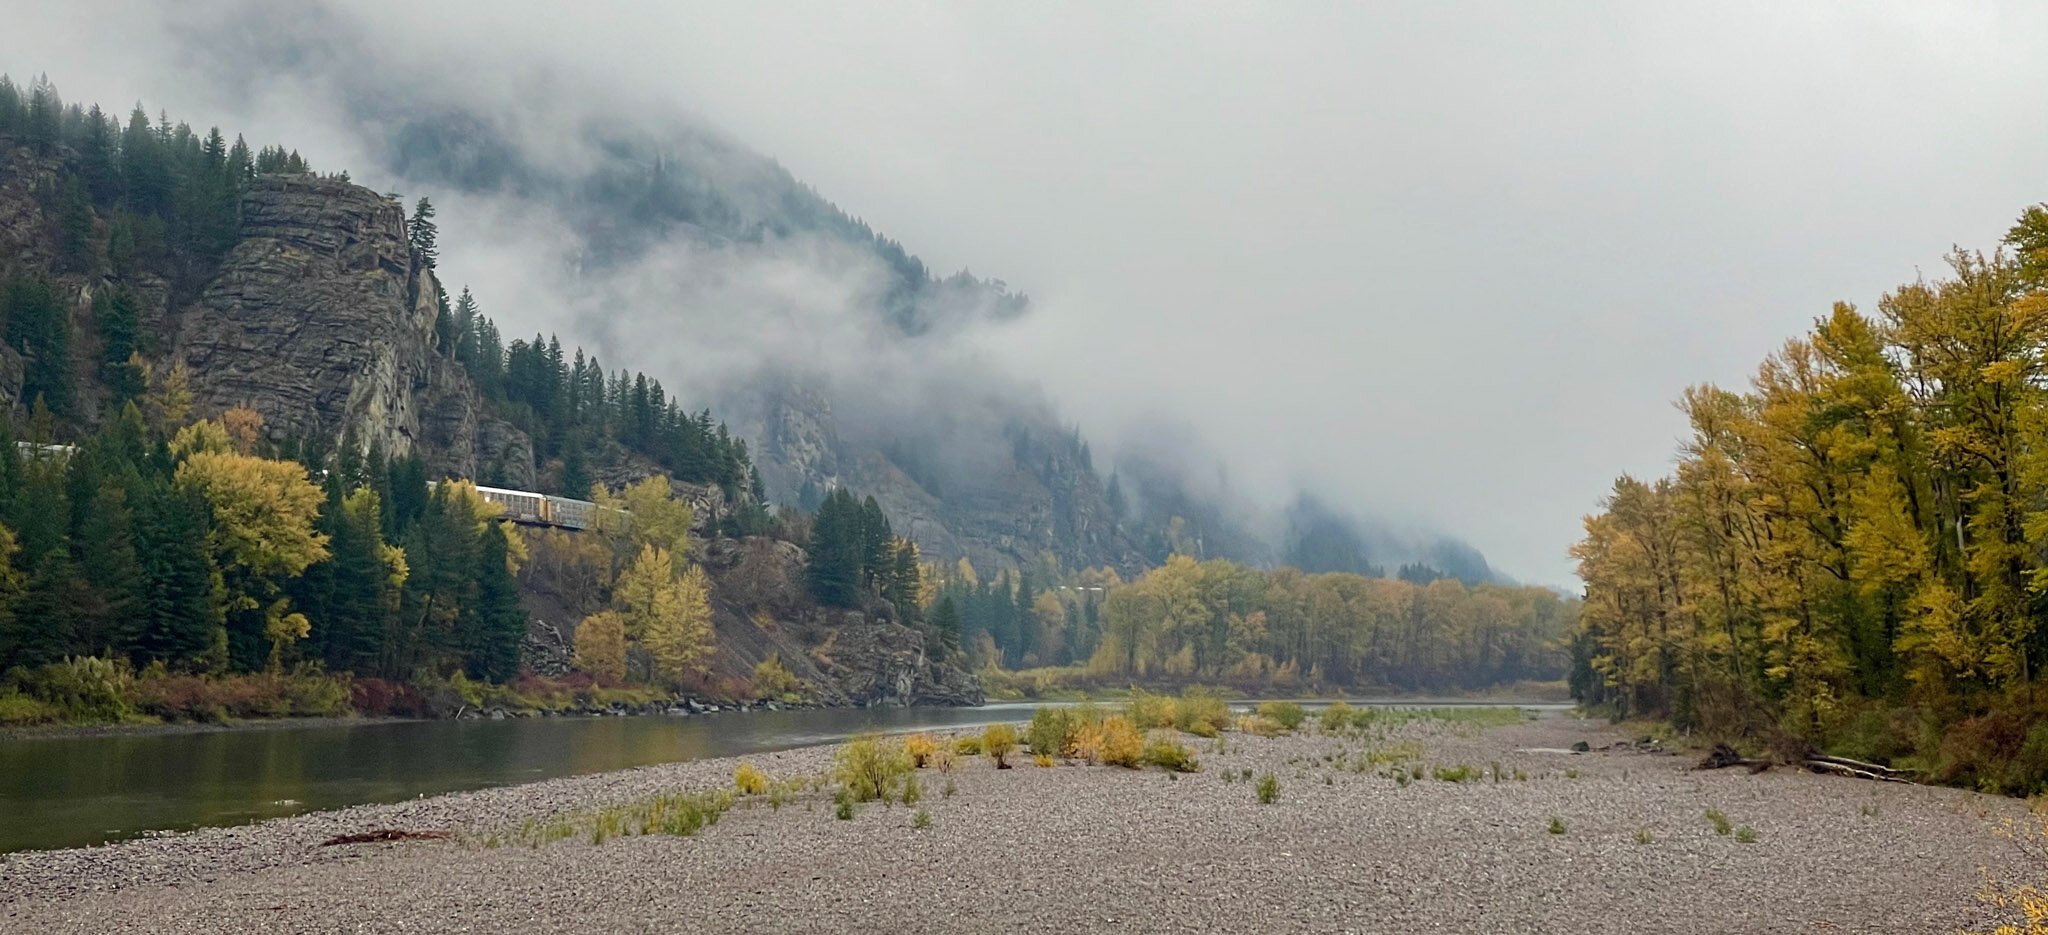
Also, I’m constantly shooting in the elements (as seen in the rain and snow photos here), so knowing the water resistance is now rated at IP68 (30 minutes at 6 meters deep, which is 50% better than the iPhone 11 Pro).
Shoots get crazy and gear gets thrown around — the iPhone 12 Pro is ready for it.
a few wishes
1) Better EXIF data
I’d love to have better visibility of what’s happening in my exposures — particularly Night mode shots. This is helpful for me in finding the limits of my gear, and also to re-create similar shots.
2) Option for LiDAR “distance to subject” meter in camera
I think it’d be cool if you could turn on a “distance to subject” reading inside the Camera app. This would be helpful to create consistency in a bunch of portraits or product shots (e.g., always shoot them from 5.25 feet away).
3) Quick reset for Exposure Adjustment
I love the new Exposure Adjustment feature, but I also wish I could quickly reset it back to default. Maybe it looks like simply double-tapping the meter in the top left of the UI.
iphone shooting insights for photographers
Use the Wide (1x) lens when shooting in extreme low-light conditions… the Ultra Wide is much better than before but Wide is still by far the best.
Use Burst mode to capture the perfect moment.
Spend some time in Settings > Camera to familiarize yourself with the many customization options and controls now available to you.
When shooting a time-lapse on a tripod, Night mode automatically turns on when it needs to (no indication in the UI, though.)
Check out my gear below for the best accessories like tripods, etc.
Shot on iPhone 12 Pro w/ Ultra Wide (handheld).
thoughts on proraw
It looks like ProRAW will offer the meticulous control creative pros demand without sacrificing the greatest strengths of the iPhone as a largely computational camera. This is an exciting prospect and I’m anxious to see how the files work in practice, but I’m also interested to see if ProRAW shifts the way pro photographers leverage their iPhone camera in their workflow.
Traditionally, RAW files themselves can’t be edited. When adjustments are made, they’re stored in a reference file instead of destructively changing the original image file.
With this in mind, many publications require the submission of RAW files for the images sent in by photographers. This allows them to examine the original, untouched data and helps protect their legitimacy as a news source.
If the ProRAW format really does work this way, it marks an important step forward in the validation of the iPhone camera as a tool photographers can rely on to deliver client work, particularly in the editorial space.
buying advice for photographers
The iPhone 12 Pro is a solid camera, and thanks to a bunch of new digital tech I found it to be slightly stronger than the already great iPhone 11 Pro — but if you are serious about photography with your iPhone, wait for the iPhone 12 Pro Max. It looks to be the most significant jump in iPhone camera hardware we’ve experienced in years, and it’s only three weeks away.
Anyone who has followed this blog knows I prefer to carry a smaller iPhone because it fits better in my pocket, it’s easier to hold, and it’s overall more discreet. That said, I definitely want the new camera capabilities of the iPhone 12 Pro Max, so I’m planning to adapt to the slightly larger device to get significantly more hardware horsepower.
Regardless of which direction you go, you’re going to have a blast shooting with this year’s new iPhone camera on your next adventure.
ask me anything on instagram stories
I’ll be doing an AMA on Instagram Stories shortly and will be happy to answer any questions you might have about iPhone 12 Pro, travel, or anything else. Join me there for more insight or to ask a question of your own.
Special Thanks
Thanks to Airstream, ProDPI, and Halide for supporting this review.
Thanks to jorby for the video and Thad Kopec for the audio.
And thanks to Myers Auto for building my Land Cruiser
and to my wife Esther for modeling in the extreme cold!
Essential Tools & Apps
Halide Camera
Hands down the best third-party camera app for iPhone. Simple interface, yet powerful features. Still my go-to app when I need fine-tuned manual camera control.
ProDPI
The best way to print your iPhone photos.
Studio Neat Glif iPhone Tripod Mount
I love the quick-release and vertical mount options.
(Use coupon code “austin” to get 10% off a Glif.)
UltraPod II Mini-Tripod
Lightweight yet durable plastic, and the velcro strap is very useful.
Peak Design Travel Tripod
A great full-size but compact tripod with a built-in iPhone mount.
Peak Design Travel Backpack
I’ve taken this bag to 30+ countries and love it.
have a question/comment?
More questions about the iPhone 12 Pro? I’d love to hear your thoughts and I’ll be replying to every comment below.


